
A failing crankshaft position (CKP) sensor can leave your Honda Click 125 stranded, but its symptoms often overlap with other ignition or fuel system issues. Because the CKP sensor monitors engine speed and position to control fuel injection and ignition timing, its failure directly disrupts the combustion cycle. Before replacing parts, it is essential to systematically observe the scooter’s behavior, rule out simpler electrical faults, and verify whether the CKP sensor is truly the culprit. This guide walks you through the warning signs, differential checks, and safe diagnostic steps to help you make an informed repair decision.
Understanding how this component operates helps clarify why its failure causes such drastic performance issues. The CKP sensor sits near the flywheel, sending continuous electrical pulses to the Engine Control Unit (ECU). When this signal becomes weak, intermittent, or lost entirely, the ECU cannot determine when to fire the spark plug or open the fuel injector, resulting in a sudden loss of engine power or a complete refusal to start.
Common Symptoms of a Failing CKP Sensor
One of the most frustrating signs of a failing CKP sensor is hard starting or extended cranking. You might press the starter button and hear the starter motor spinning the engine vigorously, but the engine struggles to catch or fire up. This happens because the ECU is waiting for a clean position signal before it permits the ignition system to spark. Without that signal, the engine simply cranks continuously without starting.
Products mentioned in this guide
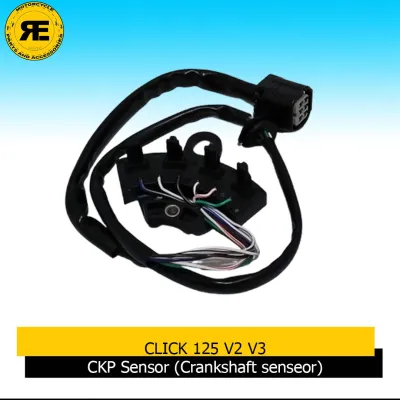
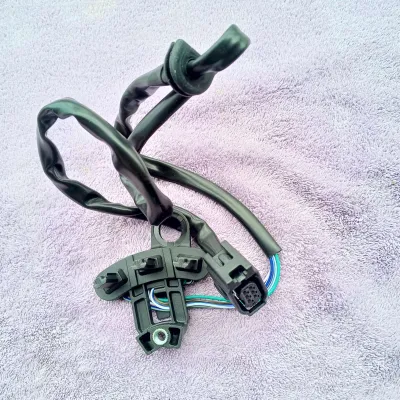
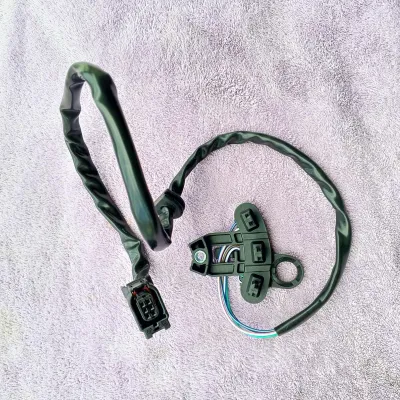
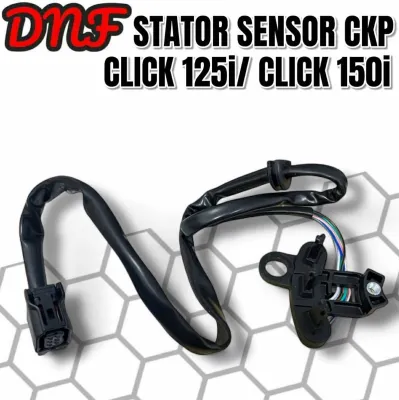
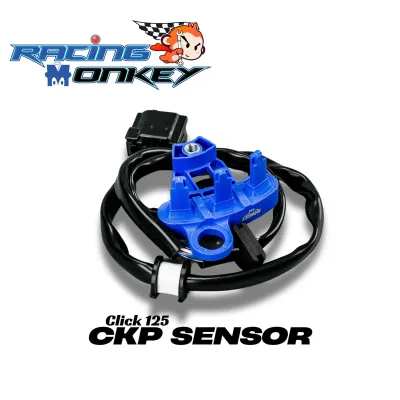
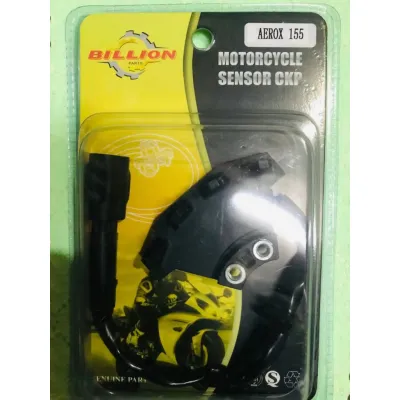
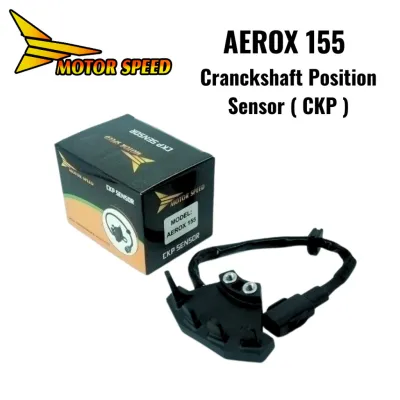
Prices are valid at publication and may change. Please refer to the product page for the latest price.
Unexpected engine stalling is another classic symptom, particularly when the scooter is hot or operating under a heavy riding load. In the tropical climate of the Philippines, stop-and-go traffic generates significant engine heat. This heat causes the internal copper windings of the CKP sensor to expand, which can temporarily break an already degraded electrical connection inside the sensor. Once the engine cools down for a few minutes, the connection may re-establish, allowing the scooter to start again until it heats up once more.
An irregular idle, hesitation, or a sudden loss of power during acceleration also points to sensor degradation. If the CKP sensor sends erratic or delayed signals, the ECU miscalculates the ignition timing. This causes the engine to sputter, hesitate when you twist the throttle, or idle unevenly at traffic lights. You might feel a sudden jerk or drop in power as the ECU struggles to synchronize the fuel injection with the physical position of the piston.
Finally, a malfunctioning CKP sensor will typically trigger the Malfunction Indicator Lamp (MIL) on your instrument panel. The ECU detects the missing or irregular pulses and stores a Diagnostic Trouble Code (DTC). On many Honda scooters, this is displayed as a sequence of blinks when the ignition is turned on—specifically, code 52 is commonly associated with a CKP sensor circuit malfunction. However, you should always consult your specific model’s service manual to accurately interpret these blink codes or use a compatible diagnostic scanner.
Differentiating CKP Sensor Issues from Other Ignition Problems
Because a no-start or stalling condition can stem from multiple sources, you must rule out other common ignition and electrical faults before purchasing a new sensor. A worn-out spark plug, for example, can cause random misfires, poor acceleration, and hard starting. However, a bad spark plug usually causes a consistent degradation in performance across all temperatures, whereas a failing CKP sensor is highly prone to sudden, heat-induced shutdowns where the spark disappears entirely.

Electrical system health is another critical factor to evaluate. High humidity and heavy rains can accelerate battery terminal corrosion and degrade the stator or rectifier. A weak battery might not supply enough voltage to the ECU during cranking, mimicking a sensor failure. Use a multimeter to check your battery voltage; if the battery holds a strong charge above 12.4 volts and the starter motor spins rapidly, but you still have no spark, the issue is more likely related to the CKP sensor or the ignition coil rather than the battery itself.
Fuel system issues can also mimic CKP symptoms. If your Honda Click 125 cranks but refuses to start, listen closely when you turn the ignition key to the “on” position. You should hear a brief, high-pitched hum from the fuel pump priming inside the tank. If you hear this hum, the fuel pump is receiving power and priming the system, which helps rule out a primary fuel delivery failure and points the diagnosis back toward an ignition or sensor signal fault.
Lastly, do not overlook the main wiring harness and ground connections. The Honda Click 125 is a daily workhorse exposed to road vibrations, bumps, and water splashes. Over time, the wiring harness running near the rear suspension can rub against the frame, causing insulation damage. Corroded ground terminals or loose pins in the sensor connector can interrupt the low-voltage signals of the CKP sensor, triggering a fault code even if the sensor itself is physically undamaged.
Step-by-Step Diagnostic Checks You Can Do at Home
Before performing any diagnostic work, establish a safe working environment. Ensure the scooter is parked securely on its center stand on a flat surface, the ignition is turned off, and the engine has cooled completely to prevent burns. Disconnect the negative battery terminal before unplugging any major electrical connectors to protect the ECU from accidental short circuits.
Begin with a thorough visual inspection of the CKP sensor wiring harness. Locate the wire bundle exiting the right side of the engine near the stator cover. Trace this harness upward toward the main frame, looking for any signs of physical damage, pinched wires, chafing, or melted insulation. Unplug the CKP sensor connector and inspect the pins inside for green corrosion, dirt, or moisture, which can easily block the low-voltage signals.
If you have the mechanical experience and tools to remove the radiator and stator cover, you can inspect the sensor tip directly. The CKP sensor relies on magnetism to read the reluctor wheel on the rotor. Over time, fine metal shavings from engine wear or road grime can accumulate on the magnetic tip of the sensor, disrupting its magnetic field. Carefully clean the sensor tip using an approved electrical contact cleaner and a soft, lint-free cloth, following the cleaner manufacturer’s instructions.
To perform electrical testing, set a digital multimeter to the resistance (ohms) or continuity setting. Disconnect the sensor and measure the resistance across the specified terminals. Because acceptable resistance thresholds and wire colors can vary across different model years and variants of the Honda Click 125, you must consult the official Honda service manual for your specific model to verify the correct pinouts and target values. A reading of infinite resistance (open circuit) or zero resistance (short circuit) indicates a failed sensor coil.
Recognize the limits of home diagnostics. While a multimeter can detect a completely dead sensor or a broken wire, it cannot easily capture high-speed signal dropouts that occur only when the engine is running at high RPMs. If your visual checks and basic resistance tests do not reveal a clear fault, but the stalling symptoms persist, stop and consult a qualified motorcycle mechanic. Professional shops use advanced ECU diagnostic scanners or oscilloscopes to view the live waveform of the sensor signal while the engine is running.
When to Replace the CKP Sensor and What to Consider
You should only proceed with replacing the CKP sensor after you have definitively ruled out wiring harness damage, corroded connectors, and ECU communication errors. Replacing the sensor unnecessarily is a costly mistake if the true issue is simply a loose ground wire or a chafed harness rubbing against the frame. Once you have confirmed the sensor itself is faulty, sourcing the correct replacement is the next step.
When purchasing a replacement, compatibility is paramount. The Honda Click 125 has evolved through several generations and design updates. A sensor designed for an older model year may not have the same mounting dimensions, connector shape, or wire length as one designed for a newer variant. Always verify the exact part number against your scooter’s chassis number and model year. Using an incorrect sensor can lead to physical fitment issues or timing errors that prevent the engine from running correctly.
Always prioritize safety during the installation process. Ensure the engine is completely cold, as you will be working close to the engine block and cooling system components. Keep your workspace clean and free of dust, as opening the stator cover exposes internal engine components to contamination. Tighten all mounting bolts to the torque specifications listed in your service manual to prevent the sensor from shifting due to engine vibration.
After installing the new CKP sensor, reconnect the battery and turn the ignition on. If your scooter was displaying a Check Engine Light, you may need to clear the historical DTCs stored in the ECU memory. This can be done using a compatible diagnostic tool or by following the manual ECU reset procedure detailed in the official service manual. Finally, perform a controlled test ride in a safe, low-traffic area to ensure the engine idles smoothly, accelerates without hesitation, and does not stall when reaching operating temperature.
Frequently Asked Questions (FAQ)
Can a bad CKP sensor cause poor fuel economy on a Honda Click 125?
Yes, a failing CKP sensor can indirectly cause poor fuel economy. When the sensor sends weak or intermittent signals, the ECU cannot precisely calculate the optimal ignition and fuel injection timing. This often results in incomplete combustion, causing the engine to run rich and burn more fuel than necessary. However, before assuming the CKP sensor is the cause of your poor mileage, check more common maintenance items such as incorrect tire pressure, a dirty air filter, or worn CVT drive belts.
Is it safe to ride the scooter with a failing CKP sensor?
No, it is not safe to ride a scooter with a failing CKP sensor. A compromised sensor can cause the engine to stall suddenly and unpredictably, which poses a severe safety hazard when navigating heavy traffic, merging onto highways, or making turns at busy intersections. Additionally, you risk being stranded far from home if the sensor fails completely and refuses to restart. It is highly recommended to diagnose and resolve the issue promptly.
How much does a replacement CKP sensor typically cost?
The cost of a replacement CKP sensor varies depending on whether you choose an original equipment manufacturer (OEM) part or an aftermarket alternative. OEM parts generally offer the highest reliability and guaranteed compatibility but come at a higher price point. To find the exact price for your specific Honda Click 125 model, check current pricing in ₱ and part availability directly with authorized Honda dealerships or reputable motorcycle parts shops in the Philippines.
Community discussion
Share your experience or ask a question. Comments are reviewed before publication.