
A damaged manifold hose on a Honda Click or Yamaha Mio typically manifests as rough idling, hard starting, or visible cracks in the rubber. Because these popular automatic scooters rely on a precise air-fuel mixture to run efficiently, any unwanted air entering through a compromised hose disrupts engine performance. Identifying these signs early prevents sudden stalling on busy roads and avoids more costly engine repairs down the line.
Working on your scooter’s fuel and intake systems carries inherent safety risks. Before performing any diagnostic steps or attempting a replacement, always consult your vehicle’s official service manual, ensure the engine is completely cool, and work in a well-ventilated area. If you are unsure about your mechanical skills, have a qualified professional inspect and install the replacement parts to ensure road safety and proper engine calibration.
Visual Inspection: Checking for Physical Damage
Locating the intake manifold hose—often referred to as the intake manifold joint or insulator pipe—is the first step in your diagnostic process. On both the Honda Click and the Yamaha Mio, this component is situated between the throttle body (on fuel-injected models) or the carburetor (on older carbureted Mio variants) and the engine cylinder head. To access this area, you will typically need to remove the under-seat utility box using standard hand tools, exposing the top of the engine bay.
Products mentioned in this guide
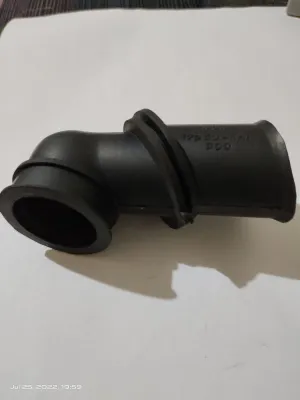
Prices are valid at publication and may change. Please refer to the product page for the latest price.
Once the engine bay is accessible, use a bright flashlight to examine the entire surface of the rubber hose. Look closely for fine hairline cracks, deep splits, dry rot, or areas where the rubber has become brittle and hard. The tropical climate of the Philippines, characterized by high humidity and intense ambient heat, combined with the high operating temperatures of stop-and-go city traffic, accelerates the degradation of rubber components. A healthy hose should feel firm yet slightly pliable; if it feels rock-hard or crumbles when pinched, it requires immediate attention.
In addition to checking the rubber body, inspect the connection points where the hose meets the metal ports. Look for loose, rusted, or misaligned metal clamps that may have backed off due to engine vibration. Check for any oily residue or dark soot accumulating around these joints. Because the intake tract experiences vacuum pressure, oil mist from the crankcase breather can seep out of even the smallest gap, leaving a sticky film that serves as a clear indicator of an active air leak.
Performance Symptoms: Recognizing Engine Behavior Changes
When a manifold hose develops a leak, it introduces “unmetered air” into the engine. This means air enters the combustion chamber without passing through the throttle body or being measured by the engine control unit (ECU) on fuel-injected models like the Honda Click 125i or 150i. This extra air leans out the air-fuel mixture, leading to a highly unstable combustion process that immediately affects how your scooter idles and accelerates.

One of the most common performance symptoms is a rough, erratic idle or sudden stalling when you come to a stop at an intersection. You might notice the engine speed fluctuating wildly on its own, or the scooter may require you to keep gently twisting the throttle just to keep the engine from dying. Additionally, a vacuum leak often causes a “hanging idle,” where the engine RPMs remain unusually high for several seconds after you completely release the throttle grip before slowly dropping back down.
During acceleration, a compromised manifold hose will cause noticeable hesitation, flat spots, or a bogging sensation when you try to speed up. You may also experience a drop in fuel efficiency, as fuel-injected systems attempt to compensate for the excess oxygen by spraying more fuel, or carbureted models simply run too lean to produce efficient power. While these symptoms can sometimes mirror a dirty spark plug or a clogged air filter, a vacuum leak is uniquely characterized by a whistling or sucking sound coming from the engine bay during acceleration, along with occasional popping or backfiring through the exhaust when decelerating.
The Soapy Water Test: Confirming a Vacuum Leak
If your visual inspection is inconclusive but your scooter exhibits classic vacuum leak symptoms, you can perform a simple and safe diagnostic check known as the soapy water test. This test helps confirm if air is actively escaping or being drawn into the intake tract through microscopic cracks that are invisible to the naked eye. To begin, mix a mild solution of liquid dish soap and water in a clean spray bottle or prepare it in a small container to apply with a soft brush.
Start your scooter and let it idle on its center stand. Gently spray or brush a small amount of the soapy water solution directly onto the manifold hose, paying close attention to the rubber body, the molded bends, and the areas directly beneath the metal securing clamps. Observe the applied solution carefully for a few moments. If there is a leak, you will see bubbles rapidly forming, expanding, or being sucked into the cracks as the engine’s vacuum pressure interacts with the soapy liquid.
While performing this test, you must observe strict safety precautions to prevent injury or damage to your scooter. Keep your hands, hair, loose clothing, and the spray bottle nozzle well away from moving engine parts, such as the cooling fan, drive belt, or CVT components. Avoid spraying water directly onto electrical connectors, the spark plug boot, or hot exhaust pipes, as sudden temperature changes can crack metal components or cause electrical short circuits. If the engine idle speed changes or smooths out temporarily when the liquid is applied, this also confirms that the liquid has momentarily sealed an active vacuum leak.
When to Replace vs. When to Repair
Deciding whether to replace the manifold hose or attempt a minor adjustment depends entirely on the severity and location of the issue. If your visual inspection or soapy water test reveals deep cracks, dry rot, physical tears, or a collapsed internal structure, you must replace the hose immediately. Temporary fixes like wrapping the hose in electrical tape, applying silicone sealant, or using rubber patches are highly unreliable; the intense heat, fuel vapors, and constant engine vacuum will quickly degrade these temporary materials, leading to sudden engine failure while riding.
Conversely, if the manifold hose itself is structurally sound, flexible, and free of cracks, the leak may simply be caused by loose or improperly positioned metal clamps. Over time, engine vibrations can cause the mounting screws on these clamps to back out, or the metal bands can corrode and lose their tension. In this scenario, loosening the clamps, ensuring the hose is fully seated and flush against its mounting flanges, and then securely tightening the clamps may resolve the vacuum leak without requiring a new hose.
When a replacement is necessary, always prioritize original equipment manufacturer (OEM) parts or high-quality, exact-fit aftermarket components designed specifically for your scooter model and year. The manifold hose must be constructed from specialized, fuel-resistant, and heat-resistant rubber compounds to withstand the harsh environment of a scooter engine bay. Before purchasing, verify the exact dimensions, mounting angles, and part numbers against your vehicle’s documentation, as even a minor mismatch in diameter or shape will prevent a proper airtight seal and compromise your scooter’s road legality and safety.
Frequently Asked Questions (FAQ)
Can I use a generic rubber hose instead of an OEM manifold hose?
Using a generic, straight rubber hose as a substitute for an OEM manifold hose is highly discouraged and poses significant safety risks. Scooter manifold hoses are specifically molded with precise angles and curves to clear tight engine bay clearances and align perfectly with the throttle body or carburetor. A generic hose will likely kink when bent to fit, which severely restricts airflow and starves the engine. Furthermore, standard automotive or utility hoses are rarely rated to withstand the combination of high engine temperatures, constant vibration, and direct exposure to fuel vapors, leading to rapid softening, swelling, or cracking.
How often should the manifold hose be inspected on a Honda Click or Yamaha Mio?
It is recommended to visually inspect the manifold hose during every routine maintenance service, or roughly every 6,000 to 10,000 kilometers. Because accessing the hose usually requires removing the under-seat compartment, it is highly efficient to check its condition whenever you are replacing the spark plug or cleaning the air filter. If you frequently ride in harsh tropical conditions, heavy stop-and-go traffic, or dusty environments, increase the frequency of these inspections, as elevated engine bay temperatures and environmental debris accelerate the aging and brittleness of rubber components.
Community discussion
Share your experience or ask a question. Comments are reviewed before publication.