
Deciding whether your Suzuki Raider 150 carburetor model requires a new cylinder head is a critical step in maintaining the performance and longevity of your motorcycle. As a high-revving, double overhead cam (DOHC) four-valve machine, the Raider 150 is highly sensitive to top-end wear and thermal stress. In tropical climates like the Philippines, where daily commutes involve heavy stop-and-go traffic and high ambient temperatures, the engine’s top end is subjected to intense operating conditions. Recognizing the early warning signs of cylinder head deterioration can prevent minor issues from escalating into catastrophic engine failure.
While some top-end symptoms can be resolved with simple adjustments or gasket replacements, structural damage to the cylinder head itself requires a complete replacement. Determining the root cause of your engine’s performance drop involves observing physical symptoms, conducting systematic checks, and knowing when to transition from home garage troubleshooting to professional mechanical repair. By understanding how the cylinder head behaves when it is failing, you can make an informed decision that protects both your safety and your budget.
Common Symptoms of a Failing Cylinder Head
Unusual engine noises originating from the top end of your motorcycle are often the first indicators of cylinder head trouble. While a light, consistent ticking is normal for the Raider 150 DOHC shim-under-bucket valve train, a loud, metallic knocking or irregular clattering suggests a more serious issue. These harsh sounds typically point to excessive wear in the camshaft journals, damaged valve guides, or worn valve seats that prevent the valves from closing smoothly. Ignoring these noises can lead to severe mechanical interference inside the combustion chamber.
Products mentioned in this guide
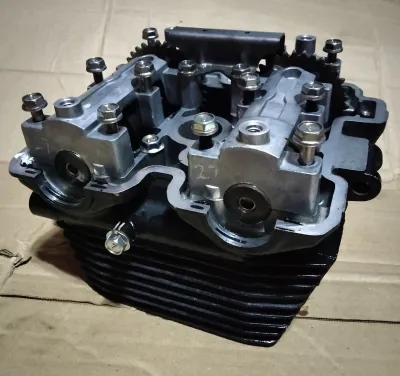
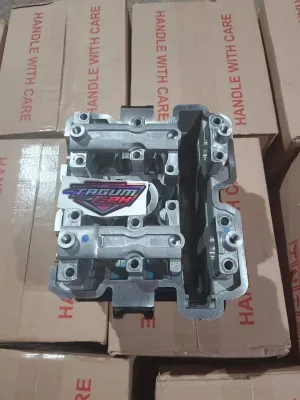
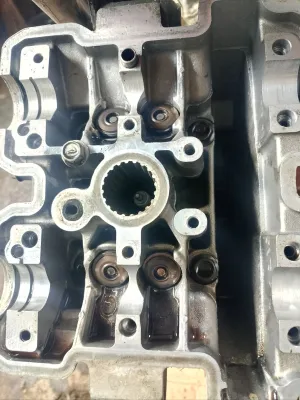
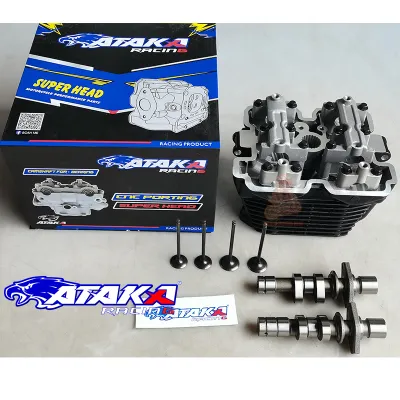
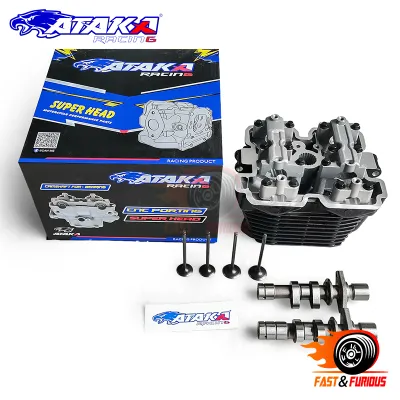
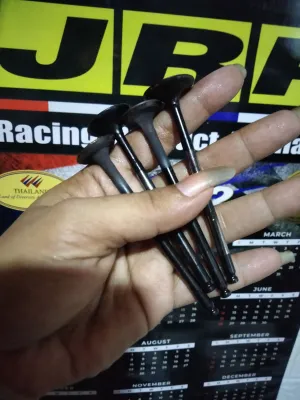
Prices are valid at publication and may change. Please refer to the product page for the latest price.
Visible oil leaks around the cylinder head mating surfaces are another clear warning sign that should never be ignored. When the cylinder head warps or the mating surfaces degrade, oil begins to seep past the head gasket or the valve cover seal. In dusty and humid environments, this escaping oil quickly mixes with road grime, creating a dark, dirty buildup around the cooling fins. If left unaddressed, this continuous seepage reduces the engine’s oil volume, leading to poor lubrication and accelerated wear of the internal components.
A noticeable loss of engine power, accompanied by hard starting and an unstable idle, directly points to a compromise in cylinder head compression. Because the cylinder head houses the valves and seals the combustion chamber, any structural defect allows compressed fuel-air mixture to escape during the compression stroke. You may notice that the motorcycle requires multiple attempts to start when cold, struggles to maintain a steady idle without throttle input, or feels sluggish and unresponsive during acceleration.
Overheating tendencies and abnormal exhaust smoke are severe symptoms that indicate the cylinder head is no longer operating within safe parameters. Since the Raider 150 carburetor model relies on an oil-cooling system, a compromised cylinder head can restrict oil flow or allow oil to enter the combustion chamber. If you observe blue-gray smoke exiting the exhaust pipe, it is highly likely that oil is leaking past worn valve stem seals or damaged valve guides. Rapid overheating under normal riding conditions suggests that combustion gases are bypassing the seals, placing extreme thermal stress on the entire engine block.
Troubleshooting Table: Symptoms, Possible Causes, and Next Steps
| Symptom | Potential Root Cause | Immediate Action / Next Step |
|---|---|---|
| Loud metallic knocking or clattering from the top end | Worn camshaft journals, damaged valves, or loose timing chain components | Stop the engine immediately. Do not ride the motorcycle. Transport it to a service center for a top-end teardown. |
| Oil weeping or heavy seepage at the head-to-cylinder joint | Blown cylinder head gasket or warped cylinder head mating surface | Clean the area thoroughly, monitor the leak rate, and check the engine oil level. Plan a detailed inspection of the head surface flatness. |
| Persistent blue-gray exhaust smoke and high oil consumption | Worn valve stem seals or damaged valve guides within the cylinder head | Check and top up the engine oil. Schedule a replacement of the valve stem seals and inspect the valve guides for play. |
| Severe loss of compression, hard starting, and poor idle | Burnt valves, improper valve clearance, or a cracked cylinder head | Perform a compression test. Check and adjust valve clearances using correct shims according to manufacturer specifications. |
| Rapid engine overheating under normal riding conditions | Restricted oil passages in the head, blocked oil cooler, or severe gas bypass | Stop riding immediately and allow the engine to cool. Verify oil level and inspect the oil cooling system for blockages. |
Safe Diagnostic Checks You Can Perform at Home
Before committing to a full cylinder head replacement, you can perform several low-risk, reversible diagnostic checks in your home garage. Always ensure the motorcycle is parked on a level surface, secured on its center stand, and that the engine is completely cool to the touch before beginning any inspection. Working on a hot engine increases the risk of burns and can cause aluminum threads in the cylinder head to strip easily.

Start with a thorough visual inspection of the external cylinder head area. Use a bright flashlight to examine the joint where the cylinder head meets the cylinder block, looking for fresh oil wetness or bubbling when the engine is briefly turned over. Inspect the spark plug well for accumulated oil, which often points to a failing valve cover gasket. Additionally, check the exhaust port connection for signs of wet black carbon, which indicates that oil is escaping past the exhaust valves.
Next, remove the spark plug to inspect its electrode tip, as its condition provides valuable clues about the state of the combustion chamber. A dry, light-tan or grey spark plug indicates healthy combustion, while a wet, oily, or heavily carbon-fouled plug suggests that engine oil is entering the chamber through the cylinder head assembly. While the spark plug is removed, inspect the threads in the spark plug hole to ensure they are intact and have not been stripped or cross-threaded during previous maintenance.
To obtain a definitive measure of the cylinder head’s sealing ability, a compression test is the standard diagnostic tool. This test requires a dedicated compression gauge threaded into the spark plug hole. While holding the throttle wide open, crank the engine several times to record the maximum pressure reading. If the reading falls significantly below the manufacturer’s specification, it confirms a compression leak. To determine if the leak is caused by the cylinder head valves or the piston rings, add a small teaspoon of engine oil into the spark plug hole and repeat the test; if the compression remains low, the leak is almost certainly located in the cylinder head valves or gasket.
When to Seek Professional Help or Replace the Cylinder Head
While basic visual inspections and compression tests can be performed at home, diagnosing structural damage inside the cylinder head requires professional expertise and specialized measuring tools. If your diagnostic checks reveal severe symptoms, the cylinder head must be disassembled and inspected by a qualified mechanic. A professional will use a precision straightedge and a feeler gauge to check the mating surface for warpage. If the warpage exceeds the strict service limits specified in the manufacturer’s service manual, the head cannot be safely resurfaced and must be replaced.
Deep structural cracks, particularly in the narrow areas between the valve seats or around the spark plug threads, are clear indicators that a replacement is necessary. Attempting to repair cracks in a cast aluminum cylinder head through welding is often a temporary fix that compromises the structural integrity of the component under high combustion pressures. Furthermore, if the camshaft journals inside the head are deeply scored or worn beyond repair, the entire cylinder head assembly must be replaced, as these journals are machined directly into the head casting and cannot be easily rebushed.
Reassembling a DOHC engine like the Raider 150 requires absolute precision and strict adherence to safety boundaries. The timing chain must be aligned perfectly with the camshaft sprocket marks to prevent the valves from colliding with the piston. Additionally, the cylinder head bolts must be tightened in a specific sequence using a calibrated torque wrench to ensure even pressure across the gasket. Because improper installation can lead to catastrophic engine destruction and pose a severe safety hazard on the road, always consult a qualified professional and use verified replacement parts that match your specific model year and carburetor configuration.
Preventive Maintenance to Extend Cylinder Head Life
Extending the lifespan of your Raider 150 cylinder head relies heavily on consistent preventive maintenance habits. Because the cylinder head houses high-speed moving parts like the camshafts and valves, proper lubrication is paramount. Adhere strictly to the recommended engine oil change intervals and always use the oil grade specified in your owner’s manual. Fresh, clean oil ensures that the camshaft journals and valve guides remain lubricated, reducing friction and preventing premature wear.
Managing engine temperature is equally important in preventing cylinder head warpage. Avoid prolonged high-RPM riding, especially during hot midday conditions or when climbing steep inclines with heavy loads. If you are planning a long long-distance ride, schedule periodic rest stops to allow the engine and the oil-cooling system to shed accumulated heat. Ensuring that the external cooling fins of the cylinder head and the oil cooler radiator are clean and free of mud or debris will significantly improve heat dissipation.
Finally, perform periodic valve clearance adjustments as outlined in your motorcycle’s maintenance schedule. Over time, the constant hammering of the valves against the valve seats causes the clearances to tighten. If the clearance becomes too tight, the valves will not close fully, leading to compression loss, overheating, and eventually burnt valves that ruin the cylinder head. Checking and adjusting these clearances using high-quality shims ensures that the valves seal perfectly and operate within their designed thermal limits.
Frequently Asked Questions (FAQ)
Can I just replace the cylinder head gasket instead of the entire head?
You can replace only the cylinder head gasket if the gasket itself has blown but the cylinder head remains perfectly flat, structurally sound, and free of cracks. A qualified mechanic must inspect the mating surface of the head using a precision straightedge and feeler gauge before reassembly. If any warpage or cracking is detected, simply installing a new gasket will not resolve the leak, and the gasket will fail again shortly after the engine is run.
What factors determine the total cost of a cylinder head replacement?
The total cost of replacing a cylinder head is determined by several variables, including whether you purchase an original equipment manufacturer (OEM) head assembly or a reputable aftermarket alternative. Additionally, you must account for the cost of essential supporting parts, such as a new head gasket, valve cover gasket, valve stem seals, fresh engine oil, and potentially new valves or shims. Labor rates at professional service centers in the Philippines also vary, so it is highly recommended to request an itemized quote from a trusted local mechanic.
Is it safe to ride the motorcycle if I suspect a cylinder head problem?
No, it is not safe to ride your motorcycle if you suspect a cylinder head problem. Severe symptoms such as metallic knocking, rapid overheating, or heavy oil leaks indicate that internal components are on the verge of failing. Continuing to ride under these conditions can cause a valve to break or drop into the cylinder, resulting in complete engine seizure. This can lock the rear wheel instantly, creating an extremely dangerous situation on the road. Instead, have the motorcycle towed or transported directly to a repair shop.
Community discussion
Share your experience or ask a question. Comments are reviewed before publication.