
Applying car rust treatment successfully requires thorough surface preparation, complete mechanical removal of loose corrosion, precise chemical application according to the manufacturer’s instructions, and a sealed protective topcoat. In tropical environments where high humidity, coastal salt air, and heavy seasonal rains accelerate oxidation, addressing rust early prevents minor surface blemishes from turning into expensive structural damage. By following a systematic approach, you can halt the spread of corrosion and restore the integrity of your vehicle’s body panels.
Assessing the Damage and Gathering Materials
Before starting any repair work, you must determine whether the corrosion on your vehicle is suitable for a do-it-yourself fix. Inspect the affected area closely to classify the severity of the damage. Surface rust, which appears as light bubbling or discoloration on the paint, is highly treatable at home. Scale rust, characterized by pitting and bubbling that has begun to degrade the metal’s thickness, can also be corrected with patient preparation. However, if the metal has rusted completely through, leaving holes, crumbling edges, or compromised structural supports, you must stop and seek help from a professional automotive body shop.
Once you confirm the rust is treatable, read the product labels of your chosen rust treatment to identify the necessary personal protective equipment. Chemical rust converters and prep solvents often contain strong acids and volatile organic compounds that require adequate safety measures. Ensure you work in a well-ventilated space, preferably outdoors or in an open garage with active airflow. Equip yourself with heavy-duty nitrile gloves, safety goggles to protect against flying debris during sanding, and a dual-cartridge respirator mask designed to filter out both fine dust particles and chemical vapors.
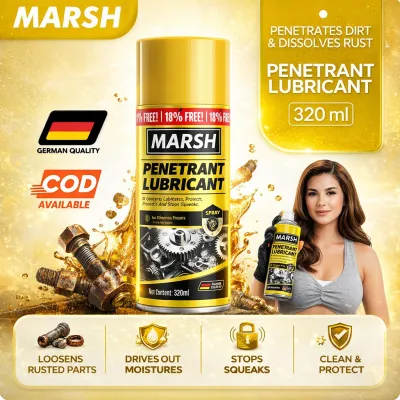
Products mentioned in this guide
7 Lazada user ratings
Great product
Prices are valid at publication and may change. Please refer to the product page for the latest price.
With safety gear secured, gather your preparation and application tools to keep them within arm’s reach. You will need a wire brush and various grits of sandpaper, typically ranging from coarse 80-grit for heavy rust removal to fine 400-grit for smoothing the surrounding paint. Additionally, acquire high-quality automotive masking tape, masking paper or newspaper, clean microfiber cloths, a dedicated wax and grease remover, and your chemical rust treatment product. Having these items ready prevents interruptions once you begin the time-sensitive steps of the repair.
Preparing and Cleaning the Affected Surface
Proper adhesion of any rust treatment or paint layer depends entirely on how clean the surface is before application. Begin by washing the targeted area thoroughly with dedicated car wash soap and clean water to remove road grime, mud, and surface contaminants. Avoid using household dish soaps, as they can leave behind thin films that interfere with chemical bonding. After washing, rinse the area completely and allow it to dry. In highly humid climates, moisture can linger in seams and crevices, so use a clean microfiber towel or a compressed air blower to ensure no water remains trapped.

Next, protect the surrounding areas of your vehicle from accidental damage. Chemical rust treatments, overspray, and abrasive sanding dust can easily ruin healthy clear coats, plastic trim pieces, and rubber weatherstripping. Use automotive masking tape and thick masking paper to cover a generous radius around the work area. Secure the edges of the tape firmly to prevent fine sanding dust or liquid chemicals from seeping underneath onto your vehicle’s pristine paintwork.
Once the surrounding areas are masked, perform a deep chemical cleaning of the exposed work zone. Apply a high-quality wax and grease remover to a clean, lint-free cloth and wipe down the rusted metal and the immediate surrounding paint. This step is critical because invisible contaminants like road tar, silicone residues, and old wax polishes will prevent your rust treatment from making direct contact with the metal. Wipe the solvent off with a second dry cloth before it evaporates to ensure the contaminants are lifted away rather than redistributed.
Removing Rust Down to Bare Metal
To ensure a lasting repair, you must mechanically remove as much loose rust as possible before applying any chemical treatments. Start with a stiff wire brush or coarse 80-grit sandpaper to scrape away loose paint flakes and thick rust scale. Work systematically across the damaged area, applying firm, even pressure. Your goal is to grind away the oxidized layers until you reach solid, shiny, and uncompromised bare steel.
As you approach the edges of the rusted area, transition to a medium-grit sandpaper, such as 180-grit or 220-grit, to feather the surrounding paint. Feathering involves sanding the edge of the healthy paint at a shallow angle so that it tapers smoothly down to the bare metal. This smooth transition prevents a sharp, visible ridge from showing through once you apply the final primer and paint coats. Take care not to use excessive force or aggressive power tools like high-speed angle grinders on thin body panels, as the friction heat can easily warp the metal and ruin the panel’s contour.
After completing the mechanical sanding, the work area will be covered in fine metal shavings and rust dust. Use a dry brush or clean compressed air to blow away the bulk of the debris. Follow this by wiping the entire area down with a clean, lint-free microfiber cloth dampened with your manufacturer-recommended prep solvent. This final wipe ensures that no microscopic dust particles remain to contaminate the chemical treatment or compromise the adhesion of subsequent coatings.
Applying the Car Rust Treatment Correctly
Before opening your rust treatment product, read the manufacturer’s instructions carefully to understand its specific application parameters. Pay close attention to recommended temperature ranges and humidity limits, as extreme tropical heat or high moisture levels can cause the product to dry too quickly or fail to react properly. Depending on the product type, you may need to apply it using a nylon brush, a lint-free cloth, or a low-pressure spray bottle.
Apply the rust treatment in thin, even coats over the prepared bare metal. Avoid applying the product too heavily, as thick layers can lead to runs, drips, or pooling, which results in a soft, gummy finish that will not cure correctly. Keep the application strictly within the masked area, and immediately wipe away any accidental drips that land on healthy, unmasked painted surfaces to prevent staining or chemical etching.
As the treatment cures, observe the surface for the visual cues described on the product label. Many chemical rust converters contain active ingredients that react with iron oxide, turning the rusted surface from a reddish-brown color to a hard, protective black or dark gray barrier. This color change is a reliable indicator that the chemical reaction is successfully neutralizing the remaining microscopic rust particles. Allow the product to sit undisturbed during this reaction phase, adhering strictly to the manufacturer’s specified wet-contact times.
Curing, Priming, and Finishing the Repair
Allowing the rust treatment to cure completely is vital before you apply any topcoats. Refer to the product label for the exact curing duration, keeping in mind that high ambient humidity can significantly extend the required drying time. Rushing this step can trap uncured chemicals beneath the paint, leading to premature bubbling and paint failure. Let the vehicle sit in a dry, dust-free environment for the full duration recommended by the manufacturer.
Once the treatment has fully cured into a stable barrier, inspect the surface texture. If recommended by the product instructions, use fine 400-grit or 600-grit sandpaper to lightly scuff-sand the cured surface. This light sanding creates a microscopic texture, often referred to as a mechanical tooth, which greatly improves the adhesion of your primer. After scuffing, wipe the area clean with a dry, lint-free cloth to remove any fine dust.
To seal the repair permanently, apply a high-quality, rust-inhibiting automotive primer over the cured treatment. Apply two to three thin coats of primer, allowing adequate flash-dry time between each coat as specified on the can. Once the primer is dry, you can apply color-matched touch-up paint followed by a protective clear coat. This multi-layer finish not only restores your vehicle’s original appearance but also creates an impermeable barrier that blocks oxygen and moisture from reaching the metal.
Post-Treatment Care and Rust Prevention
Maintaining your vehicle’s exterior after a rust repair is essential to prevent corrosion from returning or developing in new areas. Establish a regular washing routine to remove road grime, bird droppings, and environmental contaminants that can degrade the clear coat over time. Apply a high-quality car wax or paint sealant every few months to provide an extra hydrophobic layer that helps shed water and block UV rays.
Make it a habit to inspect common rust-prone areas of your vehicle at least once a season. Pay close attention to the inner wheel arches, the undercarriage, the lower edges of the doors, and the trunk seams, as these areas frequently collect road debris and trap moisture. Ensure that the factory drain holes located at the bottom of your doors and rocker panels remain clear of dirt and leaves, allowing rainwater to drain freely rather than pooling inside the metal panels.
Finally, consider your vehicle’s storage conditions to minimize exposure to harsh environmental factors. Whenever possible, park your car in a dry, covered garage or under a carport, especially during heavy rain seasons or in coastal areas where salt-laden air is prevalent. If you must park outdoors, using a breathable, high-quality car cover can help shield your vehicle from direct rain while allowing trapped condensation to evaporate, keeping your car’s body panels dry and rust-free.

Community discussion
Share your experience or ask a question. Comments are reviewed before publication.