
Installing car floor mats might seem like a simple task of placing a piece of rubber or carpet onto your vehicle’s floorboards, but doing it incorrectly poses a serious safety hazard. A loose or improperly fitted mat can slide forward during transit, potentially trapping the accelerator pedal or blocking the brake pedal from fully engaging. This risk is especially critical in tropical climates like the Philippines, where heavy rains, muddy shoes, and sudden downpours require durable, high-sided mats that must remain absolutely secure under all driving conditions.
To ensure your vehicle’s interior remains protected from moisture, dirt, and wear while maintaining maximum safety on the road, you must follow a systematic installation process. This guide outlines the precise steps to prepare your cabin, align the mats with your vehicle’s factory retention systems, and verify that your pedals have completely unobstructed travel. By taking the time to secure your mats properly, you protect both your vehicle’s carpet and everyone inside the cabin.
Why Proper Floor Mat Installation Matters for Safety
The primary function of a car floor mat is to shield the vehicle’s carpet from dirt, moisture, and wear, but safety must always take precedence over aesthetics. A poorly installed or shifting floor mat is a known cause of sudden, unintended acceleration and reduced braking efficiency. If a mat is allowed to slide forward, its front edge can easily catch on the bottom of the accelerator pedal, holding it down even after you lift your foot.
Products mentioned in this guide
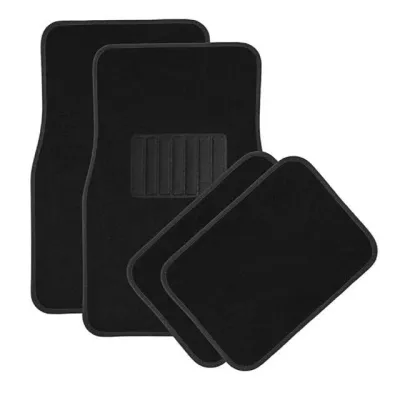
7 Lazada user ratings
Perfect fit for my car, Quality:Non-slip mats for safety, Appearance:Easy to install and secure in place, Performance:Great value for money,
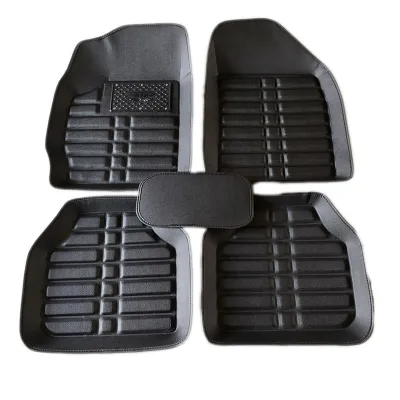
2,923 Lazada user ratings
Great value for money, Stylish and elegant design, fast delivery po and walang damage ang item though it's not perfectly fit po sa Honda Acc…Read full reviewShow less
Great value for money, Stylish and elegant design, fast delivery po and walang damage ang item though it's not perfectly fit po sa Honda Accord 1999 but still maganda pa din po ang naging itsura ng item sa car .. it's universal po so I understand na ganun po pero maganda po 😊
Enhances the overall look of my car, Easy to clean and maintain, Provides excellent protection, Perfect fit for my car, Durable and long-las…Read full reviewShow less
Enhances the overall look of my car, Easy to clean and maintain, Provides excellent protection, Perfect fit for my car, Durable and long-lasting, Versatile and suitable for all seasons, Great value for money, Stylish and elegant design,
📏Fit:Fit sa Vios Gen 1, Sulit na sulit 🧼Ease of Cleaning:Mabilis lang linisan kahit tubig lang 🛠️Durability:Matibay
📏Fit:good na good 5star kayo skin bagay na bagay sa car ko thank you seller sa susunod order ako ulit thanks
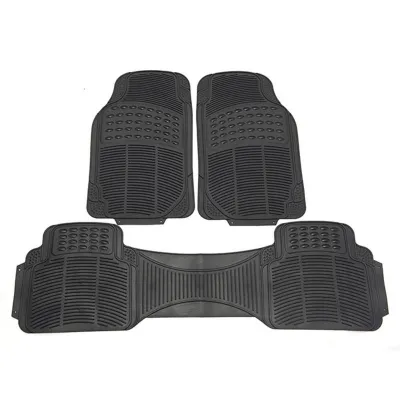
3,015 Lazada user ratings
Absolutely fantastic deal! Found a great price, especially considering the dates and convenience of the delivery. The order process was smoo…Read full reviewShow less
Absolutely fantastic deal! Found a great price, especially considering the dates and convenience of the delivery. The order process was smooth and the customer service was super helpful when I had a quick question. Definitely recommending it to anyone looking for a budget-friendly deal.
Keeps my car interior clean, High-quality rubber material, Stylish and sleek design, Easy to clean and maintain, Great protection for my car…Read full reviewShow less
Keeps my car interior clean, High-quality rubber material, Stylish and sleek design, Easy to clean and maintain, Great protection for my car floor,
Provides excellent grip, Perfect fit for my car, Durable and long-lasting, Value for money, thank you lazada,seller,delivery rider
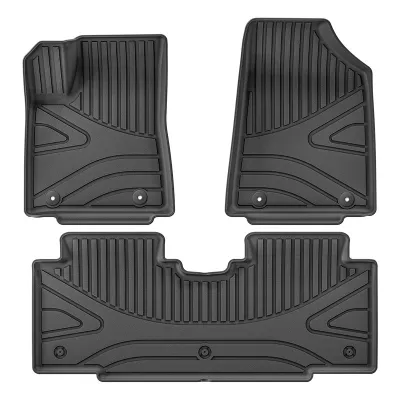
11 Lazada user ratings
Fast delivery and good items. Items were well packed but be careful in opening the package as not all mattings were contained in the box. Re…Read full reviewShow less
Fast delivery and good items. Items were well packed but be careful in opening the package as not all mattings were contained in the box. Recommended seller.
Nice quality and elegant
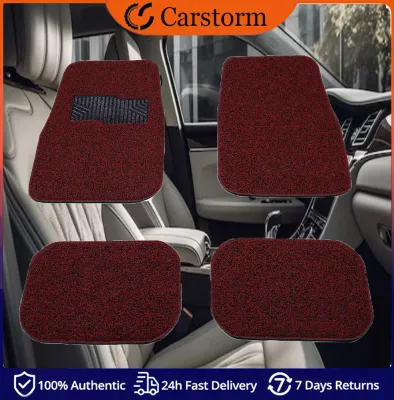
2,241 Lazada user ratings
Great quality car mats, Great value for the price, Love the semi deep dish design, 🛠️Durability:sturdy..bendable, quality materials 🧼Ease of …Read full reviewShow less
Great quality car mats, Great value for the price, Love the semi deep dish design, 🛠️Durability:sturdy..bendable, quality materials 🧼Ease of Cleaning:easy to clean, comfortable, flexible 📏Fit:retro fitting on my car flooring
Great quality car mats, Great value for the price, Durable and long-lasting, 🧼Ease of Cleaning: ❤️easy to clean 📏Fit: ❤️nice 🛠️Durability: ❤️dur…Read full reviewShow less
Great quality car mats, Great value for the price, Durable and long-lasting, 🧼Ease of Cleaning: ❤️easy to clean 📏Fit: ❤️nice 🛠️Durability: ❤️durable
Fits wells for my Honda Civic 1998. Stirring wheel is heavy leather. And the floor mats are very thick, helps keep ny car dust free.
🛠️Durability:Provides excellent floor protection, 🧼Ease of Cleaning:Perfect fit for my car, 📏Fit:uwuiw8191oqoq2
Prices are valid at publication and may change. Please refer to the product page for the latest price.
Similarly, a bunched-up mat can slide underneath the brake or clutch pedal, preventing you from pressing the pedal all the way to the floorboard. In emergency braking situations, even a few millimeters of restricted pedal travel can significantly increase your stopping distance, leading to avoidable collisions. This makes securing the driver’s side mat one of the most critical interior maintenance tasks you can perform.
To mitigate these risks, modern vehicles are equipped with factory-installed floor mat retention systems, such as hooks, clips, or twist-locks. High-quality, vehicle-specific mats are designed with matching grommets that lock directly onto these anchor points. If your vehicle’s factory anchors are broken, missing, or damaged, you should stop the installation immediately and consult a professional mechanic or your dealership to have the retention hardware repaired before driving.
Tools and Materials You Will Need
Before beginning the installation, gathering the correct tools and materials will ensure a smooth, efficient workflow and a secure final fit. Having everything on hand prevents you from rushing through critical safety checks or leaving the mats partially secured.

First, you will need your new set of custom-fit or vehicle-specific floor mats. Ensure these are designed precisely for your vehicle’s make, model, and model year, as even minor mid-generation design updates can alter the floorpan layout and anchor positions.
Next, prepare a vacuum cleaner equipped with a crevice tool and a stiff-bristled detailing brush. These tools are essential for extracting deeply embedded sand, dried mud, and road dust from the carpet fibers before laying down the new mats.
You will also need a mild automotive interior carpet cleaner and several clean microfiber towels. Ensure the cleaner you select is authorized by its manufacturer label for use on automotive carpets and plastics, as harsh household detergents can degrade carpet fibers or damage the vehicle’s floorpan coatings.
Finally, keep a set of replacement retention clips or grommets nearby if your vehicle’s manual specifies them as necessary for your particular mat style. Having these items ready ensures you can replace any worn or cracked factory hardware immediately.
Step 1: Remove Old Mats and Clean the Floorboards
The first active step in the installation process is to completely clear the vehicle’s footwells of any existing floor coverings. Never attempt to install new mats over old ones, as this prevents the new mats from locking into the factory anchors and creates a highly unstable driving surface.
Carefully remove the old floor mats by releasing any factory clips, hooks, or twist-locks. Avoid pulling or yanking the mats forcefully, as this can tear the underlying carpet or break the plastic anchor posts mounted to the vehicle’s floorpan. Once released, lift the mats straight up and out of the cabin to avoid spilling trapped dirt and debris onto the clean seats or center console.
With the footwells completely bare, use your vacuum cleaner and detailing brush to clean the carpet thoroughly. Pay close attention to the areas around the seat tracks, the dead pedal, and directly beneath the pedals where dirt and moisture tend to accumulate. Removing this debris ensures the new mats will lie perfectly flat against the floorboards without any uneven high spots.
After vacuuming, apply a light mist of the automotive interior cleaner to any stained or heavily soiled areas of the carpet, following the product’s label instructions. Use a microfiber towel to scrub the area gently and blot up any remaining moisture. Allow the carpet to dry completely before proceeding; trapping moisture under rubber or thermoplastic liners in a warm, humid climate will inevitably lead to mold growth and persistent musty odors.
Step 2: Identify Anchor Points and Mat Orientation
Once the floorboards are clean and dry, inspect the driver and passenger footwells to locate the factory retention systems. These anchors are typically small plastic posts, hooks, or rotating tabs protruding directly through the carpet from the vehicle’s floorpan.
Next, lay out your new floor mats outside the vehicle to identify their correct orientation and placement. A standard set usually includes distinct mats for the driver’s side, front passenger’s side, and the rear passenger footwells.
The driver’s side mat is the most critical and easily identifiable piece in the set. It features specific contours designed to clear the dead pedal on the left, fit around the steering column base, and accommodate the full travel of the accelerator, brake, and clutch pedals. It will also feature reinforced heel pads and precise grommet holes that align perfectly with the driver-side floor anchors.
The front passenger mat is typically longer and lacks the complex pedal cutouts found on the driver’s side. Rear mats may consist of two individual pieces or a single, continuous runner designed to drape over the center transmission hump; verify the orientation of these rear pieces to ensure any anti-slip backing faces downward against the carpet.
Step 3: Position and Secure the Floor Mats
With the mats correctly identified, begin the physical installation with the driver’s side mat. Carefully lower the mat into the footwell, sliding the front edge forward toward the firewall while keeping the rear edge aligned with the seat tracks.
Align the built-in grommets or retention holes on the mat precisely over the factory anchor posts protruding from the floor. Do not force the mat into position; if the holes do not align naturally, double-check that you have the correct mat for the driver’s side and that it is oriented in the right direction.
Press down firmly on the grommet area until you hear or feel a distinct “click” or “snap,” which indicates that the mat has locked securely onto the anchor post. If your vehicle utilizes a twist-lock style anchor, insert the post through the grommet and rotate the locking tab 90 degrees until it sits perpendicular to the slot, preventing the mat from lifting.
Repeat this positioning and securing process for the front passenger mat and the rear passenger mats. Ensure that the edges of all mats tuck neatly under the plastic door sills, center console trim, and seat tracks without bunching, folding, or curling upward, as raised edges can catch on occupants’ shoes and damage the mats over time.
Step 4: Perform the Final Fit and Pedal Safety Check
After securing all the mats, you must perform a rigorous safety check on the driver’s side to guarantee that the installation does not interfere with vehicle operation. This is the most critical step of the entire process and must never be skipped.
Sit in the driver’s seat and manually press the accelerator, brake, and clutch pedals (if your vehicle has a manual transmission) through their entire range of motion. Press each pedal firmly all the way to the floorboard and release it slowly, observing the movement closely.
Verify that there is absolutely no contact, rubbing, or catching between the pedals and the edges or surface of the floor mat. The pedals must move smoothly and return to their resting positions instantly without any resistance or hesitation.
Next, place your foot on the driver’s mat and attempt to push it forward, backward, and side-to-side with moderate force. The mat must remain firmly locked in place; if it shifts or slides even slightly, the retention clips are not engaged properly, and you must re-examine the anchor points.
Finally, check that the heel pad area sits completely flat against the floorboard. If the mat arches upward or creates a bubble under your feet, it may be incompatible with your vehicle model, or there may be debris trapped underneath that is preventing a flush fit.
Tips for Maintaining Your Floor Mats After Installation
To ensure your floor mats continue to provide safe and reliable protection, you should establish a simple routine maintenance schedule. Regularly inspecting and cleaning your mats preserves their structural integrity and keeps them securely anchored.
Make it a habit to check the retention clips and grommets every time you wash your vehicle or vacuum the interior. Over time, road vibrations and foot pressure can cause clips to loosen, or dirt can accumulate inside the locking mechanisms, preventing a secure connection.
Clean your mats according to their specific material guidelines. For heavy-duty rubber or thermoplastic elastomer (TPE) liners, remove them from the vehicle, spray them with clean water, scrub them with a soft-bristled brush and a mild soap, and rinse them thoroughly. Always allow them to dry completely in a shaded area before reinstalling them to prevent trapping moisture in the cabin.
For carpeted mats, vacuum them regularly to remove abrasive dirt particles that can wear down the fibers. Spot-clean any spills immediately using an approved automotive carpet cleaner, and avoid soaking the mats entirely, as the backing can degrade if left wet for extended periods.
Periodically inspect the underside of your mats for wear. If you notice that the anti-slip backing has worn smooth, the rubber nibs have flattened, or the plastic retention grommets have cracked, replace the mats immediately to maintain a safe driving environment.
Frequently Asked Questions (FAQ)
Can I use generic universal floor mats instead of custom-fit ones?
While generic universal floor mats are widely available on online marketplaces and are often less expensive, they are generally not recommended for the driver’s side footwell. Universal mats lack the precise contours of your vehicle’s specific floorpan and rarely feature matching retention grommets that align with your factory anchor posts. This lack of secure anchoring significantly increases the risk of the mat sliding forward during driving, which can lead to dangerous pedal interference. For optimal safety and a snug fit, it is highly recommended to invest in custom-fit or vehicle-specific floor mats.
What should I do if my car does not have factory floor mat anchors?
If your vehicle was not manufactured with factory floor mat anchors, you must take extra precautions to prevent the mats from sliding. Look for high-quality mats that feature an aggressive, high-friction anti-slip backing, such as heavy-duty rubber nibs or specialized micro-hook fibers that grip the carpet tightly. Avoid installing aftermarket screw-in anchors that require drilling or piercing the floorpan, as these can damage hidden electrical wiring, fuel lines, or brake lines beneath the cabin floor. If you require a permanent anchoring solution, consult your vehicle manufacturer or an authorized service center for approved retrofitting options.
Is it safe to put a new floor mat over the existing factory carpet mat?
No, it is extremely dangerous to stack floor mats. Placing a new rubber, TPE, or carpet mat on top of an existing factory carpet mat prevents the top mat from engaging with the vehicle’s built-in retention anchors. The top mat will slide easily over the carpeted surface beneath it, creating a high risk of jamming the accelerator or brake pedals. Always remove your old factory floor mats completely before laying down and securing your new all-weather liners or custom-fit mats.

Community discussion
Share your experience or ask a question. Comments are reviewed before publication.