
Customizing a Honda Click 125 V4 with aftermarket decals is a practical way to personalize its appearance while shielding the original paint from daily wear, minor scratches, and environmental exposure. Because this scooter features sharp, aggressive body lines and complex curved panels, achieving a clean and durable finish requires careful planning. Selecting the right design layout and verifying material specifications are critical steps that help prevent premature peeling and ensure the decals can withstand demanding riding conditions, including intense tropical heat, high humidity, and sudden downpours.
Before purchasing any sticker kit, riders should evaluate how different materials, adhesive types, and design styles interact with the scooter’s physical structure. A successful customization project relies on choosing quality vinyl that conforms to the Click 125 V4’s unique fairings, verifying exact model compatibility, and following precise surface preparation steps. This guide outlines the key design options, material grades, and safety checks necessary to make an informed decision and achieve a clean, long-lasting result.
Choosing Design Styles for the Click 125 V4 Bodywork
The Honda Click 125 V4 is known for its sporty, angular aesthetics, featuring a prominent front cowl, sharp side fairings, and a sleek rear profile. When planning your customization, the first decision is to choose between a full-body graphic kit and partial accent decals. Full-body kits offer a complete visual transformation, covering almost every visible plastic panel with a cohesive theme, color scheme, or pattern. These kits are suitable for riders who want to completely change the look of their scooter or protect the majority of their factory paint from external elements.
Products mentioned in this guide
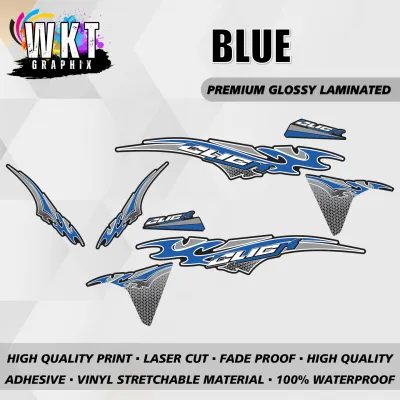
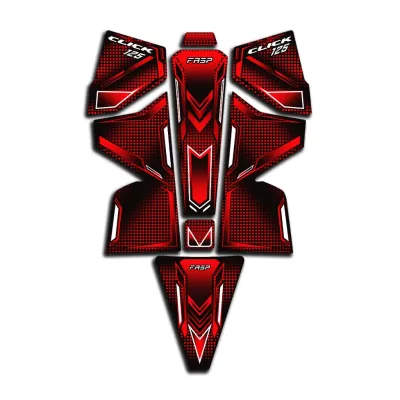
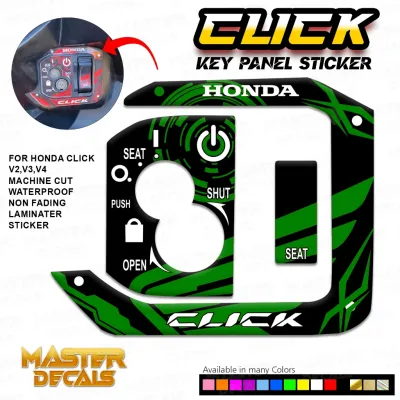
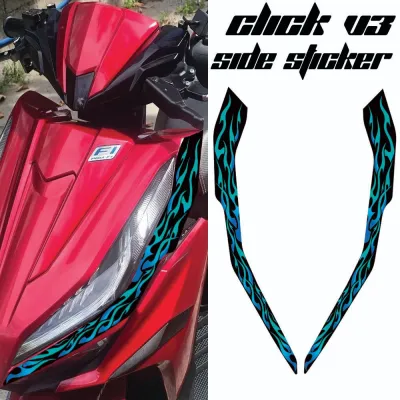
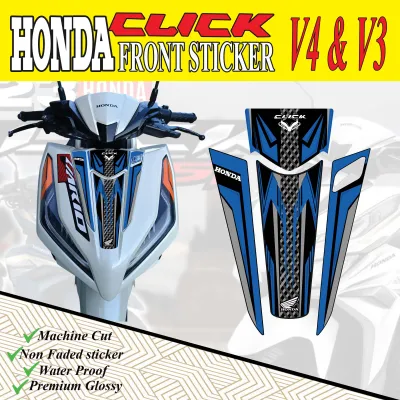
Prices are valid at publication and may change. Please refer to the product page for the latest price.
However, full-body wraps demand a high level of patience and installation skill. Because the Click 125 V4 has deep recesses, sharp creases, and complex curves, applying large sheets of vinyl without wrinkles or bubbles can be challenging. In many cases, achieving a seamless finish with a full-body kit requires partially disassembling the scooter’s bodywork so that the edges of the vinyl can be wrapped neatly around the back of the panels. If you prefer a simpler, less invasive project, partial accent decals are a practical alternative.
Partial accent decals focus on specific areas of the scooter, such as the front fender, the side panels below the seat, or the rear grab bar. These smaller stickers allow you to highlight the scooter’s natural design lines with contrasting colors, sporty stripes, or minimalist geometric patterns. Because they cover less surface area, partial decals are much easier to align and install, making them suitable for beginners or those who want to maintain a clean, understated look that complements the factory paint rather than covering it up entirely.
In addition to purely aesthetic designs, you can incorporate functional and safety-oriented decals into your customization plan. Reflective rim tapes and high-visibility accents on the front cowl and rear panels are practical additions for daily commuters. During the day, these accents blend with your chosen design theme. At night or during heavy tropical rainstorms, they reflect light from other vehicles’ headlights, enhancing your visibility on dark roads and improving overall riding safety.
Before finalizing your design choice, it is crucial to review the layout templates to ensure the graphics do not visually clash with the Click 125 V4’s existing factory paint or structural vents. The scooter features built-in ventilation slots and body contours that must remain unobstructed to ensure proper airflow and cooling. A well-designed decal kit will have precise cutouts that accommodate these vents and align with the physical panels, ensuring that the final look appears integrated and professional rather than awkwardly placed.
Comparing Sticker Materials and Surface Finishes
Selecting the appropriate material grade is essential for ensuring that your decals remain vibrant and securely adhered to your scooter over time. The market offers a variety of sticker materials, but they generally fall into two main categories: standard monomeric PVC and polymeric automotive-grade vinyl. Standard PVC stickers are often budget-friendly but tend to be rigid, prone to shrinking, and susceptible to fading when exposed to intense sunlight and outdoor elements.

For a motorcycle like the Honda Click 125 V4, which is frequently exposed to harsh tropical weather, choosing polymeric automotive-grade vinyl is recommended. This material is formulated with specialized plasticizers that give it excellent flexibility and dimensional stability. It can stretch and conform to the scooter’s curved fairings without tearing or pulling back at the edges. Furthermore, quality automotive vinyl features high resistance to UV radiation, helping to ensure that the colors and designs remain bright and do not fade prematurely under the sun.
Visual finishes also play a significant role in both the appearance and maintenance of your customized scooter. Gloss finishes provide a classic, shiny look that closely mimics factory paint and is relatively easy to clean and maintain. Matte finishes offer a modern, stealthy, and sophisticated appearance, though they can be more sensitive to fingerprints and require specialized matte-safe cleaning products to avoid creating shiny spots. Metallic, chrome, and holographic finishes add a premium, light-catching effect, while textured options like simulated carbon fiber can add a sporty touch to specific areas like the instrument cluster surround or the radiator cover.
When evaluating different products, always check the manufacturer’s specifications regarding material thickness and adhesive type. Motorcycle decals typically have a thickness of 3 to 5 mils, which provides a durable barrier against minor scratches while remaining flexible enough to conform to complex curves. The adhesive should be a pressure-activated, air-release type. Air-release technology utilizes tiny, invisible channels on the adhesive side of the vinyl, allowing trapped air to escape easily during installation, which minimizes the risk of unsightly bubbles and helps ensure a strong, uniform bond.
Finally, review the product care instructions to understand how the chosen material and finish will react to common motorcycle cleaning agents and environmental exposure. Some specialty finishes, particularly matte and textured vinyls, can be degraded by harsh chemical solvents, wax, or petroleum-based polishes. Knowing the correct cleaning procedures—such as using mild, pH-neutral motorcycle shampoos and avoiding high-pressure washers directly on the edges of the decals—will help preserve the appearance and extend the lifespan of your custom stickers.
Fitment Verification and Pre-Purchase Checks
Before purchasing a decal kit from any online marketplace, conducting thorough fitment verification is essential to prevent compatibility issues and material waste. The Honda Click series has undergone several design updates over the years, and even minor model year variations can result in different fairing shapes, vent placements, and panel dimensions. A sticker kit designed for an older generation of the Click 125 will not align correctly with the V4’s specific bodywork. Always verify that the product listing explicitly states compatibility with the Honda Click 125 V4.
To ensure a precise fit, carefully review all seller-provided sizing charts, panel templates, and reference photos. Reputable decal manufacturers often provide detailed diagrams showing the exact shape and placement of each sticker in the kit. Compare these templates to your physical scooter, paying close attention to the locations of emblems, screw holes, and body seams. If your scooter has aftermarket modifications, such as an upgraded front cowl, extra body guards, or custom side mirrors, you may need to plan for manual trimming to accommodate these changes.
The current condition of your scooter’s original paint and plastic surfaces must also be carefully assessed before applying any decals. Stickers require a clean, smooth, and stable surface to adhere properly. If your Click 125 V4 has deep scratches, peeling clear coat, or faded, chalky plastics from prolonged sun exposure, the adhesive may fail to form a secure bond, leading to premature lifting or bubbling. Additionally, applying strong adhesive decals over damaged or loose paint can cause the paint to pull away entirely when the stickers are eventually removed.
Lastly, always verify the seller’s return policy and replacement terms before finalizing your order. Despite careful selection, manufacturing defects such as misaligned print lines, incorrect color saturation, or slightly off-spec cut lines can occasionally occur. A flexible return or replacement policy ensures that you can exchange any defective sheets before you begin the installation process, saving you from the frustration of trying to apply a poorly cut decal that does not align with your scooter’s panels.
Installation Requirements and Paint Safety Boundaries
Achieving a clean installation requires meticulous preparation, the right environmental conditions, and strict adherence to safety guidelines. The first and most critical step is thorough surface preparation. The scooter’s fairings must be washed with a wax-free dish soap or a dedicated motorcycle shampoo to remove all road grime, dust, and mud. After washing, the panels should be wiped down with an isopropyl alcohol solution (typically 70% concentration) to strip away any remaining wax, grease, or silicone-based polish. The surfaces must be completely dry before application, as even a tiny amount of moisture or oil will compromise the adhesive bond.
During the installation process, you must observe strict safety boundaries to ensure the scooter remains safe and road-legal. Decals must never obstruct the headlights, turn signals, tail lights, or license plate illumination. Additionally, ensure that no stickers block the air intakes, radiator pathways, or ventilation grilles, as restricting airflow can lead to engine overheating. Keep all decals clear of moving mechanical parts, suspension components, brake discs, and the exhaust system, where high heat can melt the vinyl and create a safety hazard.
Environmental conditions during application play a significant role in how well the adhesive cures. It is recommended to apply the decals in a clean, dust-free, and shaded environment with moderate temperatures and low humidity. High humidity can trap moisture under the vinyl, while direct sunlight can make the plastic panels too hot, causing the vinyl to stretch excessively and the adhesive to grab too quickly, making repositioning difficult. If possible, work indoors or in a well-ventilated garage during the cooler hours of the morning or late afternoon.
When it comes time to remove or replace the decals, following safe removal conditions is essential to protect your scooter’s original paintwork. Applying gentle heat from a hair dryer or a low-setting heat gun softens the adhesive, making the vinyl pliable and easier to peel away. Always peel the sticker back slowly at a shallow angle, rather than pulling it straight up. If you notice the original paint or clear coat lifting, cracking, or showing signs of damage during the removal process, stop immediately. In such cases, consult a professional detailer or automotive paint specialist to prevent further cosmetic damage to your Click 125 V4.
Frequently Asked Questions (FAQ)
Can I apply full-body decals without removing the Click 125 V4 fairings?
While it is possible to apply small accent decals and minor stripes while the scooter is fully assembled, installing a comprehensive full-body graphic kit usually requires removing the fairings. Removing the plastic panels allows you to wrap the vinyl edges neatly around the back of the panels, hiding the cut lines and providing a much cleaner, factory-like finish. Attempting to install large sheets on assembled panels increases the risk of trapping dust in the panel gaps, creating bubbles, and leaving exposed edges that are highly susceptible to catching wind and peeling off during rides. Always consult the specific decal kit’s installation guide to determine if panel disassembly is recommended for optimal results.
What should I do if the sticker adhesive leaves residue on the plastic panels?
If removing a sticker leaves sticky adhesive residue on your Click 125 V4’s panels, first check the decal manufacturer’s instructions for recommended cleaning methods. Avoid using harsh, unverified chemical solvents like acetone, gasoline, or strong paint thinners, as these can easily cloud, melt, or permanently discolor the scooter’s plastic fairings and painted surfaces. Instead, use mild adhesive removers specifically labeled safe for automotive plastics and paint, or try a gentle mixture of warm water and mild dish soap. Always test any cleaning agent on a small, hidden area of the fairing first to ensure there is no adverse reaction. If the residue remains stubborn or you notice any paint discoloration, stop and consult a professional motorcycle detailer.
Community discussion
Share your experience or ask a question. Comments are reviewed before publication.