
Installing a reverse camera to your car’s head unit involves mounting the camera at the rear, routing a video cable through the cabin, and wiring the system to both the reverse light circuit and the head unit’s trigger wire. This setup allows your display to automatically switch to the rear camera feed the moment you shift into reverse, significantly improving visibility and safety. While the process requires a blend of physical mounting and basic electrical work, following a methodical approach ensures a clean, reliable installation that looks factory-grade and withstands daily driving conditions.
Preparation and Tools Required for Installation
Before unscrewing any panels, gather the necessary tools to ensure a smooth installation process. You will need a set of plastic trim removal tools to pry open interior panels without scratching the plastic or tearing the upholstery. For the electrical connections, prepare wire strippers, high-quality crimp connectors or a soldering iron, heat shrink tubing, and electrical tape. A digital multimeter is essential for safely identifying the correct positive power wires in your vehicle’s factory harness.
To verify compatibility, inspect the back of your aftermarket or factory head unit. It must feature a dedicated yellow RCA video input port, typically labeled “Camera In” or “R/C IN,” along with a reverse trigger wire, which is often colored violet or pink and labeled “Reverse” or “Back.” Review the installation manuals for both your specific camera kit and your vehicle’s wiring schematics. This step is crucial because wire colors and pin configurations vary wildly between car manufacturers and head unit brands, and verifying these details beforehand prevents costly electrical damage.
Products mentioned in this guide
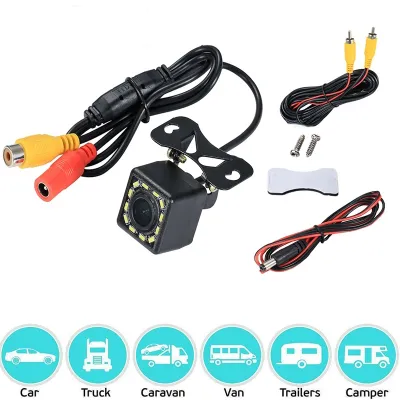
11 Lazada user ratings
🛠️Durability:good
📏Accuracy:good
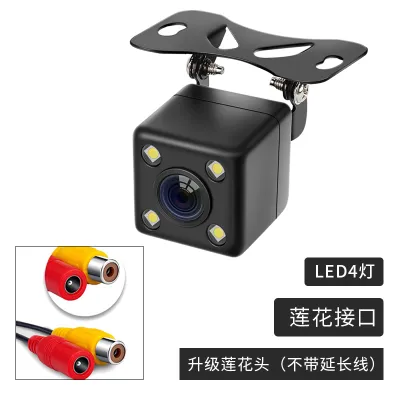

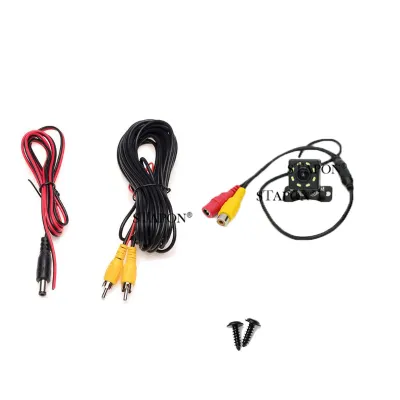
546 Lazada user ratings
Durable and reliable!, Waterproof design is a plus!, Waterproof design is a plus!, Highly recommended for safety!, Provides a wide and clear…Read full reviewShow less
Durable and reliable!, Waterproof design is a plus!, Waterproof design is a plus!, Highly recommended for safety!, Provides a wide and clear rear view!, Easy to install and use!,
Durable and reliable!, Crystal clear night vision!, second order ko na to. I've lost my old one. OK na OK xa gumagana talaga.
Excellent image quality!, Waterproof design is a plus!, Highly recommended for safety!, Provides a wide and clear rear view!,
Durable and reliable!, Waterproof design is a plus!, Perfect for parking assistance!, Easy to install and use!,
Bbvdssswggbbbb vf 📏Accuracy: Crystal clear night vision!, Easy to install and use!, vvcfddefvvvvbb
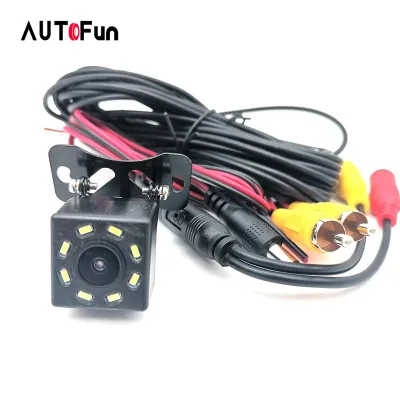
127 Lazada user ratings
Nice product and fits to my car as rear camera
Thank you dealer, very fast delivery.
Okey naman po di ko pa naipapakabit?
good quality..sakto sa motor ko
maganda madaling install

862 Lazada user ratings
The item is in good condition. Well packaged and was shipped early. Price vs quality is good. Tatagal naman siguro ung item. Anyway thank yo…Read full reviewShow less
The item is in good condition. Well packaged and was shipped early. Price vs quality is good. Tatagal naman siguro ung item. Anyway thank you seller and lazada! ayos lexph ambilis lagi 1 day lng to bulacan. Godbless.
Enhances visibility in low-light conditions., Durable and sturdy construction., Impressive starlight night vision., Clear and wide-angle vie…Read full reviewShow less
Enhances visibility in low-light conditions., Durable and sturdy construction., Impressive starlight night vision., Clear and wide-angle view.,
works as intended, need lang iadjust yung angle ng cam but it's ok for it's price. a steal tbh. item is legit, thank you
Bang for the buck! Looks more clear than my previous installed cam too. I haven't tried it on night yet. Thanks!
I had installed and tested the camera. Hope will last it. Thank you Seller, Lazada and delivery man.
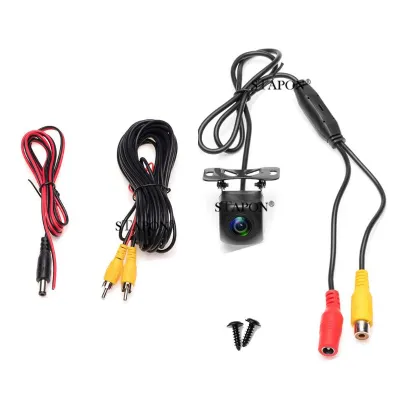
3,597 Lazada user ratings
Great value for the price, malinaw at maliwanag sa dilim. pininturahan ko Ng puti para mag camouflage sa kulay Ng car ko. para di rin pansin…Read full reviewShow less
Great value for the price, malinaw at maliwanag sa dilim. pininturahan ko Ng puti para mag camouflage sa kulay Ng car ko. para di rin pansinin
Great value for the price, Enhanced safety with wide-angle lens, 🔧Ease of Installation:Plug and Play basta bili ka lang Harness
Excellent product. Plug and play device. Worked well with Android auto, Honda Civic. Bang for your buck!
goods nmmn item . dko palng naikabit
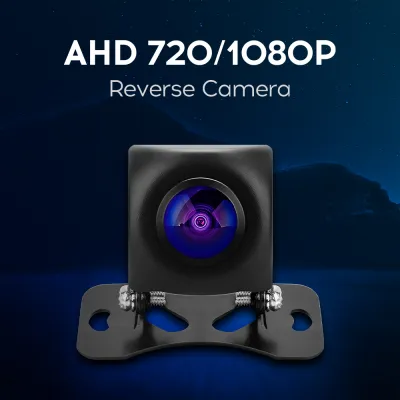
123 Lazada user ratings
Дом мой достроен, но я в нём один Хлопнула дверь за спиной Ветер осенний стучится в окно Плачет опять надо мной Ночью гроза, а наутро туман …Read full reviewShow less
Дом мой достроен, но я в нём один Хлопнула дверь за спиной Ветер осенний стучится в окно Плачет опять надо мной Ночью гроза, а наутро туман Солнце остыло совсем Давние боли идут чередой Пусть собираются все Дом мой достроен, но я в нём один Хлопнула дверь за спиной Ветер осенний стучится в окно Плачет опять надо мной Это судьба, а судьбу не могу Я ни о чём просить Только я знаю, как после меня Станут ветра голосить
second time to order from this shop. seller is responsive. interface resolution is good. back camera on reverse has decent resolution. Recom…Read full reviewShow less
second time to order from this shop. seller is responsive. interface resolution is good. back camera on reverse has decent resolution. Recommended!!
Perfect for parking in tight spaces., Crystal clear image quality., Great value for the price.,
Waterproof design works perfectly., Sturdy build quality., Wide view angle covers blind spots.,
Prices are valid at publication and may change. Please refer to the product page for the latest price.
Step 1: Mounting the Reverse Camera
The physical installation begins at the rear of your vehicle, where you must choose an optimal mounting location that provides a clear, unobstructed view of the ground and obstacles behind you. Most aftermarket cameras offer two primary mounting styles: a license plate frame bracket or a flush-mount bumper camera. A license plate mount is highly popular because it requires no drilling into the vehicle’s metal body, utilizing the existing license plate screws instead.

If you opt for a flush bumper mount, you will need to drill a hole in the rear bumper cover using the hole saw bit typically included in the camera kit. Before drilling, check behind the bumper to ensure you will not damage any factory parking sensors, impact bars, or wiring harnesses. Once the hole is drilled, clean the edges and apply a high-quality silicone sealant around the opening. In tropical climates like the Philippines, where heavy monsoon rains and high humidity are common, this sealant is vital to prevent water from seeping into the trunk or causing rust on exposed metal edges.
Insert the camera into the mounting point and secure it firmly. If your camera features an adjustable bracket, leave the mounting screws slightly loose so you can fine-tune the vertical angle during the testing phase. Ensure the camera is oriented correctly—many models have a small arrow or “Top” indicator on the housing to prevent your video feed from appearing upside down on the dashboard display.
Step 2: Routing the Video and Power Cables
Routing the cables from the rear bumper to the dashboard requires patience to ensure the wires remain hidden and protected from wear. Begin by using your plastic trim tools to carefully pop loose the interior panels, door sill plates, and trunk lining along one side of the vehicle. Running the cables along the passenger side is often preferred, as it keeps the wiring away from the driver’s foot pedals and steering column.
Thread the camera’s main wiring harness from the outside of the vehicle into the trunk or cargo area. Always use an existing rubber factory grommet to pass the wire through the vehicle body. If you must run the wire through a new hole, install a rubber grommet to protect the cable insulation from being sliced by sharp metal edges over time. Once inside, route the long RCA video cable forward along the vehicle’s existing factory wiring harness.
Secure the cable every few inches using nylon zip ties, ensuring it does not hang loose behind panels where it could rattle or get pinched. Avoid routing the cable near hot exhaust components, moving parts such as trunk hinges or seat folding mechanisms, and high-voltage factory wiring that could introduce electrical noise into the video signal. If your vehicle has side curtain airbags, route the cable along the floorboards rather than the headliner to prevent interfering with airbag deployment.
Step 3: Wiring the Camera to the Head Unit and Reverse Light
Before performing any electrical work on your vehicle, safety is the absolute priority. Disconnect the negative terminal of your car battery to eliminate the risk of short circuits, blown fuses, or damage to sensitive onboard computers. Keep the battery disconnected until all wiring connections are fully completed and insulated.
To power the camera, you must tap into the vehicle’s reverse light circuit, which only receives 12-volt power when the gear selector is in reverse. Locate the wiring harness leading to one of your rear tail light assemblies. Turn your vehicle’s ignition to the “On” position (without starting the engine), shift into reverse, and use your multimeter to test the wires until you find the one showing 12 volts. Turn the ignition off, shift back to park, and verify that the voltage drops to zero.
Once identified, connect the camera’s red positive power wire to this reverse light positive wire using a reliable crimp connector or solder. Connect the camera’s black ground wire to a clean, unpainted metal chassis bolt nearby to establish a solid ground. Next, plug the long RCA video cable into the camera’s video output. Most high-quality video cables include a short red trigger wire at both ends; connect the rear red trigger wire to the same reverse light positive wire you just tapped.
At the front of the vehicle, plug the RCA cable into the designated camera input on the back of your head unit. Connect the red trigger wire from the front end of the RCA cable to the head unit’s reverse trigger wire. This connection tells the head unit to switch the screen to the camera feed when the reverse lights turn on. Insulate all spliced connections thoroughly using heat shrink tubing or high-grade electrical tape to protect them from moisture and vibration. If you encounter any conflicting wire colors, unexpected factory wiring configurations, or pinouts that do not match your manuals, stop immediately and consult a qualified automotive electrician to avoid damaging your vehicle’s electrical system.
Step 4: Testing and Final Adjustments
With all electrical connections securely insulated, it is time to verify that the system functions correctly before reassembling your vehicle’s interior. Reconnect the negative battery terminal and tighten the clamp. Sit in the driver’s seat, turn the vehicle’s ignition to the “On” position, and allow the head unit to fully boot up and initialize.
Depress the brake pedal fully, engage the handbrake for safety, and shift the gear selector into reverse. The head unit screen should automatically switch from its current menu to the live rear camera feed within a couple of seconds. If your camera features built-in parking guidelines, check their alignment relative to the ground. If the image is clear but tilted or pointing too high, have an assistant carefully adjust the camera bracket at the rear of the vehicle until you achieve a clear view of the ground directly behind your bumper as well as approaching obstacles.
Once you are satisfied with the camera’s field of view, tighten the camera mounting screws completely to lock the angle in place. Turn off the ignition and begin the process of reassembling your vehicle. Carefully snap all plastic trim panels, door sills, and trunk linings back into their original positions, ensuring no wires are pinched or exposed to view. A clean, hidden installation not only looks professional but also protects the wiring from accidental kicks or snags by passengers.
Troubleshooting Common Installation Issues
If your screen remains completely blank or displays a “No Signal” message when you shift into reverse, start by checking the physical connections. Verify that the yellow RCA video cable is plugged into the correct “Camera In” port on the back of the head unit, as it is easy to accidentally plug it into a standard auxiliary video input. Next, access your head unit’s system settings menu and ensure that the backup camera function is enabled, as some units require manual activation in the software.
If the camera fails to turn on at all, the issue is likely a lack of power or a missing trigger signal. Use your multimeter to confirm that the camera is receiving 12-volt power at the rear when the vehicle is in reverse. If there is no power, check the vehicle’s reverse light fuse in the fuse box, and inspect your splice connections at the tail light harness. A loose or poorly crimped connection is a common culprit for power delivery failures.
A flickering, distorted, or rolling image on your screen usually points to a weak ground connection or electrical interference. Inspect the black ground wire at the rear of the vehicle and ensure it is secured to bare, unpainted metal; paint or rust on the chassis bolt can disrupt the electrical circuit. If the ground is solid, the interference may be caused by routing the video cable too close to high-current factory wiring or the vehicle’s alternator. Wrapping the video cable connections in shielding tape or rerouting the cable away from major electrical looms can resolve these signal distortions.
Frequently Asked Questions (FAQ)
Can I install a reverse camera on a car with an older factory radio?
Yes, you can install a reverse camera even if your vehicle is equipped with an older factory radio that lacks a color screen or RCA inputs. To do this, you have two primary options: replacing the factory radio with an aftermarket double-DIN touchscreen head unit, or installing a standalone display monitor. Standalone monitors are available in various styles, including compact dashboard screens or replacement rearview mirrors that feature an integrated LCD screen that activates when you shift into reverse. Both options allow you to connect the standard RCA video cable from your camera, providing a clear view without requiring a modern factory infotainment system.
Do wireless reverse cameras eliminate the need for routing cables?
Wireless reverse cameras significantly reduce the installation effort by eliminating the need to run a long RCA video cable through the entire length of your car’s cabin. However, they do not make the installation completely wireless. The camera transmitter at the rear of the vehicle still requires physical wiring to the reverse light circuit for power and ground. Additionally, the receiver at the front must be connected to the head unit’s power source and video input. While wireless kits save time on routing, they can sometimes be susceptible to signal interference from other electronic devices or physical barriers, making a wired connection the preferred choice for maximum reliability.
Community discussion
Share your experience or ask a question. Comments are reviewed before publication.