
When navigating the diverse and often challenging road conditions of the Philippines—ranging from the concrete joints of EDSA to the unpaved, pothole-riddled provincial routes—choosing the right tool-free car mount for your dashcam is critical to capturing clear, usable footage. While no single mount is perfect for every vehicle, high-strength adhesive pads generally offer the highest vibration resistance for severely bumpy roads, minimizing camera shake and ensuring the device remains securely attached. Suction cups with mechanical locking levers serve as the best alternative for flexible placement, provided they are mounted on a perfectly smooth windshield or non-porous dashboard surface and are shielded from extreme cabin heat. Conversely, vent clips are the least recommended option for heavy dashcams on rough terrain due to the high risk of damaging fragile air conditioning vent louvers under constant vertical impact. Ultimately, your final decision depends on your dashboard’s texture, your vehicle’s ventilation design, and the overall weight of your dashcam.
Suction Cup Mounts: Flexibility vs. Heat and Vibration
Suction cup mounts are a highly popular tool-free option because they rely on basic vacuum physics to create a secure hold. When you press the flexible silicone or rubber cup against a smooth surface, you force the air out from underneath it. This action creates a low-pressure void inside the cup, while the higher atmospheric pressure outside presses the cup firmly against the mounting surface. This mechanism is incredibly effective on smooth windshield glass or flat, completely non-porous dashboard surfaces, allowing for instant, tool-free installation and easy repositioning.
However, the intense tropical climate of the Philippines presents a unique physical challenge for suction cup mounts. When a vehicle is parked under direct sunlight in open-air parking lots, cabin temperatures can easily exceed 50°C to 60°C. This extreme heat causes the windshield glass to expand slightly and heats up the tiny amount of air trapped within the suction cup’s vacuum chamber. As this air expands, it reduces the pressure differential between the inside and outside of the cup, significantly weakening the vacuum seal.
Products mentioned in this guide
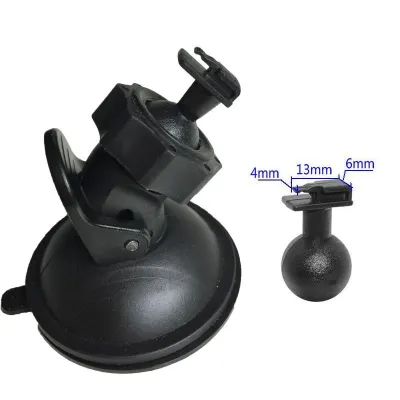

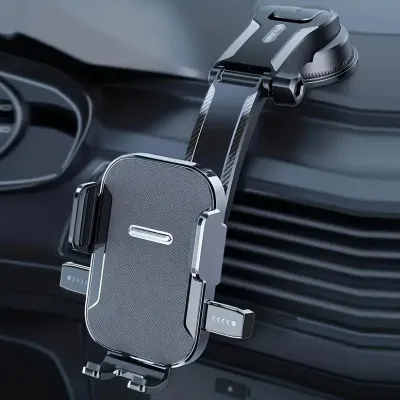
![[COD] 360° Rotating Car Holder Self-adhesive Phone Bracket Strong Dashboard Mount Stable Stand for Hands Free Driving Convenience](https://img.lazcdn.com/g/p/fd32d9e093b172930a52175911936558.jpg_400x400q80.jpg_.webp)
Prices are valid at publication and may change. Please refer to the product page for the latest price.
Bumpy roads and rough terrain exacerbate this thermal weakness by introducing constant micro-vibrations and sudden vertical shocks. When your vehicle hits a deep pothole or travels along a washboard gravel road, the physical force of the impact pulls at the weakened suction cup. Without a perfect seal, these vibrations allow external air to seep into the vacuum chamber, causing the mount to suddenly detach and drop your dashcam onto the dashboard or floor.
To combat this, manufacturers developed mechanical locking-lever and push-and-twist designs. Instead of relying solely on manual pressure to flatten the cup, a mechanical lever physically pulls the center of the flexible diaphragm upward after it is pressed against the glass. This action creates a much deeper vacuum and a significantly stronger mechanical grip. While these locking-lever suction cups are far more resilient on bumpy routes, they will still fail on textured or soft-touch dashboard materials, as the microscopic valleys in the texture prevent the airtight seal required to maintain a vacuum.
Vent Clip Mounts: Secure Grip vs. Airflow and View Obstruction
Vent clip mounts offer a completely different approach to tool-free installation by utilizing mechanical clamping mechanisms. Instead of relying on atmospheric pressure or adhesives, these mounts use spring-loaded jaws, gravity-assisted hooks, or screw-tightened collars to clamp directly onto the plastic slats of your vehicle’s air conditioning vents. Because they do not depend on a vacuum seal, their holding power is largely unaffected by the extreme cabin temperatures and high humidity levels typical of the Philippine climate.

Despite this thermal stability, mounting a heavy dashcam to an AC vent louver presents serious physical and structural risks, especially when driving on uneven roads. Car air conditioning vents are constructed from lightweight, thin plastic designed solely to direct airflow, not to bear weight. When a vehicle traverses speed bumps, rutted roads, or unpaved barangay paths, the constant vertical bouncing multiplies the effective weight of the dashcam. This continuous mechanical stress can easily crack or snap the fragile plastic louvers, leading to costly dashboard repairs.
Ergonomics and safety are also major concerns when using vent clip mounts for dashcams. Dashcams are designed to record a wide-angle view of the road from a high, unobstructed vantage point near the rearview mirror. Mounting a dashcam on an AC vent lowers the camera’s perspective significantly. This low mounting position means your vehicle’s hood will block a substantial portion of the frame, and the camera may fail to capture critical high-angle details, such as overhead traffic lights or distant road signs. Additionally, a low-mounted camera can obstruct the driver’s view of the center console screen or physical controls.
Furthermore, blocking essential cabin airflow is a significant drawback in a tropical environment. In the Philippines, maintaining efficient air conditioning performance is vital for passenger comfort and safety. A vent-mounted dashcam blocks a portion of the cold air stream, forcing the vehicle’s AC system to work harder to cool the cabin. Finally, tool-free installation of these mounts is strictly dependent on vent design; while standard horizontal or vertical rectangular vents work well with standard clips, circular, angled, or deeply recessed vents are often physically incompatible.
Adhesive Pad Mounts: Maximum Stability vs. Permanent Placement
For drivers who prioritize maximum stability and minimal camera shake on rough roads, high-strength adhesive pad mounts are the industry standard. These mounts utilize industrial-grade, double-sided acrylic foam tapes (such as 3M VHB) to create a semi-permanent physical bond between the mount base and the vehicle’s interior. Because the acrylic foam behaves as a viscoelastic solid, it possesses both viscous and elastic properties, allowing it to absorb and dissipate high-frequency road vibrations rather than transferring them directly to the camera sensor.
The primary benefit of this design is unparalleled vibration damping. When driving over severely rutted roads, concrete expansion joints, or gravel paths, the adhesive pad acts as a shock absorber. This minimizes high-frequency camera jitter, resulting in smoother, clearer video footage that makes it much easier to read license plates and identify critical details during an incident. Additionally, modern acrylic adhesives are highly resistant to extreme heat and humidity, ensuring the mount remains firmly attached even when the vehicle is parked in direct sunlight for extended periods.
The major trade-off of adhesive pad mounts is their semi-permanent nature. Once the adhesive has fully cured, removing the mount requires significant effort and care. The process typically involves applying gentle heat with a hair dryer to soften the acrylic polymer, then using dental floss or high-strength fishing line to saw through the foam core. If applied directly to soft-touch, textured, or leather-wrapped dashboards, the removal process can easily tear, discolor, or peel the top layer of the dashboard material, causing irreversible cosmetic damage.
Because of these risks, it is essential to check your vehicle’s dashboard material and consult the dashcam manufacturer’s guidelines before applying any adhesive mount. To protect the vehicle’s interior, many drivers choose to apply the adhesive pad to the windshield glass rather than the dashboard. Using a transparent electrostatic sticker as an intermediate barrier between the glass and the adhesive pad is an excellent way to enjoy the stability of an adhesive mount while ensuring clean, tool-free removal in the future.
Feature Comparison: Stability, Heat Tolerance, and Dashboard Safety
To help you quickly evaluate the physical characteristics and trade-offs of each tool-free mounting mechanism, the table below summarizes their performance across key operational dimensions. These ratings are based on the general physical and mechanical properties of each mount type under typical tropical climate conditions and rough road scenarios.
| Mount Type | Vibration Resistance (Bumpy Roads) | Heat Tolerance (Tropical Climate) | Repositionability | Dashboard Safety Risk |
|---|---|---|---|---|
| Adhesive Pad | High | High | Low | High (on soft-touch/leather) |
| Suction Cup | Medium | Low to Medium | High | Low |
| Vent Clip | Low to Medium | High | High | Medium (risk of vent damage) |
This comparison highlights that while adhesive pads offer the highest vibration resistance and heat tolerance, they sacrifice repositionability and carry a higher risk of damaging delicate dashboard materials during removal. Suction cups provide excellent repositionability and zero risk of dashboard damage, but their vacuum seals are highly vulnerable to extreme heat and severe road vibrations. Vent clips offer great heat tolerance and easy transferability, but their low vibration resistance and the risk of breaking fragile plastic vent louvers make them less suitable for heavy dashcams on bumpy roads.
Decision Framework: Choose Based on Your Dashboard and Climate
To select the most stable and reliable tool-free car mount for your specific vehicle and driving environment, use the following condition-based decision framework:
- Choose Adhesive Pad if: You prioritize capturing smooth, shake-free video footage on severely rough or unpaved roads, have a flat and hard dashboard or windshield surface, and do not plan to move the dashcam between different vehicles. This option is ideal for long-term installations where maximum reliability under intense solar heat is required.
- Choose Suction Cup if: You need the flexibility to reposition the mount, frequently move the dashcam between multiple vehicles, or want to mount the camera directly to a smooth windshield. This option works best if your vehicle is typically parked in shaded areas, under a carport, or in indoor garages to mitigate extreme heat buildup that can degrade the vacuum seal.
- Choose Vent Clip if: You own an exceptionally lightweight, compact dashcam, your vehicle features thick, sturdy horizontal AC vent louvers, and you are fully committed to keeping your windshield and dashboard completely clear of any visual obstructions.
- Verify first if: Your dashboard features a soft-touch, heavily textured, curved, or leather-wrapped surface. These physical characteristics will immediately prevent standard suction cups and adhesive pads from forming a secure bond. In such cases, you must either mount the device directly to the smooth windshield glass or utilize a specialized, flat mounting disk designed to bridge the gap between the textured dashboard and the mount.
Installation Tips to Prevent Mount Failure on Bumpy Routes
Proper surface preparation and installation technique are critical to ensuring your tool-free mount remains secure and functional, particularly when subjected to the constant vibrations of Philippine roads. Follow these specific preparation and maintenance steps for each mount type to maximize longevity and safety.
For suction cup mounts, start by thoroughly cleaning both the suction cup silicone pad and the mounting surface (windshield glass or smooth dashboard disk) using isopropyl alcohol and a clean microfiber cloth. Ensure the surface is completely dry and free of any dust, grease, or glass cleaner residue. Avoid mounting the suction cup directly over defroster vents or in areas where windshield curvature is extreme, as these factors introduce air gaps. When applying, press the cup firmly against the surface to expel all air before engaging the mechanical locking lever.
For adhesive pad mounts, surface preparation is even more critical because the adhesive polymer requires clean contact at a molecular level to form a strong bond. Clean the target area thoroughly with isopropyl alcohol and let it dry completely. Remove the protective backing, position the mount carefully, and apply firm, even pressure across the entire base for at least 30 to 60 seconds. Crucially, do not attach the heavy dashcam or subject the mount to any load for at least 24 hours; this waiting period allows the adhesive to flow into the microscopic pores of the surface and fully cure.
For vent clip mounts, carefully slide the clip’s jaws as deep as possible onto the sturdiest horizontal vent louver. If your vent clip features an adjustable support leg or stabilizer bracket, position it so that the weight of the dashcam is distributed against the surrounding hard plastic dashboard trim rather than resting solely on the fragile vent slat. Ensure the clip is tightened securely (if it uses a screw collar) but avoid over-tightening, which can crush the plastic.
Regardless of the mount type you choose, establish a regular maintenance routine. Periodically check the physical integrity and grip of your mount, especially after driving on heavily rutted provincial roads or during the peak of the dry season when cabin temperatures are highest. Gently tug on the mount to verify its stability before starting your journey. This simple check ensures your dashcam remains securely attached and prevents it from detaching unexpectedly, protecting your equipment and ensuring it is always ready to record your drive.
Community discussion
Share your experience or ask a question. Comments are reviewed before publication.