
Finding the right mags sticker for smash 115 is the most effective way to personalize your underbone motorcycle while adding an extra layer of protection to your wheel rims. The Suzuki Smash 115 remains one of the most popular and dependable commuter bikes in the Philippines, prized for its fuel efficiency and robust build. However, because its wheels are constantly exposed to harsh tropical elements—such as intense UV rays, heavy monsoon rains, muddy roads, and high road temperatures—choosing the correct material, fitment, and style is essential. The ideal decal not only enhances your bike’s sporty aesthetic but also withstands the demanding daily riding conditions of Philippine roads.
To make an informed purchase, you must evaluate sticker options based on their material composition, adhesive strength, and visibility benefits. Selecting a low-quality product can result in rapid fading, peeling, and a messy residue that is incredibly difficult to clean off your alloy wheels. By focusing on durable, weather-resistant vinyl and precise 17-inch sizing, you can ensure your Suzuki Smash 115 looks sharp and stays safe on every journey.
Key Fitment and Material Checks for Smash 115 Mags
Before purchasing any decals, you must verify the exact physical specifications of your motorcycle’s wheels. The Suzuki Smash 115 typically features 17-inch cast alloy wheels (mags) as standard equipment, but aftermarket wheel modifications are common. You must measure the flat surface area of your rim’s lip to ensure the sticker width matches. A sticker that is too wide will overhang the edge, leading to immediate peeling when it contacts dirt or water, while a sticker that is too narrow will fail to deliver the desired visual impact. Additionally, examine the spoke profile of your mags; some complex spoke designs restrict the space available for inner-rim decals, requiring you to opt for thin outer-rim striping instead.
Products mentioned in this guide

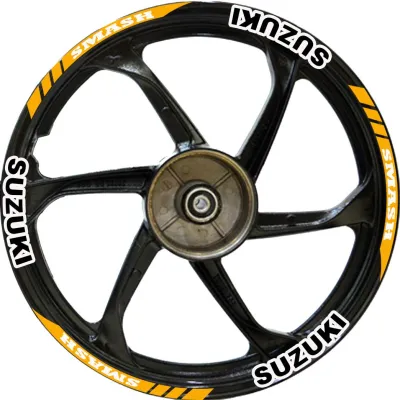
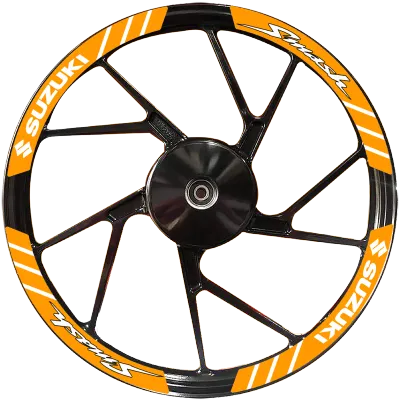
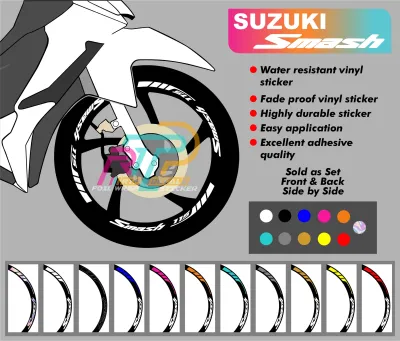
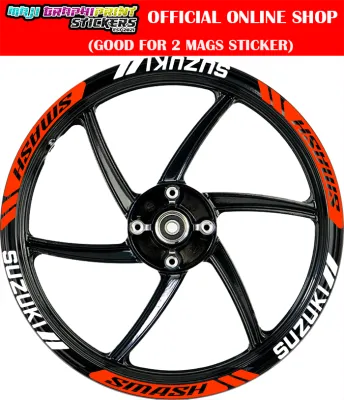
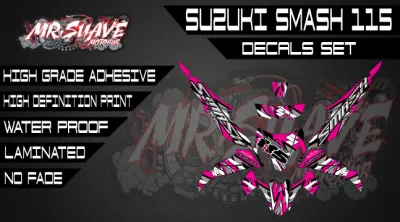
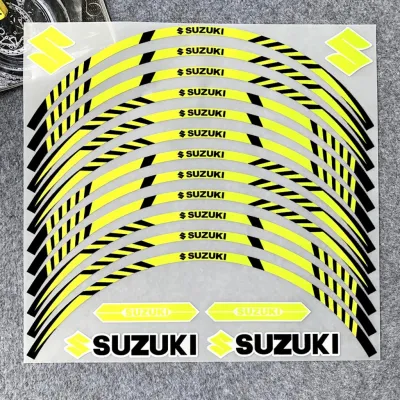
Prices are valid at publication and may change. Please refer to the product page for the latest price.
Weather Resistance in Tropical Climates
The Philippine climate presents unique challenges for any adhesive accessory. Your motorcycle wheels are subjected to extreme heat during dry summer months, followed by sudden downpours and flooded streets during the typhoon season. Standard indoor-grade vinyl will quickly crack and discolor under these conditions. When browsing product listings, look for decals explicitly labeled as waterproof, UV-resistant, and mud-resistant. High-grade polymeric or cast vinyl materials are highly recommended because they possess superior dimensional stability, meaning they will not shrink or warp when exposed to temperature fluctuations.
Adhesive Quality and High-Pressure Washes
Another critical factor is the quality of the adhesive backing. Motorcycle wheels accumulate a significant amount of brake dust, chain lube, and road grime, requiring regular cleaning. Your mags stickers must feature a high-performance, automotive-grade acrylic adhesive. This type of adhesive cures over a 24-to-48-hour period to form a semi-permanent bond that can withstand high-pressure water sprays at local car wash stations. It is equally important that the adhesive is designed to be removable; cheap adhesives can chemically bond with the wheel’s clear coat, causing permanent paint damage or leaving a hardened residue when you eventually decide to replace the decals.
Top Mags Sticker Styles to Match Your Riding Needs
Selecting the right style of mags sticker involves balancing your personal aesthetic preferences with practical riding requirements. Whether you prioritize night safety, a bold racing look, or a subtle accent, there is a specific decal category designed to meet your goals.

Reflective Decals for Night Visibility
For daily commuters who frequently ride after dark, safety is a paramount concern. Reflective mags stickers utilize retro-reflective technology, embedding microscopic glass beads or microprisms into the vinyl layer. When the headlights of passing vehicles strike the wheels, the stickers reflect the light directly back to the source, significantly increasing your lateral visibility at dark intersections and poorly lit provincial roads.
When choosing reflective decals, verify the reflectivity rating and opt for highly visible colors such as neon yellow, bright white, or vivid red. For maximum safety impact, place these decals evenly along the outer rim edge of both the front and rear wheels, creating a continuous spinning circle of light when the motorcycle is in motion.
Sporty Graphics for a Custom Look
If your primary goal is to emphasize the aggressive, sporty nature of the Suzuki Smash 115, custom graphic decals are the ideal choice. These kits often feature bold color gradients, sharp geometric patterns, and racing-inspired brand logos that coordinate with your bike’s stock body decals. Popular color schemes in the Philippines include matching Suzuki’s signature blue, or opting for high-contrast neon accents that stand out against black alloy mags.
Because these graphics rely on complex printed designs rather than solid-colored vinyl, you must ensure the manufacturer uses UV-stabilized inks. Unprotected inks will fade rapidly under intense Philippine sunlight, turning a vibrant red or blue into a dull, washed-out pastel within a few months. Look for graphics that feature a clear protective laminate layer over the print to shield the design from both sun damage and physical abrasions.
Rim Striping Tapes for a Clean Finish
For riders who prefer a clean, factory-installed look, continuous rim striping tapes offer a timeless and minimalist aesthetic. These thin, solid-color stripes run along the outermost edge of the wheel barrel, defining the wheel’s circumference and making the 17-inch mags appear larger and more dynamic.
Continuous rim tapes are available in two formats: pre-curved segmented strips and continuous rolls. Pre-curved strips are designed to match the specific arc of a 17-inch wheel, making them much easier to align without wrinkling. Continuous rolls, on the other hand, require a steady hand or a specialized plastic applicator tool to guide the tape smoothly around the rim. While continuous tape requires more patience to install, it provides a seamless, unbroken line of color that beautifully complements a clean, understated motorcycle build.
Quick Comparison of Mags Sticker Types
To help you decide which style best suits your daily riding habits and budget, the table below compares the three primary categories of mags stickers based on material properties, installation complexity, and practical performance.
| Sticker Type | Material Base | Weather/UV Resistance | Installation Difficulty | Best Use Case |
|---|---|---|---|---|
| Reflective Decals | Retro-reflective vinyl (glass bead/prism) | High (Excellent night durability) | Moderate (Requires precise alignment) | Night commuters and safety-focused riders |
| Sporty Graphics | Laminated printed vinyl | Moderate to High (Requires UV laminate) | High (Multiple segments to align) | Custom show bikes and racing enthusiasts |
| Rim Striping Tapes | Solid-color polymeric vinyl | High (Highly resistant to lifting) | Low to Moderate (Pre-curved strips are easiest) | Minimalist builds and riders seeking a factory look |
Step-by-Step Installation and Safety Boundaries
Achieving a professional-looking, long-lasting installation depends entirely on careful preparation and correct application techniques. Even the highest-quality automotive vinyl will peel prematurely if applied to a dirty or poorly prepared surface.
Surface Preparation
Before beginning, position your Suzuki Smash 115 on its center stand in a clean, dust-free environment out of direct sunlight. Do not attempt installation on hot wheels, as heat will stretch the vinyl and cause premature adhesive curing.
- Wash the wheels thoroughly with clean water and a wax-free dish soap to remove heavy mud, road salt, and loose dirt.
- Dry the wheels completely using a clean microfiber towel.
- Perform a final deep clean using a lint-free cloth dampened with isopropyl alcohol or a dedicated automotive degreaser. This step is vital to strip away stubborn chain lube, brake dust, and any silicone-based tire shine products.
- Warning: Always check the label of your cleaning agent to ensure it is safe for painted or clear-coated alloy wheels. Never use harsh solvents like acetone or paint thinner, which can dissolve the wheel's original finish.
Application Technique
Once the surface is completely dry and free of oily residues, you can begin applying the stickers.
- Carefully peel a small portion of the backing paper from the first sticker segment, taking care not to touch the adhesive side with your bare fingers.
- Align the curve of the sticker with the outer edge of the wheel rim.
- Press down lightly at one end, then slowly work your way across the segment, using a soft felt-tipped squeegee or a clean microfiber cloth wrapped around your thumb to press out any air bubbles.
- Work from the center of the sticker outward to the edges to ensure a flat, bubble-free bond.
- If a bubble becomes trapped, do not puncture it; instead, gently peel the segment back slightly, smooth it down again, or use a hair dryer on its lowest heat setting to warm the vinyl and gently press the air out.
Critical Safety Boundaries
During installation, you must respect strict safety boundaries to prevent mechanical failures or hazardous riding conditions.
- Braking Components: Never apply any stickers, adhesive tape, or cleaning chemicals onto the brake discs, brake rotors, brake calipers, or brake pads. If your Suzuki Smash 115 is equipped with front disc brakes and a rear drum brake, ensure all decals are kept strictly on the outer lip of the alloy wheel, completely clear of the braking surfaces.
- Tire Bead: Do not allow the sticker to overlap or tuck under the tire bead (where the rubber tire meets the metal rim). Overlapping the bead can compromise the airtight seal of tubeless tires, leading to gradual air pressure loss or sudden tire deflation while riding.
- Post-Installation Curing: Allow the adhesive to cure fully for at least 24 to 48 hours before riding in wet weather or washing your motorcycle. Avoid using high-pressure water jets directly on the edges of the stickers, as this can force water under the adhesive layer and cause it to lift.
- Disclaimer: If you are uncomfortable performing this installation yourself or cannot achieve proper alignment, consult a qualified motorcycle accessory technician to complete the job safely.
Where to Buy in the Philippines and Pre-Purchase Checks
Mags stickers for the Suzuki Smash 115 are widely available across the Philippines, both in physical retail locations and through digital shopping platforms.
Purchasing Channels
To find the widest selection of designs, search major online marketplaces and e-commerce platforms active in the Philippines. These platforms host numerous local decal printing shops that specialize in motorcycle accessories. If you prefer a hands-on shopping experience, visit local motorcycle accessory shops, particularly in high-density motorcycle retail areas such as 10th Avenue in Caloocan City, or your municipal town center. Physical shops often provide the added benefit of on-site installation services for a small fee.
Effective Search Terms
When searching online, using highly specific search terms will help you filter out generic, incompatible products. Use search phrases such as:
- "Smash 115 mags sticker 17 inch"
- "Suzuki Smash rim decals reflective"
- "motorcycle rim tape 17 inch waterproof"
Using these targeted keywords ensures that the search results display products tailored to your bike’s wheel size and the local climate.
Pre-Purchase Checklist
Before clicking the checkout button, protect your investment by completing these essential verification checks:
- Seller Ratings: Prioritize shops with high positive feedback scores (ideally 95% or higher) and a history of selling motorcycle-specific graphics.
- Buyer Reviews: Read recent customer reviews, paying close attention to comments from other Suzuki Smash owners. Look for feedback regarding color accuracy, adhesive longevity under heavy rain, and ease of installation.
- Set Completeness: Confirm the total number of decals included in the package. A complete set should contain enough segments to cover both sides of both the front and rear wheels, plus a few spare strips in case of installation mistakes.
- Dimension Specifications: Verify that the product description explicitly states the decals are designed for 17-inch rims and lists the exact width of the stripes.
Frequently Asked Questions (FAQ)
Will mags stickers affect my wheel balancing?
No, standard vinyl mags stickers will not affect your motorcycle’s wheel balancing, steering, or overall suspension performance. High-quality vinyl decals are incredibly thin and lightweight, typically weighing only a few grams per set. Because this negligible weight is distributed evenly around the outer circumference of the 17-inch wheel, it does not create any heavy spots or rotational imbalances. You can ride confidently at highway speeds without experiencing any steering vibration or handling issues due to the stickers.
How do I remove old mags stickers without damaging the paint?
To remove old, faded, or peeling mags stickers safely without scratching the paint of your Suzuki Smash 115, follow a gentle, heat-based removal process.
First, use a hair dryer or a heat gun on its lowest setting to warm the surface of the sticker. This softens the hardened adhesive backing, making the vinyl pliable. Gently lift the edge of a segment using your fingernail or a soft plastic scraper. Slowly peel the sticker back at a sharp 45-degree angle, applying continuous, gentle heat as you pull.
Once the vinyl is removed, a sticky residue may remain on the rim. Dampen a clean microfiber cloth with isopropyl alcohol or a mild, paint-safe automotive adhesive remover, and gently wipe the residue away. Warning: Never use sharp metal razor blades, steel wool, paint thinners, or acetone, as these abrasive tools and harsh chemicals will instantly gouge or dissolve the clear coat and paint on your alloy wheels.
Community discussion
Share your experience or ask a question. Comments are reviewed before publication.