
To find the correct cabin filter for your Toyota Avanza, you must identify your vehicle’s specific generation and model year, measure the physical dimensions of the existing filter, and choose between a standard particulate filter and an activated carbon filter based on your daily driving conditions. Because this multi-purpose vehicle has gone through several design updates since its introduction, relying solely on the vehicle name can lead to purchasing a part that does not fit the housing. A properly fitted filter ensures that the air conditioning system operates at high efficiency while protecting the cabin from dust, pollen, and outdoor pollutants.
Maintaining a clean cabin filter is especially important in tropical climates where the air conditioning system runs continuously to combat high heat and humidity. A clogged or ill-fitting filter restricts airflow, forcing the blower motor to work harder and potentially leading to premature wear of the HVAC components. By taking the time to verify compatibility and select the appropriate filter media, you can maintain a comfortable cabin environment and safeguard your vehicle’s cooling system.
Understanding Cabin Filter Compatibility for the Toyota Avanza
The Toyota Avanza has been produced across multiple generations, each featuring distinct structural designs and interior layouts. Consequently, the dimensions and housing shapes of the cabin filter have changed over the years. A filter designed for an older model year will not fit a newer generation, as the housing slot behind the glove box has been resized to accommodate different blower motor configurations. Assuming a single filter size fits all model years is a common mistake that often results in purchasing an unusable part.
Products mentioned in this guide
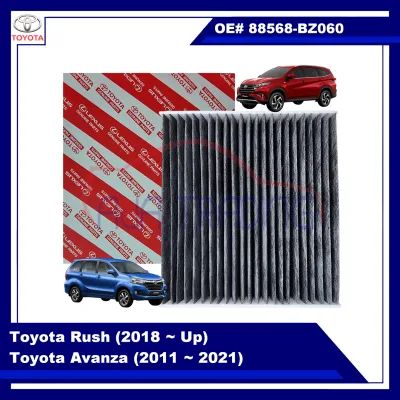
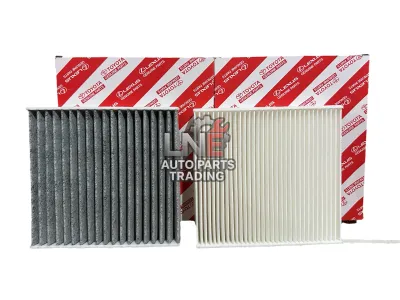
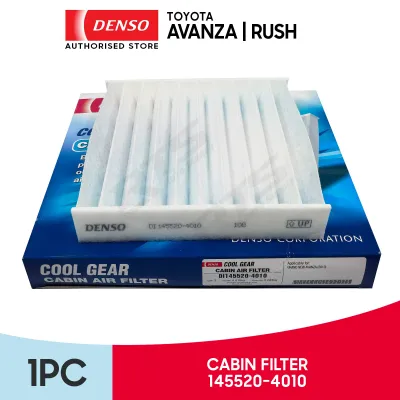
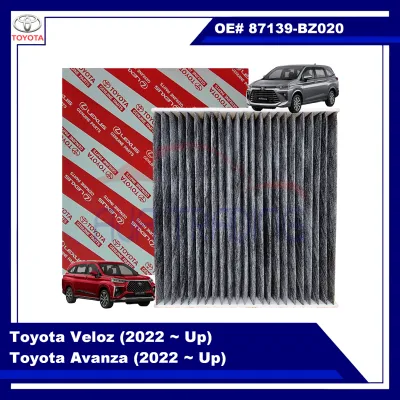
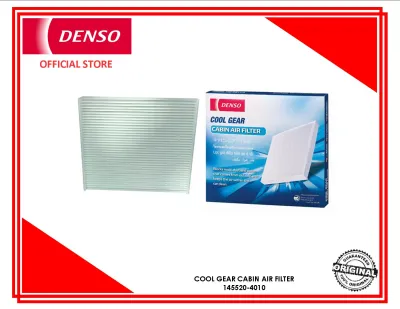
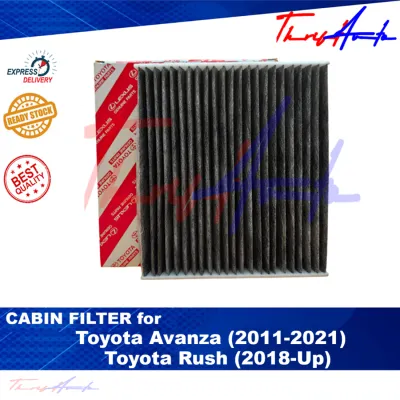
Prices are valid at publication and may change. Please refer to the product page for the latest price.
To verify the exact size and fitment required for your vehicle, the most reliable starting point is the owner’s manual, which lists the original equipment manufacturer (OEM) part number. If the manual is not accessible, you can retrieve the part number directly from the frame of the currently installed filter. When aftermarket brands do not list your specific model year on their compatibility charts, matching the OEM part number is the safest way to ensure a precise fit.
Physical measurements provide an essential backup verification method when part numbers are missing or illegible. Using a precise measuring tool, record the length, width, and thickness of the existing filter in millimeters. Even a minor discrepancy of three to five millimeters can prevent the filter from sliding into the housing or cause it to buckle inside the slot. A buckled filter leaves open gaps that allow unfiltered air, dust, and debris to bypass the filtration media entirely.
Additionally, you must pay close attention to the frame design and the airflow direction markers on the filter. Some Avanza generations utilize a filter with a rigid plastic frame that clips directly into the HVAC unit, while others require a flexible, frameless media insert that sits inside a removable plastic tray. Before purchasing a replacement, inspect the physical structure of your current filter to ensure the new unit matches the mounting style and features the correct airflow orientation indicators.
Standard vs. Activated Carbon: Which Filter Type Do You Need?
When selecting a replacement cabin filter, you will generally choose between standard particulate filters and activated carbon filters. Standard particulate filters are typically constructed from non-woven synthetic fibers or paper media. Their primary function is to act as a physical barrier that traps airborne particles such as road dust, pollen, soot, and microscopic debris. These filters are highly efficient at maintaining strong airflow because they offer relatively low resistance, allowing the air conditioning system to cool the cabin rapidly.

Activated carbon filters feature an additional layer of treated charcoal embedded within the filtration media. This carbon layer utilizes an adsorption process to attract and trap gaseous pollutants, exhaust fumes, and unpleasant odors. While a standard filter only stops solid particles, an activated carbon filter can neutralize volatile organic compounds and prevent the smell of heavy traffic from entering the vehicle interior.
The choice between these two materials depends heavily on your primary driving environment and personal comfort preferences. If your daily commute involves navigating congested metropolitan highways surrounded by diesel-powered trucks and public utility vehicles, an activated carbon filter is highly beneficial for reducing exhaust odors. Conversely, if you primarily drive in suburban or rural areas with lower traffic density but higher levels of agricultural dust, a standard particulate filter provides excellent dust protection and maximum airflow at a lower cost.
It is important to note that the denser structure of activated carbon filters can introduce slightly more airflow resistance compared to standard paper filters. In highly humid tropical environments, the carbon layer can also absorb moisture from the air over time, which may reduce its odor-absorbing efficiency and require more frequent inspections. Understanding these trade-offs allows you to select the material that best balances your need for odor control against your preference for maximum air conditioning airflow.
Key Specifications and Features to Evaluate
Evaluating the structural quality of a cabin filter before purchase is essential for ensuring long-term performance and protecting your vehicle’s blower motor. Begin by inspecting the pleat density of the filter media. A high-quality filter features closely spaced, uniform pleats, which maximize the surface area available for trapping dust. Filters with low pleat density or uneven spacing clog much faster and can restrict airflow prematurely, forcing the air conditioning system to work harder.
Structural support is another critical factor, particularly for filters subjected to high blower motor speeds. Look for filters that incorporate rigid side frames or hot-melt glue strips running across the pleats. These reinforcements prevent the filter media from bowing, twisting, or collapsing under the pressure of the incoming air. A collapsed filter not only allows unfiltered air to bypass the system but can also get drawn into the blower fan, causing mechanical damage.
The integrity of the sealing gaskets or edge frames determines how effectively the filter prevents bypass. High-quality replacement filters often feature foam or rubber seals along the perimeter to create an airtight fit within the housing. If a filter lacks proper sealing materials or has a loose-fitting frame, air will naturally take the path of least resistance around the sides of the filter, rendering the filtration media ineffective.
Always look for clear OEM cross-reference numbers and specification labels on the product packaging. Reputable manufacturers provide detailed compatibility lists and clear instructions regarding airflow direction. Avoid unbranded, generic products that lack these specifications, as they often use low-grade paper that degrades quickly in humid conditions, potentially tearing and releasing fibers into the air conditioning ductwork.
Step-by-Step Guide to Verifying Fitment Before Purchase
To avoid the inconvenience of purchasing an incompatible cabin filter, follow this systematic verification process before making a purchase.
Step 1: Locate the cabin filter compartment, which is typically positioned behind the glove box assembly. Empty the glove box, gently squeeze the sides inward to disengage the stop tabs, and lower the glove box door completely. Locate the rectangular plastic cover of the filter housing, release the securing clips on either side, and carefully slide the cover off.
Step 2: Carefully slide the old cabin filter out of the housing, taking care not to spill any accumulated leaves or dust into the blower motor fan below. Inspect the frame of the filter for a printed part number, and use a ruler to measure its length, width, and thickness in millimeters. Record these measurements and take a photograph of the filter’s orientation for reference.
Step 3: Compare the physical dimensions of the replacement filter you plan to purchase with your recorded measurements. Additionally, locate the airflow indicator arrows printed on both the old filter and the potential replacement. Ensure that the replacement filter’s airflow direction matches the downward flow of the Avanza’s HVAC system.
Step 4: Verify that the replacement filter’s frame design, including any alignment tabs, notches, or integrated cover plates, matches the configuration of your vehicle’s housing. If your Avanza uses a separate plastic tray to hold the filter, ensure the replacement media fits snugly inside the tray without bending or leaving gaps along the edges.
When to Replace Your Avanza Cabin Filter
Recognizing the signs of a failing cabin filter allows you to maintain a healthy interior environment and protect your vehicle’s air conditioning system. The most common indicator of a clogged filter is a noticeable reduction in airflow from the dashboard vents, even when the blower fan is set to its highest speed. If the cabin takes significantly longer to cool down than usual, the filter is likely restricted by accumulated dust and debris.
Unpleasant, musty, or sour odors immediately after turning on the air conditioning are another clear sign that the filter needs replacement. In humid tropical climates, moisture can combine with trapped organic matter on the filter media, creating a breeding ground for mold and bacteria. Other indicators include visible dust blowing out of the vents when the fan starts, or windows that fog up rapidly during heavy rain due to restricted air circulation.
While vehicle manufacturers provide general guidelines for replacement intervals in the owner’s manual, these recommendations assume average driving conditions. If you frequently drive in highly polluted urban areas, on unpaved dusty roads, or in regions with high humidity, you should inspect the cabin filter every six months. Replacing the filter promptly when it appears dark, discolored, or damp ensures optimal air quality and prevents unnecessary strain on the air conditioning system.
Frequently Asked Questions (FAQ)
Can I wash and reuse my Toyota Avanza cabin filter?
No, standard paper and activated carbon cabin filters are designed as single-use consumables and should not be washed or rinsed. Water degrades the structural integrity of the paper or synthetic fibers, causing the filtration media to lose its ability to trap microscopic particles. Furthermore, washing destroys any electrostatic charge built into the fibers and saturates the activated carbon layer, rendering it completely ineffective. Attempting to clean a heavily soiled filter with compressed air can also tear the media, so it is always recommended to dispose of the old filter and install a new replacement.
Will using an aftermarket cabin filter void my vehicle's warranty?
Using a high-quality aftermarket cabin filter that meets or exceeds original equipment specifications will not void your vehicle’s manufacturer warranty. Routine maintenance parts, such as cabin filters, air filters, and wiper blades, are designed to be replaced regularly, and owners are free to choose compatible aftermarket alternatives. To safeguard your warranty coverage, ensure you purchase filters from reputable manufacturers that explicitly list compatibility with your Avanza model, and keep all purchase receipts as proof of regular maintenance.
Why is the airflow weak even after installing a new cabin filter?
If the airflow remains weak after installing a new cabin filter, the most common cause is an incorrect installation where the filter was inserted upside down, restricting the designed airflow path. Double-check that the airflow arrows on the filter frame point in the correct direction of the system’s air travel. If the filter is installed correctly, the frame may have been crushed or bent during insertion, blocking the duct. If the filter fitment is correct, the weak airflow may indicate an issue with other HVAC components, such as a failing blower motor, a faulty resistor, or a heavily soiled evaporator core that requires professional inspection and cleaning.

Community discussion
Share your experience or ask a question. Comments are reviewed before publication.