
Selecting the correct cabin filter size and part number for your Toyota Innova is essential for maintaining clean air inside the vehicle and ensuring your air conditioning system operates efficiently. Because the Innova has undergone significant design changes over its long production run, the correct filter specifications depend entirely on your vehicle’s specific generation and model year. First-generation models (2004–2015) typically require original equipment manufacturer (OEM) part number 87139-06050, which measures approximately 215 mm in length, 194 mm in width, and 29 mm in height. In contrast, second-generation models (2016–present) generally use OEM part number 87139-F4010 or 87139-58010, featuring a narrower profile of roughly 213 mm by 185 mm by 29 mm.
Failing to match the exact dimensions of your cabin filter can lead to a poor seal within the housing, allowing unfiltered air, dust, pollen, and road soot to bypass the filter and enter the passenger cabin. In the tropical and often highly humid climate of the Philippines, a properly fitting filter is also your primary defense against mold spores and airborne allergens that thrive in damp automotive HVAC systems. Taking the time to verify your vehicle’s specific requirements before purchasing a replacement will save you from the frustration of a loose fit, bent filter frames, or restricted airflow.
Identifying Your Toyota Innova Generation and Model Year
Before purchasing a replacement cabin filter, you must accurately identify the generation and production year of your Toyota Innova. Relying solely on the “Innova” nameplate is a common mistake that often results in buying the wrong part, as the cabin filter housing was completely redesigned between the first and second generations. To find your vehicle’s exact model year and production details, check the Certificate of Registration (CR) issued by the Land Transportation Office (LTO), or locate the vehicle identification number (VIN) plate, which is typically found on the driver’s side dashboard or stamped on the passenger-side inner door jamb.
Products mentioned in this guide
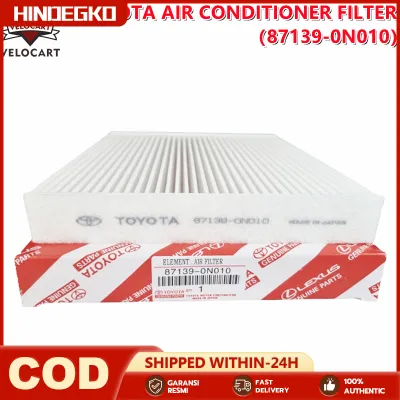
![[Fast Delivery] Toyota Aircon Cabin Filter (87139-0N010) Vios Innova Fortuner Altis Camry Yaris Rav-4 Hi-lux](https://img.lazcdn.com/g/p/97d737ee673769d5043b2151ae5ec256.jpg_400x400q80.jpg_.webp)
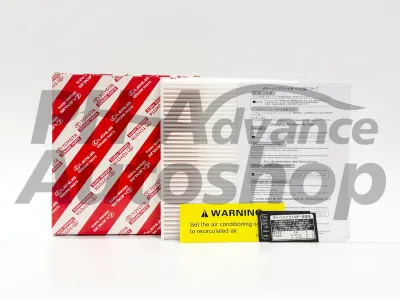
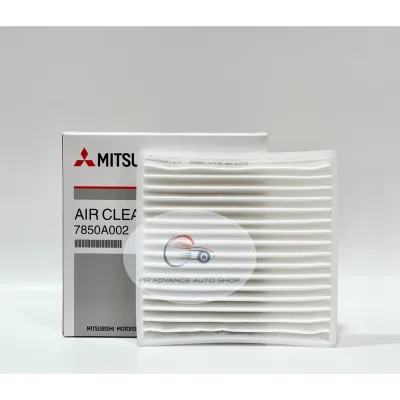
![Toyota Cabin Filter for Innova | Fortuner | Hilux | HiAce | Alphard Year 2016-Up [87139-28020]](https://img.lazcdn.com/g/p/a525da551b72f817cf40bff56c3510b9.png_400x400q80.png_.webp)
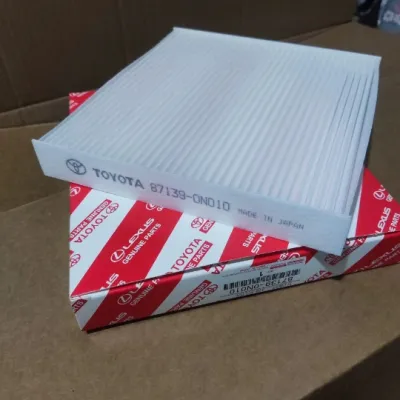
Prices are valid at publication and may change. Please refer to the product page for the latest price.
The first-generation Toyota Innova spans from its initial release in late 2004 up to 2015. Visually, these older models feature a more rounded, classic MPV body shape and underwent minor cosmetic facelifts in 2008, 2011, and 2013, though the core cabin filter housing dimensions remained consistent throughout this period. If your Innova has the traditional curved headlights and a smaller front grille, it belongs to this first-generation category.
The second-generation Toyota Innova, launched in 2016 and continuing through the present day, is widely known as the “Innova Reborn” or the current facelifted model. This generation features a much bolder, more aggressive exterior design with a large hexagonal front grille, angular LED headlights on higher trims, and a completely redesigned dashboard layout. The interior climate control system in these newer models utilizes a more compact filter slot, which requires a narrower filter than the previous generation.
Because of these structural differences, a first-generation cabin filter is too wide to fit into a second-generation housing, and attempting to force it will crush the filter pleats and destroy its filtration capability. Conversely, installing a second-generation filter into a first-generation housing will leave large gaps on the sides, rendering the filtration system useless. Always confirm your vehicle’s generation using official documentation or visual cues before making a purchase.
Correct Cabin Filter Sizes and Part Numbers by Generation
To ensure a perfect seal and optimal airflow, you must match the exact OEM part numbers and physical dimensions specified for your Innova’s generation. While the aftermarket offers a wide variety of compatible options, these products are built to match the original specifications established by Toyota. Always cross-check these dimensions with your current filter or your owner’s manual before purchasing, as minor mid-cycle production changes or regional trim variations can occasionally occur.

First Generation (2004–2015)
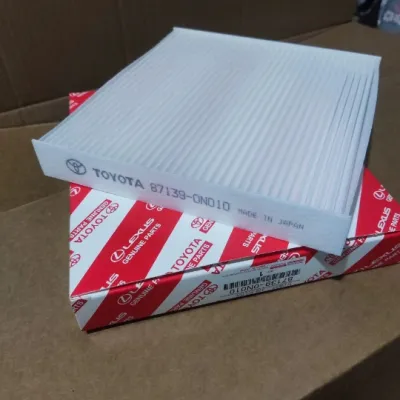
For the first-generation Toyota Innova, the primary OEM part number is 87139-06050. Depending on the specific production year and sourcing, this part is also interchangeable with OEM numbers 87139-30040, 87139-52020, and 87139-ON010.
The physical dimensions for the first-generation cabin filter are:
- Length: 215 mm
- Width: 194 mm
- Height (Thickness): 29 mm
The filter housing for this generation features a rigid plastic tray or slot located behind the glove compartment. The filter element must sit completely flat within this tray without any bowing or bending. Because the first-generation filter is relatively wide, ensure that the flexible side pleats are not compressed during installation, as this can cause the filter to warp and allow unfiltered air to bypass the media.
Second Generation (2016–Present)
For the second-generation Toyota Innova, the standard OEM part number is 87139-F4010 or 87139-58010. Other compatible OEM part numbers often listed in parts catalogs include 87139-52040, 87139-30100, and 87139-YZZ16.
The physical dimensions for the second-generation cabin filter are:
- Length: 213 mm
- Width: 185 mm
- Height (Thickness): 29 mm
In the second-generation Innova, the filter housing is slightly narrower than its predecessor. The filter element is designed to slide directly into the built-in slot without requiring a separate plastic tray in most trim levels. Because the filter frame is more compact, it is critical to insert the filter with the correct vertical orientation. If inserted sideways, the filter will not slide in completely, preventing the outer housing cover from clicking into place.
OEM vs. Aftermarket Cabin Filters: Choosing the Best Option
When replacing your Toyota Innova’s cabin filter, you must decide between purchasing a genuine OEM Toyota filter or opting for a high-quality aftermarket alternative. OEM filters are manufactured to meet Toyota’s exact specifications, guaranteeing a perfect fit and standard particulate filtration. They are typically made of high-quality non-woven synthetic fibers that effectively trap dust, pollen, and large airborne debris, and are readily available at authorized Toyota dealerships across the Philippines.
Aftermarket filters, produced by reputable automotive parts manufacturers such as Bosch, Denso, Sakura, and AC Delco, provide a wider range of options. These brands offer both standard particulate filters and premium activated carbon filters. Standard aftermarket filters are generally more budget-friendly than OEM parts while maintaining comparable filtration efficiency and build quality.
Activated carbon filters are highly recommended for drivers in the Philippines, especially those frequently navigating heavy urban traffic in Metro Manila, Metro Cebu, or Metro Davao. These premium filters feature an integrated layer of activated charcoal that adsorbs harmful exhaust gases, volatile organic compounds (VOCs), and unpleasant odors from the outside air. Additionally, many premium carbon filters are rated to trap PM2.5 particulate matter, providing significantly cleaner air for passengers with respiratory sensitivities.
To help you evaluate your options, the table below compares OEM and premium aftermarket cabin filters across key performance and cost dimensions:
| Filter Type | Key Features | Typical Lifespan | Price Range (PHP) |
|---|---|---|---|
| OEM Standard | Guaranteed fit, reliable particulate filtration, durable non-woven media | 10,000 – 15,000 km | ₱600 – ₱1,200 |
| Premium Aftermarket Carbon | Excellent odor adsorption, PM2.5 filtration, anti-allergen properties | 10,000 – 15,000 km | ₱500 – ₱1,500 |
| Standard Aftermarket | Cost-effective, reliable dust and pollen filtration, wide availability | 10,000 km | ₱250 – ₱500 |
When sourcing your replacement filter, be highly vigilant against counterfeit parts, which are common on online marketplaces and in some local auto supply stores. Counterfeit filters often feature poorly printed Toyota logos, thin or unevenly spaced filter pleats, and lack proper structural rigidity. To avoid buying a fake product, look for holographic security labels on the packaging, verify the seller’s authorization, and purchase from established physical dealerships or official flagship brand stores online.
DIY Replacement Guide: How to Change the Innova Cabin Filter
Replacing the cabin filter in your Toyota Innova is a straightforward maintenance task that you can easily perform at home without specialized tools. The cabin filter is located directly behind the glove compartment, making it highly accessible. Follow these steps carefully to ensure a proper installation and to avoid damaging your vehicle’s interior trim.
- Prepare the Work Area: Park your vehicle on a level surface, turn off the engine, engage the handbrake, and open the front passenger door wide to give yourself ample working room.
- Empty the Glove Box: Open the glove compartment and remove all contents to prevent them from spilling when the compartment is lowered.
- Disconnect the Dampener Arm: Look at the outer right side of the glove box. You will see a small plastic dampener arm (a shock absorber rod) attached to a peg on the glove box. Gently slide the arm outward off the peg. Do not force it, as the plastic can become brittle over time.
- Release the Glove Box Stoppers: Locate the plastic stopper tabs on the left and right inner walls of the glove box. Press both side walls of the glove box inward toward the center to allow the stoppers to clear the dashboard frame. Once cleared, lower the glove box downward. You can then lift the entire glove box off its bottom hinges and set it aside.
- Remove the Filter Cover: Behind the lowered glove box, you will see a rectangular black plastic cover. Squeeze the release tabs on the right side of the cover and pull it outward to expose the cabin filter.
- Remove the Old Filter: Gently slide the old cabin filter straight out of the housing. Take note of the amount of dust, leaves, or debris trapped in the pleats, and keep the filter level to prevent dirt from falling into the blower motor fan below.
- Verify Airflow Direction: Examine the markings on both your old and new filters. Many filters feature an arrow labeled "UP," indicating which side must face the roof of the vehicle. Other filters use an "AIR FLOW" arrow, which must point downward to match the direction of the air current moving from the cabin intake down into the blower motor. Always match the new filter's orientation to these markings.
- Install the New Filter: Slide the new cabin filter smoothly into the housing slot, ensuring it sits completely flat and is not bunched up or bent at the edges.
- Reassemble the Components: Align the rectangular filter cover and snap it back into place until you hear the tabs click. Rehang the glove box onto its lower hinges, swing it upward while gently pressing the sides to clear the stoppers, and reattach the dampener arm to the outer peg. Finally, close the glove box to verify smooth operation.
If at any point during this process you encounter resistance, find that the plastic clips are extremely stiff or brittle, or if your specific trim level features a different access configuration, stop immediately. Consult your official Toyota owner’s manual or seek assistance from a qualified professional mechanic to prevent breaking the delicate plastic components of your dashboard.
Warning Signs and Maintenance Intervals for Cabin Filters
Because the cabin filter acts as the primary barrier protecting your vehicle’s ventilation system, it will eventually become saturated with dirt, dust, and organic matter. Recognizing the warning signs of a failing cabin filter is crucial for maintaining a healthy and comfortable cabin environment. In the Philippines, where high ambient humidity and heavy road dust are common, keeping a close eye on these symptoms is especially important.
Common signs of a clogged cabin filter include:
- Weak Airflow: If you notice that your air conditioning system is blowing weaker than usual, even when the blower speed is set to high, a clogged filter is the most likely culprit.
- Musty or Sour Odors: High humidity can cause moisture to accumulate on a dirty filter, leading to mold and mildew growth. When you turn on the AC, this results in a damp, unpleasant smell inside the cabin.
- Increased Dust Accumulation: A saturated or torn filter can no longer trap fine particles, leading to a rapid buildup of dust on your dashboard, seats, and steering wheel.
- Whistling or Humming Noises: When the blower motor struggles to pull air through a heavily restricted filter, it can create a noticeable whistling, humming, or vibrating noise behind the glove box.
Under normal driving conditions, it is generally recommended to replace your Toyota Innova’s cabin filter every 10,000 to 15,000 kilometers, or at least once a year. However, local driving conditions play a massive role in how quickly a filter degrades. If your daily commute involves heavy stop-and-go traffic in highly polluted urban centers, or if you frequently travel on dusty provincial roads, your filter will accumulate debris much faster.
For vehicles operating in harsh, dusty, or highly humid environments, it is highly recommended to inspect the cabin filter every 5,000 kilometers or during every regular engine oil change. Gently slide the filter out and inspect the pleats; if the filter media has turned dark grey, is covered in a thick layer of dust, or emits a musty smell, replace it immediately to protect your health and preserve the efficiency of your air conditioning system.
Frequently Asked Questions (FAQ)
Can I wash and reuse my Toyota Innova cabin filter?
No, you should never attempt to wash and reuse a standard paper, synthetic, or activated carbon cabin filter. These filters are strictly designed for single-use applications. Washing the filter with water or cleaning solutions will destroy the delicate physical structure of the filter media, wash away any electrostatic charge that helps trap fine particles, and render the activated carbon layer completely useless. Furthermore, a wet or damp filter is highly prone to developing mold and mildew, which will introduce harmful spores and foul odors directly into your vehicle’s ventilation system when reinstalled.
Does a clogged cabin filter affect the Toyota Innova's fuel consumption?
No, a clogged cabin filter does not directly affect your Toyota Innova’s fuel consumption or engine performance. The cabin filter is solely responsible for cleaning the air that circulates inside the passenger cabin, whereas the engine relies on a completely separate engine air filter located under the hood. However, a heavily clogged cabin filter can indirectly impact your fuel economy in a minor way. When airflow is restricted, passengers often lower the air conditioning temperature setting or increase the blower speed to stay cool in hot weather, which keeps the AC compressor engaged longer and places a continuous load on the engine.
Community discussion
Share your experience or ask a question. Comments are reviewed before publication.