
Installing a TOCE exhaust pipe on your motorcycle is a significant modification that goes far beyond a simple aesthetic upgrade. While the distinctive multi-tip design and aggressive sound profile are highly appealing, committing to this change requires a clear understanding of how it affects your machine’s mechanics, legality, and daily rideability. Before purchasing or installing this aftermarket system, you must evaluate several factors to ensure the modification remains safe, legal, and beneficial to your motorcycle’s performance.
Taking a systematic approach to this installation prevents costly mechanical errors and legal headaches. From verifying exact physical fitment to understanding how backpressure changes alter your engine’s fueling requirements, every step of the process demands careful planning. This guide details the essential technical, legal, and practical considerations you must address before modifying your motorcycle’s exhaust system.
Understanding the Real Impact on Performance and Sound
Before modifying your motorcycle, you must distinguish between a slip-on muffler and a full exhaust system. A slip-on exhaust replaces only the rear muffler portion, leaving your stock header pipes and catalytic converter intact. This option primarily alters the exhaust note and reduces weight but has a negligible effect on engine performance. In contrast, a full exhaust system replaces everything from the cylinder head exhaust ports to the muffler tip, removing catalytic converters and altering exhaust gas velocity.
Products mentioned in this guide
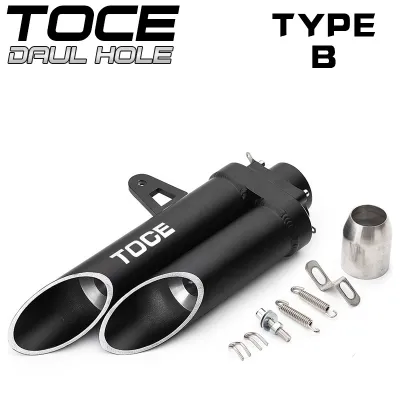
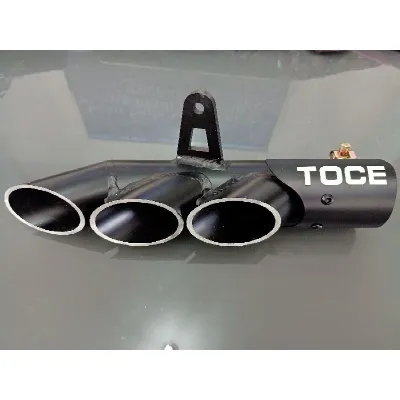
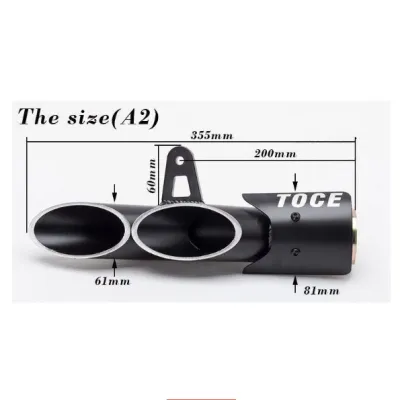
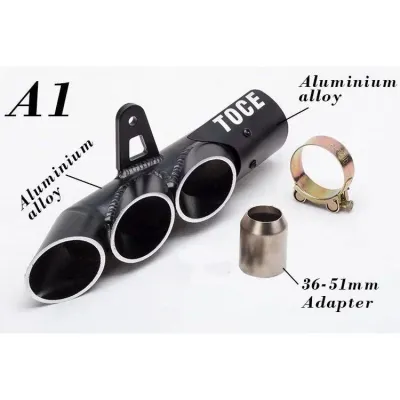
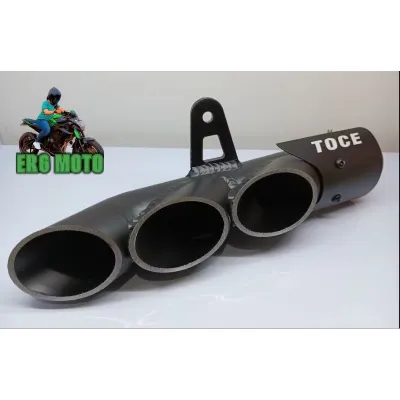
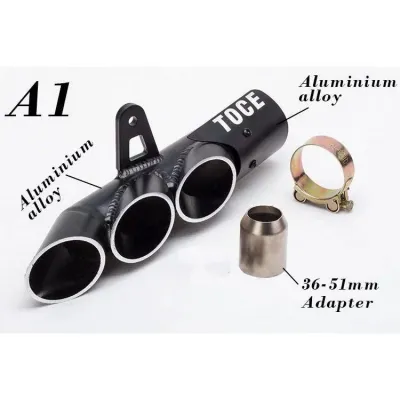
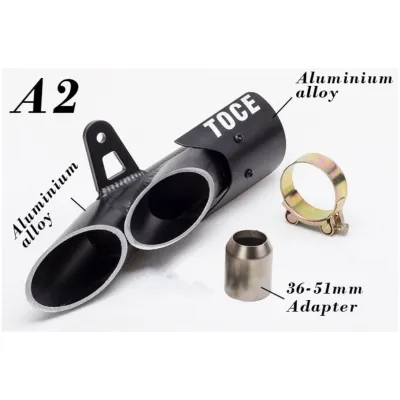
Prices are valid at publication and may change. Please refer to the product page for the latest price.
Aftermarket brands like TOCE are engineered to produce a raw, deep, and exceptionally loud exhaust note. This sound profile is significantly louder than your stock exhaust, which is designed to meet strict factory decibel limits. If you prefer a quiet, subtle ride, or if you frequently ride in noise-sensitive residential areas, the aggressive volume of this exhaust may not align with your daily riding preferences.
There is a common misconception that bolting on an aftermarket exhaust instantly provides massive horsepower gains. In reality, reducing backpressure and increasing exhaust flow often shifts the engine’s power band higher up the RPM range, which can sometimes result in a slight loss of low-end torque. To achieve actual peak horsepower gains, you must pair the exhaust with a high-flow air filter and a matching engine management tune.
Modifying your exhaust system can also have immediate consequences for your motorcycle’s factory warranty. Many manufacturers and local dealerships in the Philippines will void the warranty on engine, electrical, and emissions components if aftermarket parts are installed. Always review your dealership’s specific modification policies and warranty terms before proceeding with any installation.
Verifying Exact Fitment and Component Compatibility
Never assume an exhaust pipe will fit your motorcycle simply because it is designed for a bike with the same engine displacement or a similar appearance. Motorcycle manufacturers frequently alter frame mounts, header angles, and sensor locations between different model years and trim levels. You must cross-reference your motorcycle’s exact make, model, production year, and engine displacement with the manufacturer’s official fitment documentation.

Modern fuel-injected motorcycles rely on oxygen (O2) sensors mounted in the exhaust path to monitor air-fuel ratios. You must verify that the new exhaust system features built-in O2 sensor bungs that match the thread size and depth of your original equipment manufacturer (OEM) sensors. Installing an exhaust without these bungs, or using incorrect thread adapters, will trigger check-engine lights and cause severe fueling errors.
Physical clearance is another critical factor that is easily overlooked during the planning phase. Aftermarket exhaust routing often differs significantly from OEM designs, which can create clearance issues with passenger footpeg brackets, side stands, rear swingarms, and aftermarket saddlebags. Ensure the exhaust path does not interfere with the full range of motion of your rear suspension or contact any bodywork.
Before starting the installation, inventory the kit to confirm it includes all necessary mounting brackets, heavy-duty clamps, exhaust springs, and fresh gaskets. Reusing worn OEM exhaust gaskets often leads to persistent leaks, so sourcing new crush gaskets is highly recommended. If the kit requires you to reuse specific OEM hardware, inspect those original bolts and brackets for damage or corrosion beforehand.
Navigating Noise Regulations and Street Legality in the Philippines
In the Philippines, vehicle modifications are subject to strict oversight by the Land Transportation Office (LTO) and local government units (LGUs). National regulations and local ordinances establish specific decibel limits for motorcycles, often targeting loud, modified mufflers to curb noise pollution. Because TOCE exhausts are inherently loud, riding without sound-dampening accessories puts you at risk of facing steep fines, roadside citations, or vehicle impoundment.
Enforcement of noise regulations varies widely across different cities and municipalities. While some areas may only conduct visual inspections, others deploy calibrated decibel meters during roadside checkpoints. To maintain street legality and show courtesy to your neighbors, you should install a removable baffle, DB killer, or silencer insert to keep the decibel output within acceptable legal limits.
Removing the catalytic converter to install a full exhaust system also carries environmental implications. Under the Philippine Clean Air Act, removing emissions-control devices is illegal and can cause your motorcycle to fail the mandatory emission tests required for annual LTO registration. If you plan to ride your motorcycle on public roads, a slip-on system that retains the stock emissions equipment is generally the more practical and legally compliant choice.
Essential Tools and Safety Preparations
Executing a successful exhaust installation requires the proper tools and a safe working environment. Gather a complete metric socket set, ratchet extensions, a spring puller tool for exhaust springs, and a calibrated torque wrench. Avoid using adjustable wrenches or poorly fitting tools, as they can easily round off soft brass or aluminum fasteners on your engine block.
Consumables play a vital role in ensuring a leak-free and serviceable installation. Apply a thin layer of high-temperature anti-seize compound to the exhaust studs and mounting bolts to prevent them from seizing due to extreme heat cycles. For slip joints between pipe sections, using a small amount of high-heat silicone or copper paste helps create an airtight seal and prevents annoying exhaust leaks.
Working on a hot motorcycle engine is extremely dangerous and can result in severe burns. Always allow the motorcycle to sit idle until the engine, headers, and radiator are completely cold to the touch. Working on a cold engine also prevents thermal shock, which can cause aluminum cylinder head threads to strip or exhaust studs to snap during removal.
Establish clear boundaries for when to stop the do-it-yourself (DIY) process and seek professional assistance. If the installation of your new exhaust system requires cutting your stock mid-pipe, welding custom brackets, modifying the motorcycle’s frame, or altering the electrical wiring harness for sensor extensions, stop immediately. These complex tasks should only be performed by a qualified mechanic or professional exhaust fabricator.
Critical Installation Steps and Professional Boundaries
When removing your OEM exhaust, proceed slowly to avoid damaging surrounding components. Use masking tape or thick shop rags to cover vulnerable areas of your motorcycle’s fairings, frame, and swingarm. This simple precaution protects your paint and metal finishes from accidental scratches if a heavy tool slips or the old exhaust pipe drops unexpectedly.
During the assembly of the new system, loose-fit all components before tightening any fasteners. Position the headers, mid-pipe, brackets, and muffler loosely on their mounts, allowing the entire system to find its natural alignment. Tightening one section completely before aligning the rest introduces severe structural tension, which can cause the exhaust to crack over time due to engine vibrations.
Once everything is aligned, use a calibrated torque wrench to tighten all fasteners to the torque specifications defined in your motorcycle’s official service manual. Overtightening flange nuts on the cylinder head can warp the exhaust flange, snap the studs, or strip the threads in the engine block. Conversely, undertightening will allow exhaust gases to escape, leading to performance loss and popping noises.
Before finalizing the installation, perform a thorough visual routing check. Ensure that no part of the new exhaust system comes into contact with, or runs too close to, rubber brake lines, coolant hoses, plastic fairings, or electrical wiring harnesses. The extreme heat generated by the exhaust can quickly melt these materials, leading to sudden brake failure, coolant leaks, or electrical short circuits.
Post-Installation Leak Checks and Fueling Adjustments
After completing the physical installation, you must perform a comprehensive leak check before taking your first ride. Start the motorcycle in a well-ventilated area and let it idle. Without touching the hot metal directly, pass your hand near the header flanges and slip joints to feel for escaping air, or spray a mild soapy water solution on the joints and look for growing bubbles. Listen closely for any ticking or hissing sounds that indicate an improper seal.
Allow the motorcycle to run until it reaches normal operating temperature, then turn off the engine and let it cool down completely. This process is known as a heat cycle. As the metal expands and contracts, the mounting bolts, clamps, and gaskets will settle. You must re-torque all fasteners to their specified values after this initial heat cycle to prevent them from vibrating loose over time.
Because a full aftermarket exhaust system increases the volume of air leaving the engine, it alters the air-fuel ratio, often causing the engine to run lean. A lean-running engine has too much air and too little fuel, which leads to elevated combustion chamber temperatures, popping on deceleration, and potential engine damage. To correct this, you may need to install a piggyback fuel controller, perform an ECU remap, or jet the carburetor if your bike is older.
During your first test ride, closely monitor your motorcycle’s engine temperature, throttle response, and overall behavior. If you notice persistent backfiring, severe flat spots in acceleration, engine hesitation, or overheating, park the motorcycle immediately. Do not continue riding a motorcycle that exhibits these symptoms; instead, consult a professional tuning specialist to properly calibrate your engine’s fueling system.
Frequently Asked Questions (FAQ)
Will a TOCE exhaust automatically make my motorcycle faster?
No, installing a TOCE exhaust pipe will not automatically make your motorcycle faster. While the system reduces overall vehicle weight and improves high-RPM exhaust flow, noticeable performance gains are rarely achieved through an exhaust swap alone. To unlock actual horsepower and speed improvements, you must pair the exhaust with a high-flow aftermarket air filter and a professional ECU tune to optimize the engine’s air-fuel mixture.
Can I install a slip-on exhaust without tuning the ECU?
Yes, you can generally install a basic slip-on exhaust without tuning your ECU, as most modern fuel-injected motorcycles can automatically make minor adjustments for the slight change in backpressure. However, if the slip-on design bypasses or removes the catalytic converter, or if you notice symptoms like excessive popping on deceleration, engine hesitation, or increased running temperatures, you must install a fuel controller or perform an ECU flash to protect your engine from damage.
Community discussion
Share your experience or ask a question. Comments are reviewed before publication.