
Selecting the right car terminal removal kit requires balancing connector compatibility, tool material durability, and tip variety to match your vehicle’s specific wiring harness. Automotive electrical systems rely on secure, locked connections to transmit power and sensor data reliably. In tropical climates like the Philippines, high humidity and intense engine bay heat accelerate the degradation of plastic connector housings and promote terminal corrosion. Having a precise set of extraction tools in your toolbox is essential to avoid damaging these delicate components during repairs or upgrades.
Using the wrong tool or applying excessive force can easily ruin a wiring harness, turning a simple sensor replacement into an expensive rewiring job. By understanding the design of your vehicle’s connectors and evaluating the build quality of available tool kits, you can safely perform electrical repairs without compromising the integrity of your vehicle’s electrical system.
Understanding Terminal Types and Connector Compatibility
Automotive wiring harnesses use a diverse array of connector designs to handle power, sensor signals, and data. Standard blade terminals, which are commonly found in fuse boxes and relays, require flat, thin extraction probes to release their locking tabs. Circular pins, frequently used in heavy-duty sensor connections and older vehicle models, require tubular or cylindrical sleeves that slide over the pin to compress internal retaining metal fingers. Weather-proof styles, such as specialized weather-pack or sealed connectors, utilize silicone seals and robust locking mechanisms to keep moisture out, requiring precise tools that can bypass the seal without tearing the rubber.
Products mentioned in this guide
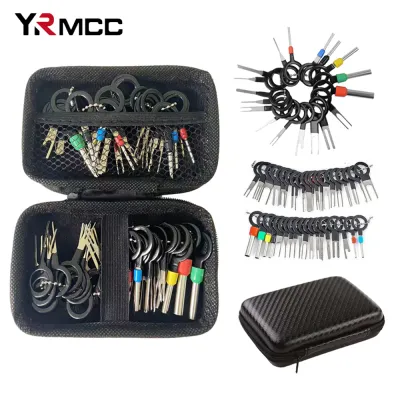

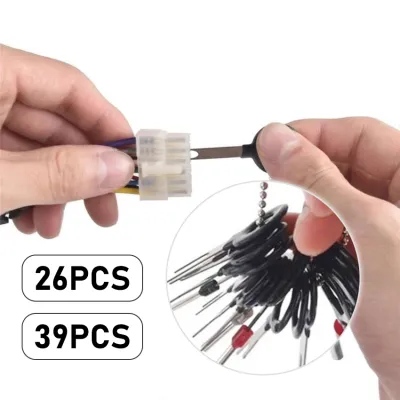

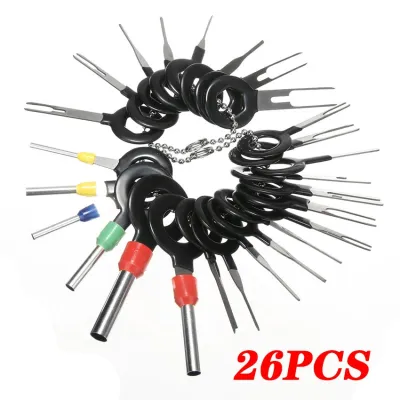

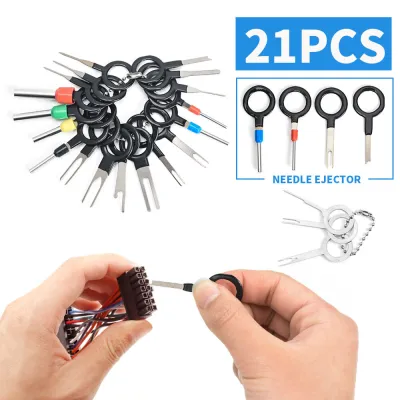
Prices are valid at publication and may change. Please refer to the product page for the latest price.
Before attempting any extraction, you must visually inspect the connector housing to identify the locking mechanism. Most automotive terminals are held in place by either a primary lock, which is a small metal tang on the terminal itself or a plastic finger inside the connector cavity, or a secondary lock. Secondary locks, such as Terminal Position Assurance (TPA) clips, are often bright, contrasting plastic inserts that must be completely removed or slid into an unlocked position before the individual terminal pins can be released. Attempting to extract a terminal while the secondary lock is engaged will damage the connector housing.
To ensure compatibility, verify your vehicle’s specific connector series by checking the factory service manual or wiring diagrams. These documents often specify the exact connector manufacturer and the corresponding terminal cavity dimensions. Matching these specifications to the tool dimensions in a kit prevents the common mistake of using a probe that is too wide or too thick, which can permanently deform the terminal cavity and prevent the new terminal from locking securely into place.
Safe Usage and Connector Preservation Guidelines
Working on automotive electrical systems carries inherent risks of short circuits, component damage, and personal injury. Before touching any electrical connector or inserting a metal tool into a terminal cavity, you must disconnect the vehicle’s battery, starting with the negative terminal, and verify that there is zero voltage in the circuit using a digital multimeter. This safety boundary is critical to prevent accidental short circuits that can destroy sensitive electronic control units (ECUs) or trigger airbag deployments.

Releasing locking tabs requires patience and a delicate touch rather than brute force. When inserting a terminal removal tool, the goal is to gently depress the locking tang or lift the plastic retaining finger inside the connector. If you feel significant resistance, do not force the tool deeper. In hot and humid environments, years of exposure to high ambient temperatures and engine heat can make plastic connector housings extremely brittle; applying excessive force will easily snap these delicate plastic components, requiring a complete connector replacement.
If a terminal remains stuck despite using the correct tool, it may be seized due to corrosion or heat damage. In such cases, stop immediately and inspect the connector for signs of melting or green copper oxidation. Forcing the extraction can tear the wire from the terminal or ruin the internal cavity structure. If the terminal cannot be freed with gentle, guided pressure, consult a qualified automotive electrician or refer to the vehicle manufacturer’s repair guidelines before proceeding.
Key Features to Evaluate in a Removal Kit
The durability of a terminal removal kit depends heavily on the materials used to manufacture the probes. Look for kits made from high-tensile stainless steel or spring steel, which offer the necessary flexibility to bend slightly without snapping or permanently deforming. Carbon steel tools are also common but must feature a high-quality, corrosion-resistant coating, such as black oxide or chrome plating, to withstand high humidity levels, where unprotected steel tools can quickly rust in your toolbox.
Handle design directly impacts your control and comfort during intricate electrical work. Ergonomic, non-slip handles made from textured plastic or rubberized sleeves provide a secure grip, even when your hands are slick with sweat or engine oil. Dual-ended designs offer excellent versatility by combining two different probe sizes on a single handle, though single-ended tools with dedicated, color-coded handles are often easier to identify and manipulate in tight, hard-to-reach areas under the dashboard or deep within the engine bay.
Pay close attention to probe thickness, stiffness, and tip profiles. A high-quality kit should include a variety of single-bar (flat blades), double-bar (forked pins), and tubular (cylindrical sheaths) profiles. The tips must be precision-machined with smooth, deburred edges; rough or oversized tips can easily gouge the soft copper or brass alloy of the terminals, leading to poor electrical contact and intermittent circuit failures once the harness is reassembled.
Piece Count vs. Practical Utility: Finding the Right Balance
When browsing online marketplaces or local tool shops, you will find kits ranging from basic 10-piece sets to massive 80-piece collections. A basic kit containing the most common single-pin, double-pin, and casing tools is often sufficient for general maintenance, such as replacing a damaged headlight socket or installing a basic aftermarket accessory. These compact sets are easy to store and keep organized, making them a practical addition to a standard DIY toolbox.
In contrast, comprehensive kits with high piece counts include dozens of highly specialized, vehicle-specific tools alongside universal extractors. While these large sets offer maximum coverage, many of the highly specialized pins may never be used if you only work on one or two specific vehicle brands. Evaluate the ratio of universal tools to specialized shapes in the kit to ensure you are not paying extra for dozens of redundant or overly specific probes that will simply occupy space.
Storage and organization are critical for keeping these small, delicate tools secure. Because terminal extractors are thin and lightweight, they are easily lost in a cluttered toolbox or dropped into the dark recesses of an engine bay. Prioritize kits that come with a dedicated storage solution, such as a labeled blow-molded case, a secure canvas roll-up pouch, or a fitted foam tray, which allows you to quickly verify that every tool is accounted for at the end of a job.
Building Your Shortlist: Matching Kits to Your DIY Needs
To select the right kit, match the tool specifications to your specific repair frequency, vehicle types, and project scope. If you are a casual DIYer focusing on basic upgrades like installing a new car stereo, routing a dashcam, or replacing worn-out horn wiring, a mid-sized universal kit is highly suitable. Look for a set containing 15 to 30 pieces that covers standard blade and circular pin sizes, which will handle the vast majority of aftermarket and common factory connections without cluttering your workspace.
For advanced modifiers undertaking complex projects like engine swaps, custom wiring harness fabrication, or ECU repinning, a high-piece-count kit is necessary. These projects require working with micro-terminals and highly sensitive sensor connectors that demand specialized tubular extractors and ultra-thin single-bar probes. Ensure the kit you choose features high-grade spring steel construction to handle the repetitive use and precise tolerances required for intricate wiring modifications.
If you manage a multi-vehicle household with cars from different regions, such as Japanese, European, and American manufacturers, your kit must accommodate diverse engineering standards. Japanese vehicles often utilize compact, highly integrated multi-pin connectors, while European brands frequently employ robust, weather-sealed circular and flat-blade designs. Prioritize a comprehensive, multi-brand compatible set that explicitly lists coverage for these regional connector styles, ensuring you always have the correct tool on hand regardless of which vehicle is currently on the jack stands.
Frequently Asked Questions (FAQ)
Can I use a small flathead screwdriver instead of a dedicated terminal removal tool?
Using improvised tools like jeweler’s screwdrivers, paperclips, or safety pins is highly discouraged due to the significant risk of damaging delicate connector components. Improvised tools rarely match the precise dimensions of terminal cavities, meaning they can easily bend or break the internal plastic locking tabs or deform the metal terminal itself. Additionally, using a sharp, non-insulated metal tool increases the risk of tearing weather-proof silicone seals or accidentally short-circuiting adjacent pins if the electrical system was not properly de-energized, leading to expensive harness repairs.
How do I know which tool size fits my car's connectors?
To find the correct tool size, start by visually inspecting the face of the connector cavity to determine the shape of the terminal and the location of the locking tab access points. Compare the cross-section of the cavity, such as a single slot, double slot, or circular opening, to the tips in your kit. Gently insert the matching tool probe into the cavity without applying force; if the tool meets immediate resistance before reaching the locking tab, it is likely too large. A properly sized tool should slide smoothly into the designated release slot, allowing you to gently disengage the lock and slide the terminal out of the housing.
Community discussion
Share your experience or ask a question. Comments are reviewed before publication.