
Selecting the right motorcycle accessory requires a careful balance of physical compatibility, rider safety, and daily utility. If you are looking to secure your smartphone for daily commutes or long-distance touring, finding the ideal motowolf cp holder involves matching your specific motorcycle cockpit to the correct mounting bracket. Because different motorcycle models feature vastly different handlebar configurations, choosing a mount that does not align with your bike’s design can lead to loose fittings, obscured instrument panels, or even physical damage to your motorcycle.
Beyond simple mounting, your choice must account for the intense environmental demands of riding in the Philippines. Tropical heat, heavy monsoon downpours, and the constant high-frequency vibrations of single-cylinder engines all place immense stress on both the phone holder and your smartphone’s internal components. By evaluating your motorcycle’s mounting points, your phone’s physical dimensions, and your specific riding habits, you can select a model that keeps your device secure and accessible throughout every journey.
Matching Motowolf CP Holder Mount Types to Your Motorcycle
Motorcycle cockpits are far from standardized, meaning the first and most critical decision is selecting a mounting base that physically matches your bike’s frame. Motowolf designs several distinct mounting interfaces to accommodate different styles of motorcycles, from urban scooters to high-performance sportbikes.
Products mentioned in this guide
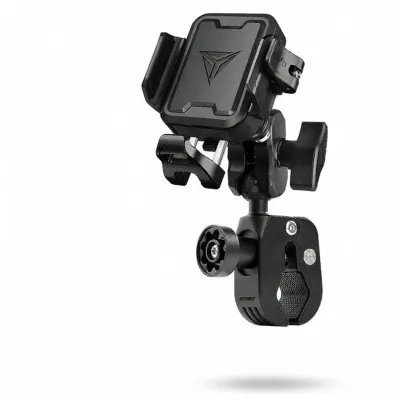
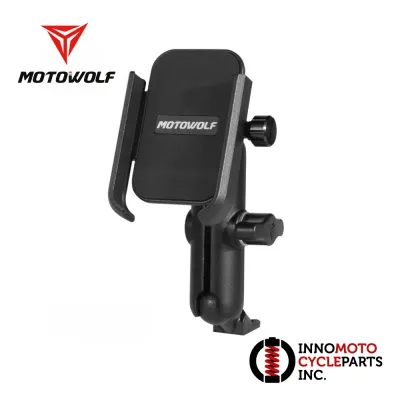
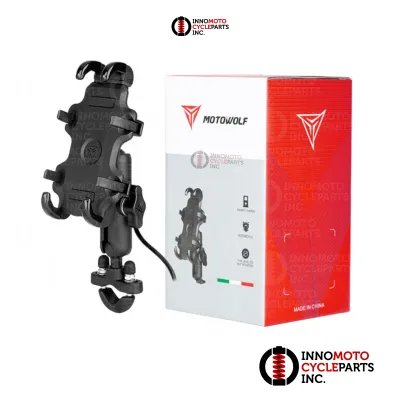
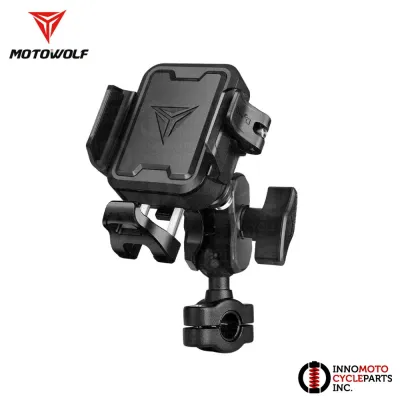
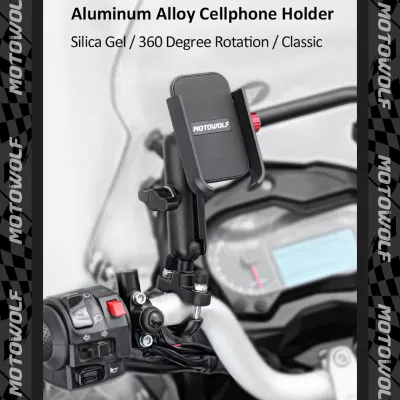
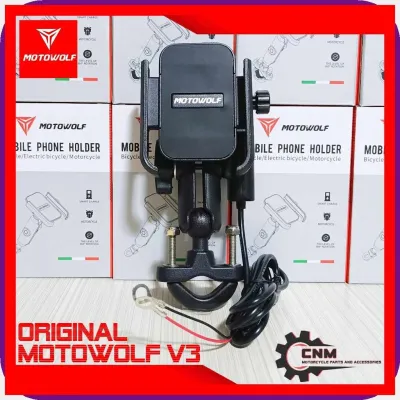
![[Original]MOTOWOLF CELLPHONE HOLDER FULL ALLOY / UNIVERSAL 360° ROTATABLE MOBILE PHONE HOLDER FOR MOTORCYCLE 1PC](https://img.lazcdn.com/g/p/3ffb81c7b3f0a60d6b62807ce3e2aa24.jpg_400x400q80.jpg_.webp)
Prices are valid at publication and may change. Please refer to the product page for the latest price.
Rearview Mirror Stem Mounts
Rearview mirror stem mounts are the most common choice for automatic scooters and underbone motorcycles, where the handlebars are fully enclosed in plastic fairings. Because these bikes lack exposed metal tubes, the mirror mounting thread serves as the primary structural anchor.
When choosing a mirror-mounted holder, you must verify the thread diameter and pitch of your motorcycle’s mirror stem. Most small-displacement motorcycles use either 8mm or 10mm threads, and some manufacturers utilize left-hand (reverse) threads on one or both sides. Before tightening the mount, check if you need to install adapter spacers to raise the holder base clear of the plastic fairing, preventing scratches or structural cracking when you tighten the assembly.
Handlebar Clamp Mounts
Handlebar clamp mounts are engineered for manual transmission motorcycles, naked street bikes, and adventure touring models that feature exposed tubular handlebars. These mounts clamp directly onto the bare metal of the handlebar, offering an exceptionally rigid and stable connection.
To ensure a secure fit, you must measure the outer diameter of your handlebar using a vernier caliper. Standard handlebars typically measure 22mm (7/8 inch) or 28mm (1-1/8 inch) at the clamping area, though some cruiser models feature thicker bars. Always measure the bare metal tube itself rather than attempting to clamp over rubber grips, plastic cable guides, or control housings, as clamping over soft materials will cause the mount to slip during operation.
Fork Stem and Riser Mounts
Specialized setups are required for sportbikes and modified motorcycles where standard handlebar or mirror mounts are physically impossible to install due to clip-on handlebars and tight aerodynamic fairings. For these configurations, fork stem mounts utilize an expanding wedge mechanism that inserts directly into the hollow center hole of the triple tree fork stem.
Before purchasing a fork stem mount, you must measure the exact inner diameter of your fork stem hole. These holes vary widely by motorcycle manufacturer and model year, typically ranging from 12mm to 25mm. A loose fit can cause the entire assembly to spin or detach under the heavy wind pressure experienced at highway speeds, making precise measurement non-negotiable.
Mounting Base Decision Matrix
| Motorcycle Type | Common Examples | Recommended Motowolf Base | Key Verification Step |
|---|---|---|---|
| Scooter / Underbone | Honda Click, Yamaha NMAX, Suzuki Raider | Rearview Mirror Stem Mount | Verify mirror thread diameter (8mm/10mm) and fairing clearance. |
| Naked / Adventure | Yamaha MT-15, Kawasaki Rouser, Honda CB150X | Handlebar Clamp Mount | Measure bare metal tube outer diameter with calipers. |
| Sportbike | Yamaha R15, Kawasaki Ninja, Honda CBR150R | Fork Stem / Riser Mount | Measure the inner diameter of the hollow triple tree stem. |
| Cruiser / Touring | Keeway Superlight, Royal Enfield Classic | Heavy-Duty Handlebar Clamp | Check for tapered handlebar sections near the risers. |
Selecting Features Based on Your Riding Needs
Once you have identified the correct mounting base for your motorcycle, your next step is to evaluate the specific features of the holder body to match your daily riding environment and usage patterns.

Anti-Vibration and Shockproof Modules
Modern smartphones feature highly sensitive camera systems equipped with Optical Image Stabilization (OIS) and closed-loop autofocus. These systems rely on tiny gyroscopes and magnetic coils to suspend the camera lens, allowing it to compensate for hand movement. However, the high-frequency engine vibrations generated by single-cylinder engines—which are incredibly common in daily commuter bikes—can quickly degrade and destroy these delicate mechanical components.
To protect your device, look for Motowolf models equipped with dedicated anti-vibration modules. These modules utilize specialized silicone dampeners or spring-loaded shock absorbers that isolate the smartphone cradle from the high-frequency harmonics of the motorcycle’s engine and the harsh impacts of uneven road surfaces. Investing in a model with these dampeners is highly recommended if you ride a single-cylinder motorcycle or frequently travel on poorly paved provincial roads.
Wireless and Wired Charging Capabilities
For long-distance touring riders, motovloggers, and delivery professionals, keeping a smartphone powered throughout the day is a major priority. Motowolf offers models featuring integrated USB wired charging ports as well as Qi-standard wireless charging pads.
While charging models offer the obvious benefit of continuous power, they also introduce specific trade-offs. Wireless charging generates additional heat, which, when combined with direct sunlight and high ambient tropical temperatures, can cause your smartphone to trigger a thermal shutdown to protect its battery. Additionally, charging models require routing electrical wiring through your motorcycle’s chassis, adding installation complexity and requiring careful waterproofing of all electrical connections.
Weather and Rust Resistance
Operating a motorcycle in a tropical climate means your accessories will be subjected to intense ultraviolet (UV) radiation, high humidity, and sudden, torrential downpours. Low-grade steel or untreated plastics will quickly rust, fade, or become brittle under these harsh conditions.
When comparing models, prioritize those constructed from high-grade, CNC-machined aluminum alloys and stainless steel hardware. Look for protective anodized coatings that resist corrosion, along with rubberized or silicone pads that do not degrade when exposed to rainwater and road grime. Ensure the cradle design includes built-in drainage cutouts so water cannot pool around your phone’s charging port or speakers during heavy rain.
Quick-Release and Security Mechanisms
How often you leave your motorcycle unattended should dictate the clamping mechanism you choose. Standard screw-tightened grips use a manual thumb screw to clamp the phone tightly in place, offering a highly secure hold but requiring several seconds of turning to insert or remove the device.
Conversely, one-touch quick-release mechanisms utilize spring-loaded arms that automatically lock around your phone when it is pressed into the cradle. This is highly convenient for riders who make frequent stops, such as delivery couriers or urban commuters. If you choose a quick-release model, ensure it features a secondary manual lock switch to prevent the spring mechanism from accidentally releasing when hitting large potholes or speed bumps.
Verifying Compatibility Before You Buy
Before finalizing your purchase, you must perform a series of physical measurements to guarantee that the holder will safely accommodate both your specific smartphone and your motorcycle’s cockpit layout.
Measuring Motorcycle Hardpoints
Never rely on generic compatibility claims or assume a mount will fit based solely on your motorcycle’s category. Use a digital caliper or a flexible measuring tape to obtain precise dimensions of your intended mounting point.
For handlebar mounts, measure the exact section of the bar where you plan to install the clamp, noting that many handlebars taper to a narrower diameter near the grips. For mirror mounts, remove the mirror completely and measure the exposed thread length and diameter. Ensure there is enough vertical clearance above the fairing to allow the mounting bracket to rotate freely during installation without striking the plastic bodywork.
Smartphone Dimensions and Case Clearance
When checking the maximum width and thickness specifications of a Motowolf holder, always measure your smartphone while it is inside the protective case you intend to use while riding. Many heavy-duty, rugged, or battery-extended cases add significant thickness and width that exceed standard holder dimensions.
Pay close attention to the depth of the holder’s corner claws. If your phone case is exceptionally thick, or if your phone features a prominent rear camera bump, the claws may not fully wrap around the edges of the device. This incomplete grip can allow the phone to slip out under hard braking or sudden impacts. The phone must sit completely flat against the backplate of the holder, with the retaining claws extending fully over the front bezel of the phone case.
Cockpit Clearance and Obstruction Checks
Mounting a smartphone must never compromise your ability to operate the motorcycle safely or monitor your instruments. Before purchasing, sit on your motorcycle in your normal riding position and visually estimate where the mounted phone will sit.
Ensure the phone and mounting arm will not obstruct your view of the digital instrument cluster, speedometer, or vital warning lights such as turn signals and neutral indicators. Additionally, verify that the mounted phone does not block your physical access to the ignition key slot, the front brake master cylinder fluid reservoir, or any handlebar control switches.
Weight and Load Limits
Every mounting system has a maximum structural load capacity determined by its joints and materials. Large-format smartphones, especially when paired with heavy, armored protective cases, can weigh upwards of 300 grams.
While this weight is easily supported when the motorcycle is stationary, the dynamic forces exerted on the mount multiply exponentially when riding over speed bumps, potholes, or rough gravel. Exceeding the recommended load limit of the mounting arm can lead to metal fatigue over time, eventually causing the bracket to snap. Always verify that your combined phone and case weight falls safely within the manufacturer’s specified limits.
Safe Installation and Routine Maintenance
Proper installation is just as important as choosing the right model. Following correct mechanical procedures ensures that your mount remains secure and does not interfere with the safe operation of your motorcycle.
Steering Clearance Verification
Once you have physically mounted the holder but before you tighten the bolts completely, you must perform a mandatory lock-to-lock steering clearance test. This test ensures that the mount does not restrict your ability to steer the motorcycle in an emergency.
Place the motorcycle securely on its center stand. Turn the handlebars slowly but fully to the far left, and then to the far right. Watch the phone holder, mounting arm, and any attached charging cables closely throughout the entire range of motion. Verify that no part of the assembly contacts the fuel tank, front windshield, fairings, or places any tension on the brake lines, throttle cables, or electrical wiring harnesses.
Proper Torque and Tightening
Over-tightening metal fasteners on a motorcycle can easily strip threads, snap bolts, or crack delicate plastic fairings and control housings. Conversely, under-tightening will allow engine vibrations to gradually back the screws out, leading to a loose mount.
Always use the rubber or plastic shims provided in the Motowolf kit. These shims serve a dual purpose: they protect your handlebar’s finish from scratches and provide a high-friction grip that prevents the mount from rotating without requiring excessive torque. Tighten all fasteners evenly, and consider applying a small drop of medium-strength thread-locking compound (such as blue threadlocker) to the screw threads to prevent them from loosening due to engine harmonics.
Wiring Safety for Charging Models
If you select a model with integrated charging capabilities, you must follow strict automotive electrical safety boundaries to protect your motorcycle’s electrical system from short circuits or battery drain.
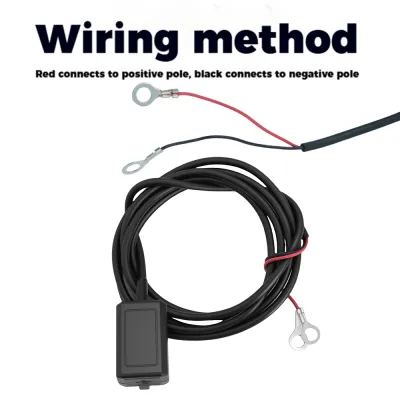
- Route Cables Safely: Route the power cable along the existing wiring loom of the motorcycle, securing it with UV-resistant zip ties. Ensure there is sufficient slack around the steering head to allow full steering movement without pulling the wire taut.
- Avoid Heat Sources: Keep the cable far away from hot engine components, exhaust headers, and moving suspension parts that could melt or pinch the insulation.
- Use an Inline Fuse: Always install an inline fuse close to the power source to protect the circuit from overcurrent.
- Connect to Switched Power: Connect the charger to an accessory socket or a switched power source that only receives electricity when the ignition key is turned to the "ON" position. Connecting directly to the battery terminals can slowly drain your motorcycle's battery when the engine is off.
- Seek Professional Help: If you do not have experience with automotive electrical systems or multimeter testing, have the wiring installed by a qualified motorcycle technician.
Routine Inspection Schedule
Motorcycle accessories are constantly subjected to harsh operating conditions, making regular inspections essential to prevent component failure. Establish a habit of inspecting your phone holder at least once a month, or immediately after traversing exceptionally rough roads or riding through heavy rain.
Check all mounting bolts and pivot joints to ensure they remain tight. Inspect the rubber or silicone dampening pads for signs of cracking, dry rot, or UV degradation, replacing them if they lose their elasticity. Finally, clean the grip mechanism with mild soap and water to remove road grime, dust, and salt residue, which can cause the moving parts of the clamping mechanism to bind or stick over time.
Frequently Asked Questions (FAQ)
Can I use a Motowolf handlebar clamp mount on a standard scooter?
Most standard, unmodified scooters feature handlebars that are fully enclosed in plastic cosmetic fairings, leaving no exposed metal tubing. Because of this design, a standard handlebar clamp mount cannot be installed without modifying or cutting the plastic bodywork. For standard scooters, the rearview mirror stem mount is the correct and non-destructive choice, as it attaches directly to the exposed thread where your mirror secures to the handlebar assembly.
Do anti-vibration phone holders completely protect my phone's camera?
While high-quality anti-vibration modules significantly reduce the high-frequency engine vibrations that damage Optical Image Stabilization (OIS) systems, no mount can guarantee 100% protection against all physical forces. Severe sudden impacts, such as hitting a deep pothole at high speed, or extreme engine harmonics from modified motors can still transmit shock to your device. To minimize risk, always check your smartphone manufacturer’s warranty guidelines regarding vehicle vibration exposure, and ensure the dampening elements of your mount are in good physical condition.
How do I safely route the charging cable on my motorcycle?
To safely route a charging cable, begin by securing the cable to the motorcycle’s main wiring harness using plastic zip ties, leaving enough slack near the steering head to allow the handlebars to turn fully from lock to lock without pulling the wire. Keep the cable entirely clear of hot engine casings, exhaust pipes, and moving suspension components. For the electrical connection, always use an inline fuse and connect the wire to a switched accessory circuit rather than directly to the battery, ensuring the charger only draws power when the ignition is active.
Community discussion
Share your experience or ask a question. Comments are reviewed before publication.