
Finding a puddle of gasoline under your motorcycle or experiencing sudden engine sputtering and stalling while riding can be both frustrating and dangerous. These issues are typically caused by a failing motorcycle fuel cock—commonly known as a petcock—that is either leaking fuel due to degraded internal seals and torn vacuum diaphragms, or starving the engine because of clogged filters, blocked tank vents, or damaged vacuum lines. Resolving this requires systematically diagnosing whether the failure is an external leak or a flow restriction, preparing the fuel system safely, and then deciding whether to clean, rebuild, or replace the assembly.
What are the common symptoms of a failing motorcycle fuel cock?
A failing motorcycle fuel cock typically manifests as either an external fuel leak that creates visible wetness and a strong gasoline odor, or engine fuel starvation that causes sputtering, hesitation, and stalling. Distinguishing between these symptoms depends heavily on whether your motorcycle uses a traditional gravity-fed petcock or a vacuum-operated system.
Visual signs of a leak are usually the easiest to spot. You may notice fuel dripping directly from the petcock body, wetness around the fuel lines, stained engine cases, or a persistent smell of raw gasoline near the tank when the bike is parked. These leaks are not just messy; they pose a significant fire hazard and can damage the paint or plastic bodywork of your motorcycle.
Products mentioned in this guide
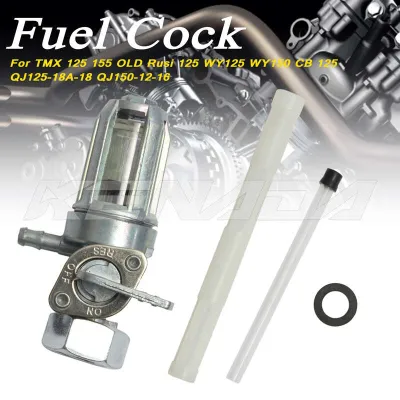
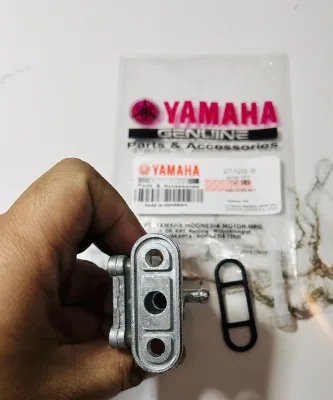
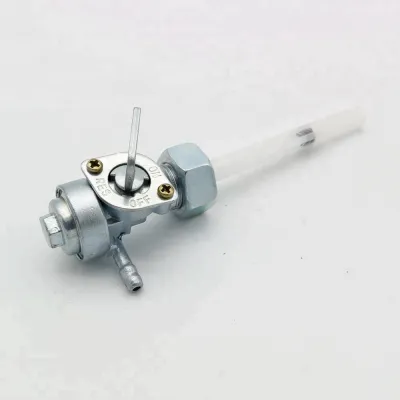
2 Lazada user ratings
salamat seller at Lazada sa fuel cock, hindi kopa nakakabit, reserba ko lang muna ito.salamat sa nag deliver.
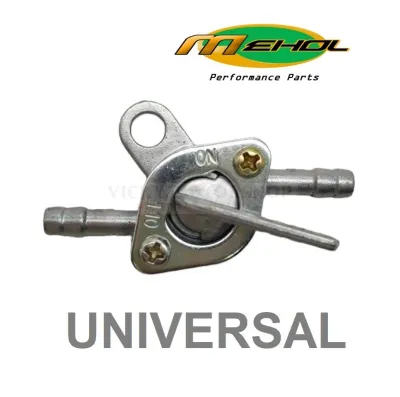
35 Lazada user ratings
good item review should be specific, honest, and balanced, highlighting practical features, performance quality, and clear pros and cons to …Read full reviewShow less
good item review should be specific, honest, and balanced, highlighting practical features, performance quality, and clear pros and cons to help other buyers make informed decisions
maganda ang naorder ko na fuel cock fit sa motor ko. mabilis na nakarating order ko. five star to you seller.
Maganda items complete good packaging hope to aoder again soon fit sa pag gagamiton order narin kayo
sera Tomatagas
155 Lazada user ratings
ok nmn ganda🥰
Good quality
172 Lazada user ratings
Improves fuel efficiency,
Compatibility:good
Easy to install,
no same thread
dikopa na try
100 Lazada user ratings
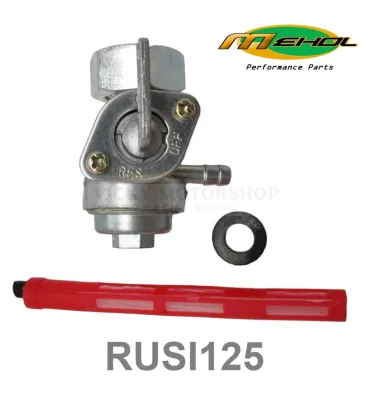
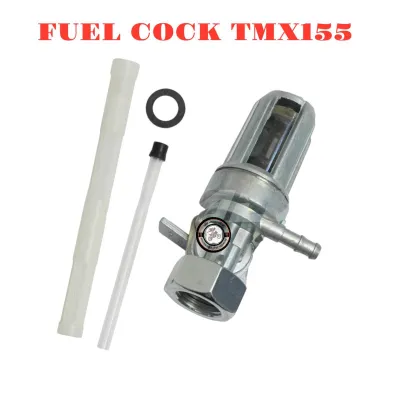
🔨Durability:Yes✓ 🔌Compatibility:Yes✓ ⛽Capacity:Yes✓ It fits well all kind of Motorcycle with threaded type Fuel cock. like TMX 125, Rusi, Sk…Read full reviewShow less
🔨Durability:Yes✓ 🔌Compatibility:Yes✓ ⛽Capacity:Yes✓ It fits well all kind of Motorcycle with threaded type Fuel cock. like TMX 125, Rusi, SkyGo, Euro...
Fast shipping, Secure connection, goods naman compatible naman. sana magtagal 🔨Durability:10 🔌Compatibility:10 ⛽Capacity:10
🔌Compatibility:very compatible Easy installation, No leaks, not so fast coz coming from overseas nice product
ijust recieve and ok naman yong item kaya lang diman lang binalot ni seller ng maayos buti di naano
🔨Durability:goods 🔌Compatibility:goods ⛽Capacity:goods All goods salamat Lazada, seller, rider
Prices are valid at publication and may change. Please refer to the product page for the latest price.
Performance signs of starvation, on the other hand, affect how the engine runs. The motorcycle might start easily but die after a few minutes of riding, hesitate when you roll on the throttle, or sputter and lose power at high RPMs. This happens because the fuel flow cannot keep up with the demand of the carburetor or fuel injection system, emptying the float bowl or fuel rail faster than it can refill.
To avoid misdiagnosing a functional system, you must understand how your specific petcock operates. A gravity-fed petcock relies on manual positions (ON, OFF, RES) and will continuously flow fuel if left in the ON position when the engine is off. A vacuum-operated petcock (typically featuring ON, RES, and PRI positions) requires engine vacuum to open an internal diaphragm. It should never flow fuel in the ON or RES positions when the engine is off, so do not mistake this normal safety behavior for a blockage.
How do you safely prepare the motorcycle for fuel cock inspection?
Safely preparing your motorcycle for a fuel cock inspection requires working in a well-ventilated area away from open flames, turning the fuel valve to the “OFF” position, and letting the engine cool completely. Because fuel systems operate under gravity or vacuum pressure, you must use proper containment tools and establish clear safety boundaries before disconnecting any lines.

Working on fuel systems carries inherent fire, chemical burn, and inhalation risks. Always consult your motorcycle’s original-vehicle service manual for model-specific fuel system layouts, depressurization steps, and safety warnings before beginning. If you lack basic hand tools, observe fuel spraying under unexpected pressure, or smell severely degraded fuel, immediately halt the process and consult a qualified professional mechanic.
Begin by turning the petcock to the “OFF” position if you have a manual gravity-fed system. For vacuum-operated systems, the valve is naturally closed when the engine is off, provided it is not set to the “PRI” (Prime) position. Allow the engine, exhaust pipes, and muffler to cool completely to eliminate any hot surfaces that could ignite escaping fuel vapors.
Place a fuel-safe catch pan directly beneath the petcock assembly to catch any fuel that remains inside the lines. Keep clean, absorbent shop rags nearby to quickly wipe up any accidental spills. Additionally, disconnect the negative battery terminal to eliminate any potential electrical spark hazards while you are working near open fuel sources.
Why is fuel dripping from the vacuum diaphragm or overflow tube?
Fuel dripping from the vacuum diaphragm, overflow tube, or petcock body is generally caused by torn internal rubber components or hardened gaskets that can no longer seal the fuel pressure. Over time, exposure to modern fuel blends degrades these elastomer seals, allowing fuel to bypass the valve mechanism.
In vacuum-operated petcocks, a thin rubber diaphragm separates the fuel chamber from the vacuum chamber. If this diaphragm tears, fuel will leak into the vacuum side of the system. A primary, non-invasive diagnostic check is to pull the vacuum hose off the petcock; if liquid fuel is present inside the vacuum line or drips from the vacuum port, the diaphragm has failed and must be replaced. Left unaddressed, this can allow raw fuel to be sucked directly into the engine intake manifold, causing an extremely rich air-fuel mixture and potential engine damage.
Worn, hardened, or flattened O-rings and gaskets are another common source of external leaks. The selector valve uses internal O-rings or a rubber gasket to seal different ports as you turn the lever. When these components lose their elasticity, fuel will seep past them, causing external drips or allowing fuel to flow even when the valve is set to “OFF.”
Internal debris or varnish buildup can also prevent the valve from seating properly in the “OFF” or “RES” positions. Fine rust particles from the fuel tank or varnish from stale fuel can lodge between the sealing surfaces. This prevents the internal valve from closing completely, leading to slow, persistent leaks that can eventually overwhelm the carburetor needle valves and flood the engine crankcase.
Why is the engine starving for fuel even when the petcock is turned on?
Engine fuel starvation occurs when physical blockages or vacuum delivery failures restrict the flow of fuel from the tank to the carburetor or fuel injection system. This restriction prevents the engine from maintaining the correct air-fuel ratio, especially under high-load or high-RPM conditions.
Clogged internal fuel filters or inline screens are the most frequent physical culprits. Most petcocks feature an internal plastic mesh tower filter that extends up into the fuel tank, along with an inline filter. If the tank contains rust, scale, or debris, these screens become choked, severely restricting fuel flow.
For vacuum-operated petcocks, cracked, pinched, or disconnected vacuum lines are a common cause of starvation. These lines fail to deliver the necessary engine manifold vacuum to pull the internal diaphragm open. Without this vacuum signal, the petcock remains closed or only partially open, starving the engine of fuel shortly after starting.
Blocked fuel tank breather vents can also create a vacuum lock inside the tank. As fuel flows out, air must enter the tank to replace it; if the vent hole in the gas cap or the tank breather tube is blocked, a vacuum forms inside the tank, physically holding the fuel back. A quick check is to open the gas cap when the engine starts to sputter; if the engine immediately recovers, the tank vent is clogged.
To verify the actual fuel flow rate, disconnect the fuel delivery line from the carburetor and drain it into a measured catch container. For vacuum petcocks, apply a safe external vacuum source to the vacuum port (or turn the valve to “PRI” if equipped) to observe if fuel flows freely and consistently, helping you confirm whether the starvation is a petcock issue or a carburetor problem.
When should you clean, rebuild, or replace the motorcycle fuel cock?
Deciding whether to clean, rebuild, or replace your motorcycle fuel cock depends on the physical condition of the metal housing, the availability of model-specific rebuild kits, and overall safety considerations. While minor debris and hardened O-rings can often be serviced, structural damage or severe wear requires a complete unit replacement.
If the petcock housing is structurally sound and the issue is simply debris or varnish, you can disassemble the unit, clean the internal passages with a label-authorized carburetor cleaner, and wash the reusable mesh filters. Ensure you wear eye protection and work in a well-ventilated space when using chemical cleaners.
If the housing is intact but the rubber seals, O-rings, or diaphragms are torn or hardened, installing a manufacturer-approved rebuild kit is a highly cost-effective solution. Always verify your vehicle model, year, interface, and dimensions from the specific product and vehicle documentation before purchasing a rebuild kit, as compatibility cannot be inferred from a category term alone.
You must replace the entire fuel cock assembly if the cast metal housing is cracked, the mounting threads are stripped, the internal selector face is deeply scored, or if compatible rebuild kits are unavailable in the Philippines. Operating a motorcycle with a compromised fuel cock housing poses severe safety risks, including sudden fuel loss or fire.
When reinstalling the petcock, always follow the torque specifications outlined in your motorcycle’s service manual to avoid stripping the soft aluminum threads of the fuel tank. Replace the mounting gasket or crush washers. Before starting the engine, perform a static leak test: fill the tank with a small amount of fuel, leave the engine off, and inspect the petcock and lines for several minutes to ensure there are absolutely no damp spots or drips.

Community discussion
Share your experience or ask a question. Comments are reviewed before publication.