
A puddle of oil beneath your motorcycle is a frustrating sight, especially under the intense tropical heat of the Philippines where engines run hot and lubrication is critical. A leaking motorcycle oil filter is a common issue that usually stems from a compromised rubber seal, improper installation torque, or a trapped double gasket. Resolving this issue quickly is vital to prevent severe engine damage and keep your oil from dripping onto your rear tire, which poses a major safety hazard on wet or dusty roads. Fortunately, identifying the cause and fixing the leak is a manageable task if you follow the correct diagnostic steps and safety precautions.
Identifying the Source of the Oil Leak
Before turning a single wrench, you must confirm that the oil filter is the true culprit. Oil has a tendency to migrate while riding, blown backward by the wind and pulled downward by gravity, which can easily mislead you about the leak’s origin.
To trace the leak, start by thoroughly cleaning the engine block and the surrounding area with a label-authorized degreaser. Once the surfaces are dry, spray a light dusting of aerosol foot powder or baby powder around the filter, drain plug, and crankcase seams.
Products mentioned in this guide
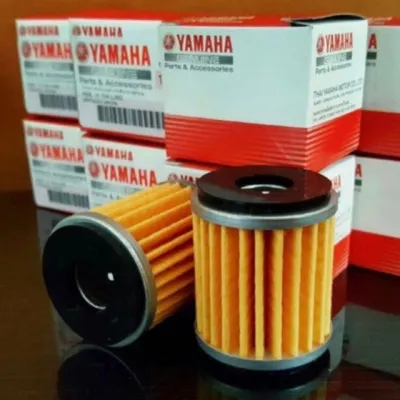
Prices are valid at publication and may change. Please refer to the product page for the latest price.
Start the engine and let it idle in a well-ventilated space while watching the powdered areas. You will quickly see a dark trail cutting through the white powder, pointing directly to the source of the leak.
If the trail originates above the filter, check the valve cover or cylinder head gaskets. If the trail starts at the very bottom of the engine, the drain plug or its crush washer may be failing. A leak originating directly from the seam where the filter meets the engine block confirms an oil filter issue.
Always perform these inspections with extreme caution. A recently running engine has hot exhaust pipes and scalding oil that can cause severe burns; let the bike cool down to a safe, warm-to-the-touch temperature before reaching into tight spaces.
Common Causes of Oil Filter Leaks
One of the most frequent culprits behind a leaking filter is a phenomenon known as double-gasketing. This occurs when the rubber O-ring from the old oil filter sticks to the engine block’s mating surface instead of coming off with the filter. When you spin the new filter on over it, the two gaskets fail to form a reliable seal, leading to a rapid and heavy oil leak once the engine starts.

Improper installation torque is another major factor. Under-tightening the filter allows engine vibrations to back it off over time, while over-tightening can crush, warp, or tear the delicate rubber gasket.
Cross-threading during installation can also prevent the filter from seating flush against the engine block. If the threads on the filter or the engine mount are misaligned, the filter will feel tight but will leave a gap on one side where pressurized oil can escape.
Using an incompatible or low-quality filter that does not match your motorcycle’s exact specifications can lead to immediate leaks. Even a fraction of a millimeter difference in the gasket diameter or thread pitch can prevent a proper seal.
In rare cases, a malfunctioning oil pressure relief valve can cause excessive oil pressure within the lubrication system. This extreme pressure can balloon the filter canister or blow the rubber gasket completely out of its groove.
Step-by-Step Guide to Fixing a Leaking Oil Filter
To fix a leaking filter, you must first gather the correct tools and replacement parts. You will need a replacement oil filter verified for your specific motorcycle model, fresh engine oil, a dedicated oil filter wrench, a drain pan, clean rags, and a torque wrench if specified by your manufacturer.
Park your motorcycle on a level surface using the center stand or a paddock stand to keep it stable. Place your drain pan directly beneath the oil filter and the engine drain plug to catch any escaping fluid.
If the oil is dirty or near its service limit, it is best to perform a complete oil change. Carefully remove the drain plug to empty the crankcase, then use your oil filter wrench to unscrew the leaking filter counterclockwise.
Once the old filter is off, inspect its mounting face to ensure the old rubber O-ring came off with it. Use a clean, lint-free rag to wipe the engine block’s mating surface, checking for any dirt, grit, or leftover gasket material that could ruin the new seal.
Prepare the new filter by dipping your finger into clean engine oil and applying a thin, even film to the rubber gasket. This lubrication prevents the gasket from binding, twisting, or tearing as you tighten the filter against the metal engine block.
Spin the new filter onto the mounting thread by hand, turning it clockwise. Ensure it spins smoothly without any binding or resistance, which would indicate cross-threading.
Once the gasket makes contact with the engine block’s mating surface, tighten the filter according to your motorcycle manufacturer’s exact specifications. This is typically hand-tight plus an additional half to three-quarters of a turn, or a specific low-torque value measured with a torque wrench.
Reinstall the drain plug with a new crush washer, fill the engine with the recommended volume of fresh oil, and start the motorcycle. Let it idle for a few minutes while inspecting the filter area for any signs of weeping, then check the oil level window or dipstick to ensure it is correct.
When to Seek Professional Motorcycle Repair
While replacing an oil filter is a straightforward task, certain underlying issues require the expertise of a qualified mechanic. If you discover that the threads on the engine block’s filter mount are stripped or cross-threaded, do not attempt to force a new filter on.
A cracked engine casing or a warped mounting surface cannot be fixed with a new filter or extra sealant. These structural issues prevent the gasket from seating flat and require professional machining or component replacement, as ignoring them can lead to catastrophic failures costing upwards of ₱50,000 in engine rebuilds.
If you have installed a new, correct-spec filter and torqued it precisely to specification, but oil continues to seep from the mating surface, there may be an internal pressure issue. A professional can connect a mechanical pressure gauge to diagnose a faulty oil pressure relief valve or a blocked internal passage.
Additionally, if your motorcycle’s oil pressure warning light remains illuminated after you have corrected the leak and topped off the oil, turn off the engine immediately. Continued operation under these conditions can lead to catastrophic engine failure, and a professional diagnostic is necessary to find the root cause.
Preventing Future Oil Filter Leaks
Preventing future leaks starts with meticulous part selection. Always verify the exact oil filter part number in your motorcycle’s owner’s manual or official parts catalog, as filters that look identical can have different thread pitches or gasket profiles.
Never install a dry filter gasket. The simple step of lubricating the rubber O-ring with clean engine oil before installation ensures it glides smoothly into place and seals evenly without binding.
Avoid the temptation to over-tighten the filter “just to be safe.” Using a torque wrench to meet the manufacturer’s specified torque is the most reliable way to prevent gasket distortion and thread damage.
Finally, stick to your motorcycle’s recommended oil and filter change intervals. Over time, heat cycles and environmental exposure can degrade the rubber gasket, making it brittle and prone to leaking even if the filter itself is not clogged.
Frequently Asked Questions (FAQ)
Can I just tighten the oil filter to stop the leak?
If the leak is caused by a slightly loose filter that was under-tightened during installation, gently tightening it to the manufacturer’s recommended spec may stop the leak. However, if the leak is due to a damaged, dirty, or double-stacked gasket, tightening it further will only crush the rubber and worsen the leak. Always inspect the gasket first rather than blindly overtightening the housing.
Is it safe to ride my motorcycle with a minor oil filter leak?
No, it is not safe to ride with even a minor oil filter leak. Under engine operating temperatures and pressures, a minor weep can quickly turn into a high-pressure spray, coating your rear tire and rear brake assembly in slick oil, which can cause a sudden loss of control. Furthermore, rapid oil loss can starve the engine of lubrication, leading to overheating and permanent internal damage within minutes.
Community discussion
Share your experience or ask a question. Comments are reviewed before publication.