
Choosing the right matting footboard for your Yamaha Aerox V1 involves selecting a material that balances wet-weather traction, long-term durability under intense tropical sun, and an exact physical fit that does not block access panels or controls. Because the Aerox V1 has specific floorboard contours, a precise match is essential to prevent slipping, water pooling, or interference with your feet during sudden stops. A well-chosen footboard mat protects the original plastic bodywork from scratches, scuffs, and mud, while also enhancing your overall riding stability. However, selecting an incompatible or poorly designed mat can lead to loose fitment, which poses a safety hazard if it shifts while you are navigating busy roads or tight corners.
In the Philippines, where riders frequently encounter sudden downpours, dusty roads, and high humidity, the choice of footboard matting directly impacts daily comfort and safety. The ideal accessory must withstand constant exposure to moisture and heat without warping, losing its grip, or trapping water underneath, which could lead to rust on hidden metal components. By understanding the specific design requirements of the Aerox V1 and comparing the available material options, you can make an informed decision that enhances both the utility and appearance of your scooter.
Verifying Fitment and Compatibility for the Aerox V1
Before purchasing any aftermarket accessory, verifying the exact fitment for your specific scooter model is the most critical step. The Yamaha Aerox V1 has a distinct floorboard geometry that differs from later generations, such as the Aerox V2 or Connected models. Even within the V1 production run, minor variations in body panel alignment or aftermarket modifications can affect how a footboard mat sits on the deck. Relying on vague product descriptions that claim “universal scooter fitment” or “fits all Aerox models” often leads to installation failures, as these generic mats rarely match the precise contours and mounting points of the V1.
Products mentioned in this guide
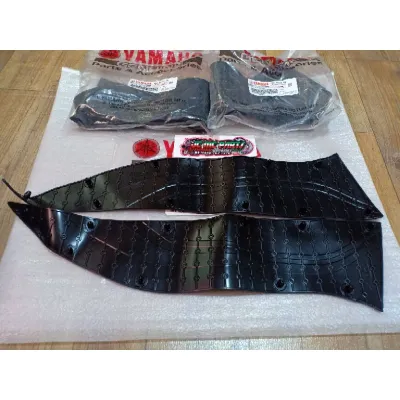
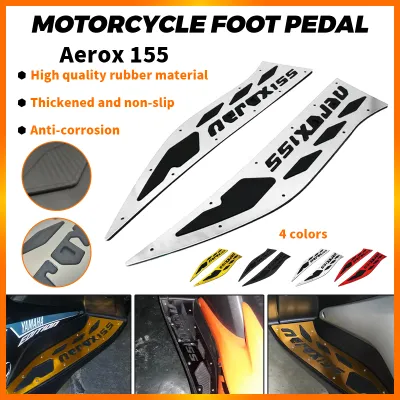
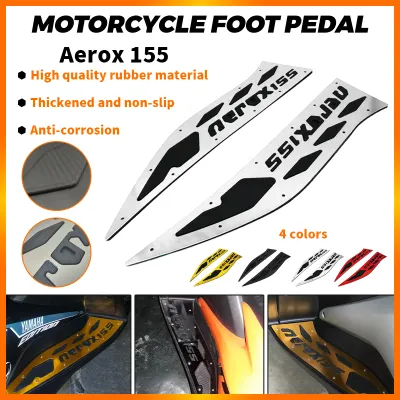
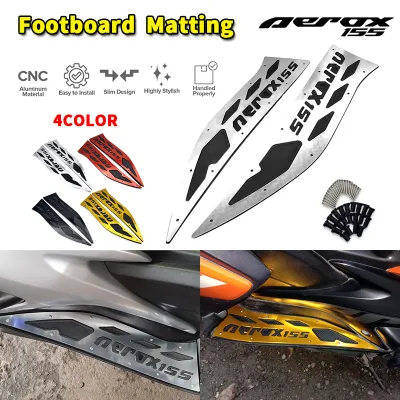
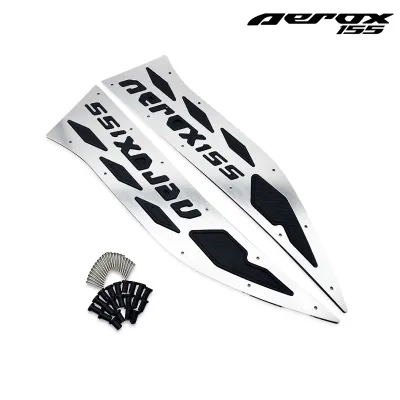
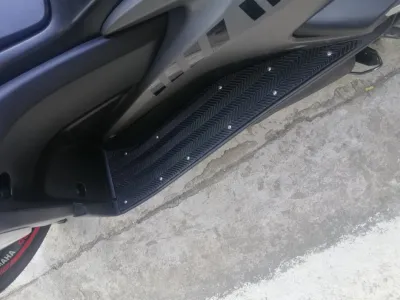
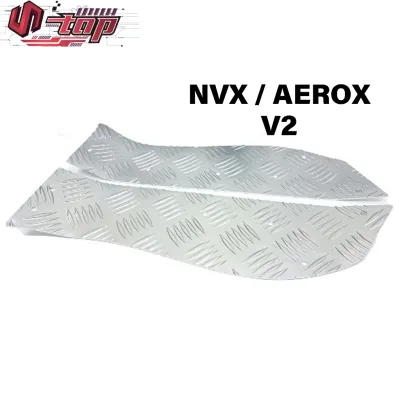
Prices are valid at publication and may change. Please refer to the product page for the latest price.
To ensure a perfect match, start by identifying your scooter’s exact model year and variant. Check your vehicle registration documents or the manufacturer’s label on the chassis to confirm it is indeed a V1. When browsing product listings, look for explicit compatibility statements that target the Aerox V1 specifically. A compatible mat should align perfectly with the factory-molded lines of the floorboard, leaving no gaps where dirt or water can accumulate.
Additionally, you must verify the physical layout of the mat against your scooter’s original deck. Pay close attention to the placement of mounting holes, kickstarter cutouts (if your specific sub-variant includes one), and the outer edge contours. If the mat requires mechanical fastening, the pre-drilled holes in the accessory must align precisely with the existing screw locations on the scooter’s frame or plastic panels. Forcing a mismatched mat into place by drilling new holes or bending the material can damage the scooter’s bodywork and compromise the structural integrity of the mounting points.
Comparing Common Footboard Mat Materials
The material of your footboard mat determines how well it performs under different riding conditions, how long it lasts, and how much maintenance it requires. In a tropical climate characterized by intense heat, high humidity, and heavy seasonal rainfall, the material must be resilient enough to handle extreme environmental shifts. A poor material choice can degrade quickly, fade under the sun, or become dangerously slick when wet.

When evaluating different materials, consider the balance between grip, durability, and weight. Heavier mats can add unnecessary bulk, while excessively thick mats might slightly alter your foot positioning or reduce the clearance around the side stand and center stand. Furthermore, the material’s texture plays a significant role in how easy it is to clean after riding through muddy streets or dusty roads. Some materials trap grime in deep grooves, requiring thorough scrubbing, while others can be wiped clean in seconds.
Rubber and Silicone Options
Rubber and silicone are highly popular choices for daily commuters due to their flexibility, shock-absorbing properties, and natural water resistance. These materials excel at dampening engine vibrations, providing a more comfortable and cushioned feel under your feet during long rides. The natural tackiness of rubber offers reliable grip even when your footwear is wet, making it a practical choice for the rainy season.
However, rubber and silicone mats have distinct limitations that you must consider. The deep grooves and patterns designed to channel water away can easily trap mud, sand, and road grime, requiring regular cleaning with a brush to maintain their appearance and effectiveness. Additionally, prolonged exposure to intense ultraviolet rays can cause lower-quality rubber to dry out, fade, crack, or become brittle over time. To prolong the lifespan of a rubber mat, it is advisable to park your scooter in shaded areas whenever possible and avoid using harsh chemical dressings that can make the surface slippery.
Aluminum and Grip Tape Combinations
For riders seeking a more rigid, premium look and enhanced durability, machined aluminum plates combined with grip tape inserts are a compelling alternative. Aluminum footboards offer excellent structural rigidity and a precise, custom-fit appearance that complements the sporty aesthetic of the Aerox V1. Because aluminum does not degrade under ultraviolet light or absorb moisture, these mats can last the lifetime of the scooter if properly maintained.
The primary challenge with aluminum footboards is maintaining adequate traction. Raw aluminum can become extremely slippery when wet, which is why high-quality options incorporate textured grip tape or raised rubber inserts into the design. Over time, this grip tape will wear down from the friction of your shoes and exposure to water, requiring periodic replacement to ensure continued safety. Furthermore, aluminum is a highly conductive material; when parked under direct sunlight, the metal plates can absorb significant heat, transferring that warmth to your feet and potentially softening any adhesive backing used to secure the mat.
Critical Features to Evaluate Before Purchase
When selecting a matting footboard for your Aerox V1, several functional features must be carefully evaluated to ensure safety and usability. First and foremost is the depth and design of the anti-slip pattern. A flat or shallow pattern may look sleek, but it will fail to provide sufficient traction during heavy downpours. Look for mats with deep, well-defined channels that allow water to drain away from your shoes, ensuring your feet remain securely planted even during sudden braking maneuvers.
Second, assess the overall thickness and weight of the mat. While a thicker mat may offer more cushioning, it must not interfere with the operation of the scooter’s controls or stands. Ensure that the mat’s edges do not protrude in a way that restricts the full deployment or retraction of the side stand and center stand. A mat that is too thick can also reduce the effective ground clearance of your scooter, making it more susceptible to scraping when navigating high speed bumps or steep driveways.
Finally, confirm that the mat features precise cutouts for all essential components. The Aerox V1 has specific areas that require unobstructed access, such as the side stand pivot, passenger foot pegs, and any under-floorboard panels that house the battery or electrical wiring. A properly designed mat will have clean, finished cutouts that allow these parts to move freely without rubbing or binding. Avoid products that require you to trim or modify the mat yourself, as DIY alterations can weaken the material and leave sharp or uneven edges.
Installation Precautions and Safety Boundaries
Installing a footboard mat may seem like a simple cosmetic upgrade, but it carries important safety implications that must not be overlooked. Before beginning the installation, consult your scooter’s original owner’s manual to understand the location of key components beneath the floorboard. Ensure that the installation process—whether using screws, bolts, or heavy-duty adhesive—does not pinch, puncture, or obstruct any electrical wiring, throttle cables, or brake lines running underneath the deck.
If the mat relies on mechanical fasteners, use only the designated mounting points provided by the manufacturer. Avoid drilling new holes into the scooter’s frame or structural plastic panels, as this can weaken the chassis and void your warranty. When using adhesive tape or liquid adhesives, thoroughly clean the original floorboard surface with a mild, non-greasy cleaner to remove all dirt, wax, and oil. Proper surface preparation ensures a strong bond, preventing the mat from lifting or shifting while you are riding, which could lead to a loss of control.
Safety is the absolute priority when modifying any part of your motorcycle. If at any point during the installation you notice that the mat obstructs the full range of motion of the foot pegs, interferes with the brake pedal, or prevents the stands from functioning correctly, stop the installation immediately. Do not attempt to ride the scooter with a poorly fitted or unsecured mat. If you are unsure about the mounting process or if the mat requires modifications that conflict with your scooter’s manual, seek the assistance of a qualified professional mechanic to ensure a safe and secure installation.
Sourcing and Verifying Accessories in the Philippines
Navigating the market for motorcycle accessories in the Philippines requires a cautious approach to avoid counterfeit, low-quality, or incompatible products. While online marketplaces offer a vast selection of footboard mats, prices in ₱ can vary significantly, often reflecting differences in material quality and manufacturing precision. When shopping online, do not rely solely on stock photos; instead, carefully read customer reviews and look for real-life photos uploaded by other Aerox V1 owners to verify the actual fitment and color.
Before finalizing an online purchase, it is highly recommended to contact the seller directly and request exact dimension photos or technical diagrams of the mat. Compare these measurements with your scooter’s physical floorboard to confirm compatibility. Be wary of sellers who offer extremely low prices but cannot provide clear details about the material composition or fitment guarantees. A robust return policy is also essential, allowing you to return the product if it does not match the advertised specifications upon arrival.
For the highest level of assurance, consider purchasing your footboard mat from authorized dealers or established local motorcycle accessory shops. Visiting a physical store allows you to inspect the material quality firsthand, feel the texture of the grip, and even test-fit the mat on your scooter before handing over any payment. Physical shops also provide reliable after-sales service, warranty support, and professional installation advice, ensuring that your new accessory is fitted safely and correctly for your daily rides.
Frequently Asked Questions (FAQ)
Will a universal footboard mat fit the Aerox V1?
Universal footboard mats are generally not recommended for the Yamaha Aerox V1. Because the Aerox V1 features a highly contoured floorboard with specific angles, mounting points, and clearance requirements, a generic flat mat will not sit securely. Attempting to cut or trim a universal mat to fit often ruins the finished edges, exposes the inner material layers to water, and voids any return policies. For safety and aesthetic reasons, it is always best to choose a mat designed specifically for the Aerox V1.
How do I clean and maintain a rubber footboard mat?
To clean a rubber or silicone footboard mat, remove it from the scooter if possible, or wash it in place using mild soap, water, and a soft-bristled brush. Gently scrub the grooves to dislodge accumulated mud, dust, and road grime. Avoid using harsh chemical degreasers, bleach, or high-pressure washers directly on the mat, as these can dry out the rubber, cause cracking, or degrade the adhesive backing. Allow the mat to dry completely in a shaded area before riding to prevent slipping.
Does changing the footboard mat void the scooter's warranty?
In most cases, installing a simple drop-in or adhesive-backed footboard mat will not void your scooter’s warranty, as it is considered a non-structural cosmetic accessory. However, if the installation requires drilling into the frame, modifying the original wiring, or altering structural body panels, it could potentially void parts of your warranty. Always consult your specific warranty booklet or contact your local dealership before making any permanent modifications to your scooter.
Community discussion
Share your experience or ask a question. Comments are reviewed before publication.