
Choosing the right brake caliper for your Yamaha Mio i 125 is a critical decision that directly impacts your safety, riding comfort, and budget. As one of the most popular daily-commuter automatic scooters in the Philippines, the Mio i 125 frequently encounters demanding road environments. From navigating the dense, stop-and-go traffic of metropolitan areas to handling sudden downpours and flooded streets during the monsoon season, your front braking system must perform consistently. When the stock front caliper begins to show signs of wear, or when you find yourself needing more responsive stopping power, you face a choice between replacing it with an Original Equipment Manufacturer (OEM) unit or upgrading to an aftermarket alternative.
There is no single best option for every rider, as the ideal choice depends on your daily riding conditions, budget, and mechanical experience. OEM calipers are the superior choice for daily commuting, budget-conscious replacements, and riders who want a guaranteed bolt-on fitment without modifying other components. Conversely, aftermarket calipers are highly suitable for riders seeking improved brake lever feel, enhanced aesthetic appeal, or better heat dissipation under heavy loads. However, these performance upgrades are only beneficial if you correctly match the caliper’s piston volume with your master cylinder ratio and fork setup. Because the front brake provides the majority of your scooter’s stopping power, any modification must prioritize proper hydraulic dynamics and professional installation over visual styling.
Quick Answer: OEM vs Aftermarket Calipers for the Mio i 125
When choosing a brake caliper for mio i 125 setups, the decision comes down to your practical needs and mechanical setup. An OEM caliper is the best option if you want a reliable, direct-fit replacement that works perfectly with your stock master cylinder and forks. It offers predictable braking performance, standard heat management, and hassle-free maintenance at an affordable price point.
Products mentioned in this guide
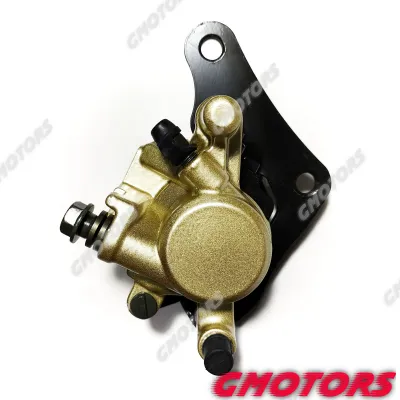
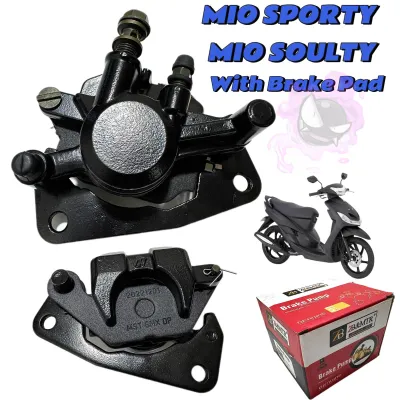
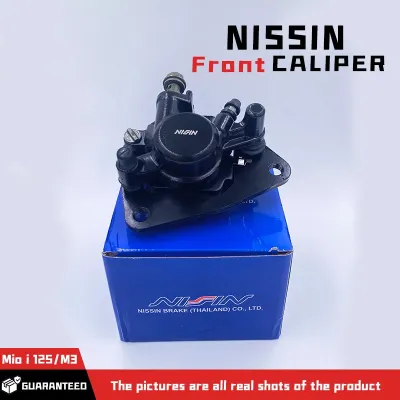
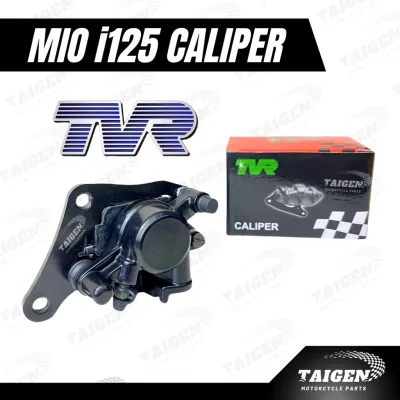
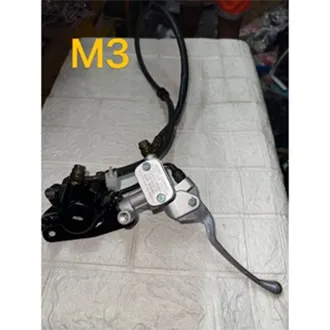
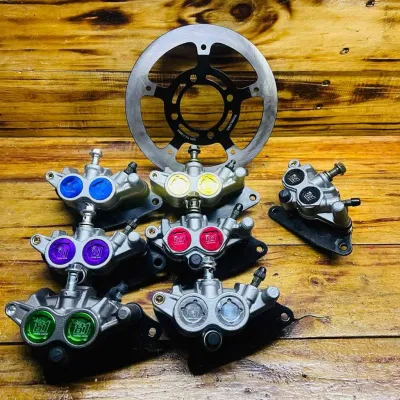
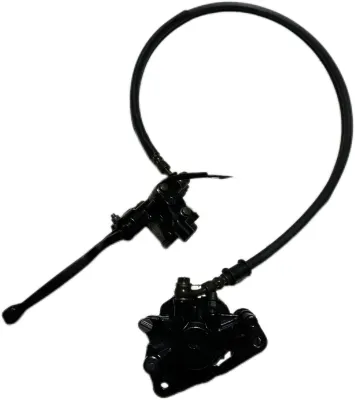
Prices are valid at publication and may change. Please refer to the product page for the latest price.
An aftermarket caliper is a suitable upgrade if you are looking for stronger initial bite, better lever modulation, and improved heat dissipation during aggressive riding. However, aftermarket calipers require custom mounting brackets, precise alignment checks, and potentially an upgraded master cylinder to prevent a spongy lever feel. For daily commuters, the OEM caliper remains the safest and most cost-effective choice.
Identify Your Riding Style and Braking Needs
Before purchasing a new brake caliper, you must diagnose your actual riding requirements and evaluate the current state of your braking system. The Yamaha Mio i 125 is a lightweight scooter, weighing approximately 92 to 94 kilograms dry, which means it does not require extreme clamping force to come to a halt under normal conditions. However, the way you ride and the environments you navigate should dictate your choice of hardware.

Daily city commuters who travel short to medium distances in urban traffic require consistency and low maintenance. In these scenarios, the brakes are applied frequently but at relatively low speeds, making predictable modulation and reliability in wet weather the primary concerns. For highway touring or long-distance riding across provincial routes, brakes must manage higher speeds and longer downhill descents, where heat buildup becomes a factor. Aggressive riders or those who participate in local track events demand immediate initial bite and excellent heat dissipation to prevent brake fade during repeated hard braking.
It is also crucial to recognize the physical limits of your machine. The Mio i 125 typically runs on narrow stock tires, which have a limited contact patch with the road. Installing an overly aggressive, high-piston aftermarket caliper on a scooter with stock tires can easily overwhelm the available traction, leading to sudden front-wheel lockup and low-side crashes, especially on wet or dusty asphalt. Your braking force must always align with your tire grip.
If you are considering a replacement because of a suspected malfunction, look for these observable signs of a failing stock caliper:
- Sticking or seized pistons: The caliper fails to retract fully, causing the brake pads to drag against the disc, which generates excessive heat and slows the scooter down.
- Uneven brake pad wear: One pad is significantly thinner than the other, indicating that the sliding pins or pistons are not distributing pressure evenly.
- Fluid leaks around the piston seals: Wet patches or a drop in the master cylinder fluid level, which directly compromises hydraulic pressure and stopping power.
- A spongy or excessively soft brake lever: This often points to air entering the hydraulic system through degraded caliper seals or a failing piston.
OEM Brake Calipers: Reliability and Direct Fitment
The OEM brake caliper supplied by Yamaha is engineered specifically for the Mio i 125’s weight, speed capabilities, and hydraulic system. This single-piston, sliding-type caliper is designed to offer a balanced, forgiving, and highly reliable braking experience for riders of all skill levels.
The most significant advantage of choosing an OEM replacement is guaranteed, direct bolt-on compatibility. Because it is designed to match the factory specifications exactly, the OEM caliper aligns perfectly with the stock front forks, wheel axle, and the standard 190mm front brake disc. It requires no custom brackets, adapter plates, or modifications to the brake hose routing. This plug-and-play nature eliminates the risk of misalignment, which can cause premature pad wear, disc warping, or localized overheating.
Furthermore, the OEM caliper is hydraulically matched to the stock master cylinder’s piston bore. This precise pairing ensures a predictable, linear brake lever feel. When you pull the lever, the volume of brake fluid displaced by the master cylinder moves the caliper piston by a calculated distance, preventing sudden, unexpected locking of the front wheel. This predictability is highly beneficial on slippery, rain-slicked roads where sudden panic braking is common.
Maintenance and parts availability also favor the OEM route. Authorized Yamaha 3S shops and reputable local motorcycle parts dealers across the Philippines consistently stock genuine Yamaha replacement parts. Whether you need a complete caliper assembly, new piston seals, slide pins, or genuine brake pads, sourcing these items is straightforward. This widespread availability ensures that your scooter remains operational without long wait times for specialized import parts.
However, the OEM caliper does have limitations. It is constructed from cast aluminum with a standard single-piston layout, which prioritizes cost-effectiveness and durability over high-performance heat dissipation. Under continuous, heavy braking—such as descending steep mountain passes with a passenger—the caliper can struggle to shed heat quickly. This can lead to brake fade, a condition where the brake fluid heats up, causing the lever to feel spongy and reducing overall stopping performance. For standard daily commuting, however, these limits are rarely reached.
Aftermarket Brake Calipers: Performance Upgrades and Fitment Challenges
Upgrading to an aftermarket brake caliper is a popular choice for riders who want to customize their Mio i 125 or demand higher performance. These calipers are available in various configurations, most notably multi-piston designs (such as dual-piston or four-piston setups) and alternative mounting styles.
The primary performance benefit of an aftermarket caliper is improved brake modulation and initial bite. Multi-piston calipers distribute hydraulic pressure over a larger brake pad surface area. This allows you to apply braking force more progressively, giving you finer control over how quickly the scooter slows down. Additionally, many aftermarket options feature CNC-machined aluminum bodies with integrated cooling fins, which dissipate heat much more effectively than the cast-iron or basic cast-aluminum OEM units. This superior heat management keeps the brake fluid cooler, maintaining a firm lever feel even during spirited riding.
Despite these performance advantages, installing an aftermarket caliper introduces several mechanical complexities and fitment challenges:
- The need for custom brackets: Unlike the OEM unit, most aftermarket calipers do not bolt directly onto the Mio i 125's front fork legs. You will typically need a CNC-machined adapter bracket to offset the caliper correctly. If this bracket is poorly manufactured or misaligned by even a fraction of a millimeter, the caliper will sit crookedly relative to the disc, causing uneven pad wear, constant rubbing, and reduced braking efficiency.
- Mismatched master cylinder ratios: If you upgrade to a larger two-piston or four-piston caliper while keeping the stock master cylinder, you may experience a spongy, long lever pull. This occurs because the stock master cylinder's small piston must push a larger volume of fluid to move the multiple caliper pistons. Conversely, if the ratio is too aggressive, the lever may feel incredibly hard, with an "on-off" switch behavior that makes progressive braking nearly impossible.
- Clearance issues: Larger aftermarket calipers are physically wider than the slim OEM unit. You must verify that the caliper body does not rub against the wheel spokes, the inner side of the front fender, or the speedometer cable. In some cases, aftermarket wheels or oversized brake discs are required to make the new caliper fit safely.
Comparing OEM and Aftermarket Calipers: Key Dimensions
To help you make an informed decision, it is helpful to compare these two paths across several practical dimensions. When choosing, you must weigh the upfront simplicity and long-term reliability of OEM parts against the potential performance gains and customization options of aftermarket upgrades.
Braking Power and Lever Modulation
The OEM caliper provides adequate, predictable stopping power that is highly forgiving for everyday riders. The lever feel is soft but progressive, making it easy to manage in wet weather. Aftermarket calipers, particularly multi-piston designs, offer significantly higher clamping force and a much firmer lever feel. This allows for precise, single-finger braking, but it requires a more skilled hand to avoid locking up the front tire on slippery surfaces.
Installation and Hardware Requirements
Installing an OEM caliper is a straightforward replacement task that uses your existing mounting bolts, brake lines, and brackets. Aftermarket upgrades, however, often turn into a multi-part project. You may need to purchase a matching adapter bracket, a larger aftermarket brake disc (such as a 200mm or 220mm rotor), and high-pressure braided stainless steel brake lines to fully realize the benefits of the upgraded caliper.
Maintenance and Long-Term Cost of Ownership
OEM calipers are incredibly durable and require minimal maintenance beyond regular pad replacements and occasional cleaning. Rebuild kits, including rubber seals and boot covers, are cheap and widely available. Aftermarket calipers often require specialized brake pads that may not be available at small, local shops. Furthermore, finding replacement internal seals for specific aftermarket brands can be difficult, sometimes requiring you to replace the entire caliper if a seal begins to leak.
| Dimension | OEM Caliper | Aftermarket Upgrades |
|---|---|---|
| Fitment Type | Direct bolt-on, no modifications | Requires custom adapter bracket |
| Brake Lever Feel | Soft, predictable, and forgiving | Firm, highly responsive, and direct |
| Braking Power | Standard (optimized for daily commuting) | High (increased clamping force) |
| Heat Dissipation | Standard (prone to fade under extreme load) | Excellent (machined aluminum, better airflow) |
| Installation Complexity | Low (ideal for basic DIY maintenance) | High (requires precise alignment and bleeding) |
| Parts Availability | Excellent (available at any Yamaha 3S shop) | Variable (brand-dependent, specialized pads) |
| Required Supporting Mods | None (uses stock master cylinder and disc) | Often requires upgraded lines, disc, or master cylinder |
Safety Boundaries and Installation Requirements
Because the braking system is your motorcycle’s most critical safety feature, any work performed on it must adhere to strict safety standards. Incorrect installation or using incompatible parts can lead to complete brake failure, putting your life at risk.
Before purchasing any aftermarket brake component, you must verify the hydraulic compatibility of your setup. The hydraulic ratio between your master cylinder piston and your caliper piston(s) determines your braking leverage. If you install a caliper with significantly larger or more numerous pistons, you must verify if your stock master cylinder can displace enough fluid. If the master cylinder is too small, you will have to pull the brake lever almost to the handlebar grip before the pads make firm contact with the disc, creating a highly dangerous riding condition.
When replacing or servicing your caliper, always check the recommended brake fluid type. For the Yamaha Mio i 125, this specification is molded directly onto the top of the master cylinder reservoir cap (typically DOT 3 or DOT 4). Never mix different types of brake fluid, as chemical incompatibilities can cause the fluid to gel, blocking the tiny ports inside the master cylinder and causing the brakes to lock up or fail completely. Always use fresh fluid from a sealed container, as glycol-based brake fluid absorbs moisture from the air, which lowers its boiling point and reduces performance.
During the installation process, perform the following physical clearance and safety checks:
- Verify bracket alignment: Ensure that the brake caliper is centered perfectly over the brake disc. The disc should run precisely down the middle of the caliper channel, with equal clearance on both sides.
- Check for wheel clearance: Spin the front wheel by hand while the scooter is on its center stand. Listen for any rubbing sounds and visually confirm that the caliper body does not touch the wheel spokes or the rim.
- Inspect brake hose routing: Turn the handlebars fully from lock to lock. Ensure that the brake hose is not stretched, pinched, or rubbing against the front fender, body panels, or suspension components.
- Bleed the system thoroughly: Ensure that every trace of air is purged from the brake lines. Air is compressible, and even a tiny bubble trapped in the caliper or line will result in a spongy, ineffective brake lever.
If you do not possess the proper tools—such as a torque wrench to tighten mounting bolts to factory specifications, high-quality flare nut wrenches, and a reliable brake bleeding kit—do not attempt to install a brake caliper yourself. If you are unsure about bracket alignment, piston clearance, or how to properly bleed the air from your hydraulic lines, stop immediately and consult a qualified professional motorcycle mechanic at an authorized service center.
How to Choose the Right Caliper for Your Setup
To make your final decision, evaluate your budget, mechanical setup, and daily riding conditions against these clear, condition-based guidelines.
Choose OEM if:
- You use your Yamaha Mio i 125 primarily for daily commuting, running errands, or ride-hailing services in city traffic.
- You want a hassle-free, cost-effective replacement that bolts directly onto your stock front forks without needing extra brackets.
- You prefer low-maintenance components with easily sourceable replacement pads and rebuild kits from local Yamaha dealers.
- Your current master cylinder, front forks, and brake disc are completely stock, and you want to maintain the predictable factory braking feel.
Choose Aftermarket if:
- You have already upgraded your front suspension, installed high-grip performance tires, or replaced your master cylinder, and you need a caliper to match.
- You frequently ride on long, steep downhill routes or participate in track days where standard brakes are prone to overheating and fading.
- You are willing to invest in high-quality supporting hardware, such as custom CNC-machined brackets and braided steel lines, to ensure a safe installation.
- You want to customize the visual appearance of your scooter and value a firm, highly responsive brake lever feel.
Verify first if:
- You are unsure about the exact mounting hole spacing on your front fork legs, as different model years of the Mio series can have subtle design variations.
- You are buying an aftermarket caliper and do not know if it comes with the correct adapter bracket for a stock 190mm disc or if it requires an oversized 200mm/220mm rotor.
- Your current brake disc is worn below its minimum thickness limit (typically stamped on the disc itself); installing a new caliper on a thin, warped disc is highly unsafe and will ruin your new brake pads.
Frequently Asked Questions (FAQ)
Can I use a brake caliper from another Yamaha scooter on the Mio i 125?
While several Yamaha scooters share similar design philosophies, you cannot assume that calipers are directly interchangeable. Models like the Mio Sporty, Mio Soul i 125, or Aerox may have different front fork mounting hole spacings, disc offsets, or piston sizes. Even if a caliper physically bolts onto your fork leg, the alignment relative to the brake disc centerline might be slightly off. Always verify the exact OEM part numbers or physically measure the mounting pitch and offset before attempting to swap calipers between different scooter models.
Do I need to change the brake master cylinder when upgrading the caliper?
If you are replacing your stock caliper with an OEM unit or a standard single-piston aftermarket equivalent, you do not need to change your master cylinder. However, if you upgrade to a larger multi-piston caliper (such as a 4-piston design), the stock master cylinder will likely feel spongy because it cannot move enough fluid efficiently. To maintain proper hydraulic leverage, a firm lever feel, and safe stopping distances, you should pair a multi-piston caliper with an aftermarket master cylinder that has a larger piston bore diameter.
How often should I rebuild or service my Mio i 125 brake caliper?
You should inspect your brake caliper during every regular oil change or at least every 5,000 kilometers. In the tropical climate of the Philippines, heavy rain, road grime, and floodwater can quickly degrade brake components. Service your caliper immediately if you notice sticking pistons, uneven pad wear, or a spongy lever feel. Under normal operating conditions, it is good practice to flush and replace your brake fluid every two years or 20,000 kilometers, and rebuild the caliper with new rubber seals whenever you observe fluid weeping around the pistons.
Community discussion
Share your experience or ask a question. Comments are reviewed before publication.