
Finding the right visor or windshield for your Yamaha Sniper 155 involves balancing aerodynamic performance, rider comfort, and visual clarity. As one of the most popular underbone motorcycles on the road, the Sniper 155 features a sharp, aggressive front fairing designed for sporty riding. Adding an aftermarket visor can significantly alter how wind flows over your helmet and chest, affecting both your daily commute and long-distance weekend rides. However, selecting the wrong style or material can lead to poor fitment, increased vibration, or even safety hazards on the road. To make an informed decision, you must evaluate how different designs interact with your riding posture, verify local road regulations, and ensure the mounting hardware is fully compatible with your motorcycle’s existing structure.
Comparing Visor and Windshield Styles for the Sniper 155
Sport screens are compact, low-profile accessories designed to maintain the sleek, aggressive aesthetic of the underbone. They direct wind blast away from your lower torso but leave your shoulders and helmet exposed to the oncoming airflow. This setup is highly suitable for urban riding where speeds are moderate and maximum ventilation is desired to combat tropical heat. Because they add minimal surface area, sport screens have a negligible impact on the motorcycle’s handling in windy conditions.
Tall touring windshields, on the other hand, are designed to deflect wind much higher, pushing the main air stream over your helmet or at least to the very top of it. This significantly reduces wind buffeting and chest pressure during long-distance travel on open highways. However, a taller screen increases the aerodynamic drag on the front of the motorcycle, which can slightly alter handling in strong crosswinds. Riders who frequently travel long distances often find the reduction in fatigue worth the slight change in wind sensitivity.
Products mentioned in this guide
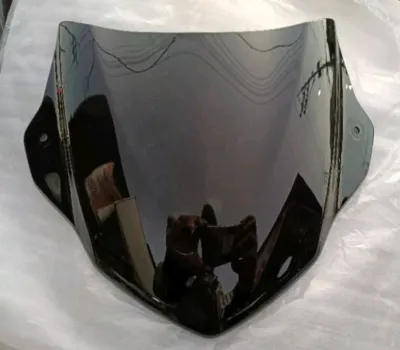
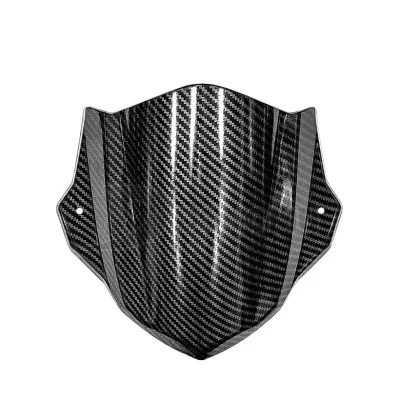
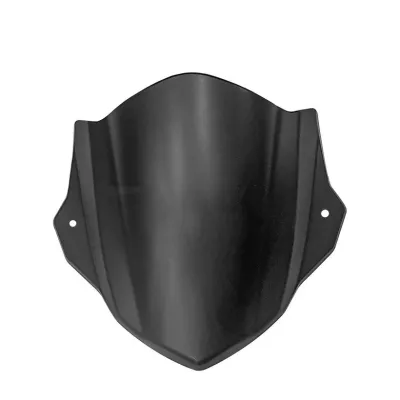
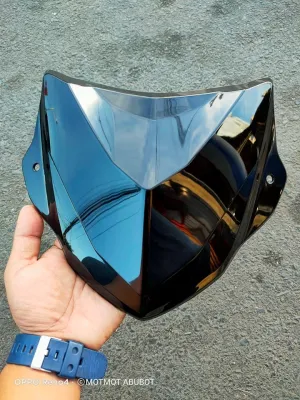
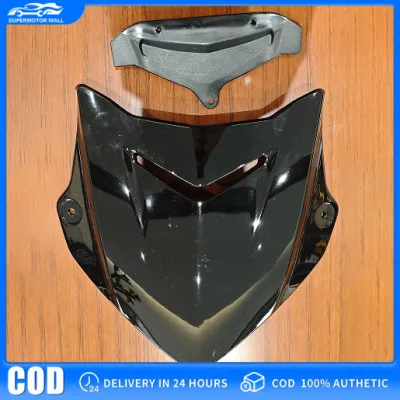
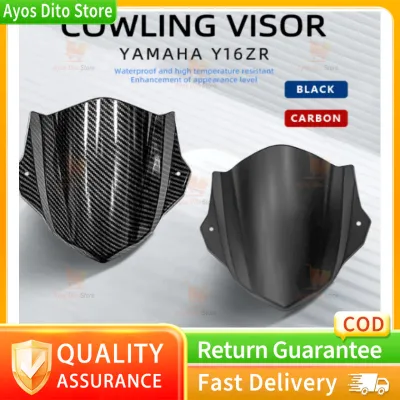
Prices are valid at publication and may change. Please refer to the product page for the latest price.
Your typical riding posture also dictates which screen profile is most effective. If you frequently tuck in for a sporty riding stance, a shorter sport visor provides a clean pocket of air to slip under. If you prefer an upright riding position for daily commuting, a medium-to-tall windshield helps minimize neck fatigue by absorbing the brunt of the oncoming wind. Matching the screen height to your seated eye level is crucial to ensure you do not have to look directly through the top edge of the plastic.
Tint levels are another critical consideration, directly impacting visibility across different times of day. Clear visors offer unobstructed vision and are highly recommended if you frequently ride at night, during dawn or dusk, or through heavy tropical rainstorms where light levels drop rapidly. They do not offer glare reduction, meaning you may need to rely on a drop-down sun visor inside your helmet during bright days.
Lightly tinted or smoke visors offer a middle ground, reducing the harsh glare of the midday sun while still allowing reasonable visibility during overcast conditions. Heavily smoked or dark-tinted visors provide excellent glare reduction and keep the motorcycle looking aggressive, but they can become highly hazardous at night on unlit provincial roads, making it difficult to spot potholes, debris, or pedestrians. Always prioritize your primary riding hours when choosing a tint level.
Material composition determines how well the visor stands up to road debris and environmental exposure. Polycarbonate is a highly durable thermoplastic known for its exceptional impact resistance. It is flexible and tends to bend or deform rather than shatter when struck by flying pebbles or road debris, making it a safer option for high-speed riding. Check the manufacturer’s product specifications to verify the material type before purchasing.
Acrylic, often marketed as PMMA or plexiglass, is another common material used in budget-friendly visors. While acrylic offers excellent optical clarity and is highly resistant to scratching, it is much more brittle than polycarbonate. Under a severe impact, an acrylic windshield is more likely to crack or shatter into sharp fragments, which poses a potential safety risk to the rider. Always check the manufacturer’s product specifications to verify the material type before purchasing.
Critical Fitment and Legal Factors to Check Before Buying
Fitment verification is the most crucial step before purchasing any aftermarket accessory for your Yamaha Sniper 155. Because the front fairing of the Sniper 155 has specific contours, angular lines, and integrated lighting, a visor must match these dimensions exactly. Even minor variations in the model year or trim level can result in misaligned mounting holes or brackets that rub against the painted fairings. Never assume a visor designed for a different underbone model will fit your motorcycle.

When evaluating a potential visor, inspect the bracket geometry and mounting hole alignment. The brackets must align perfectly with the factory mounting points on the handlebar cover or front cowl without requiring you to force, bend, or stress the plastic components. If a bracket requires excessive force to line up, it will constantly exert stress on the fairing, eventually leading to hairline cracks around the mounting holes due to engine and road vibrations.
Clearance is another physical factor to check. A properly fitted windshield must not interfere with the full range of motion of your handlebars. Turn the handlebars completely from lock to lock to ensure the visor or its mounting brackets do not pinch your brake lines, throttle cables, or electrical wiring, and that they do not strike the side mirrors or your hands. Any contact between the accessory and the motorcycle’s controls can compromise your safety on the road.
Beyond physical fitment, you must ensure the accessory complies with local land transportation regulations in the Philippines. The Land Transportation Office (LTO) and local government units enforce specific rules regarding motorcycle modifications to maintain road safety. Windshields must not obstruct the rider’s clear view of the road ahead, meaning extremely tall, heavily tinted screens that force you to look through them rather than over them may be deemed illegal.
Additionally, ensure the windshield does not protrude excessively beyond the width of the handlebars or create sharp, outward-facing edges that could pose a hazard to pedestrians or other motorists in tight traffic. The mounting of the visor must also keep the primary headlamp and turn signals completely unobstructed from all forward-facing angles. Non-compliant modifications can result in fines or failure during vehicle registration renewal.
To avoid compatibility issues, always review the product packaging or official documentation for an explicit model compatibility list. Avoid accessories that rely on generic descriptions like “universal underbone visor” or “fits most scooters.” A dedicated product label confirming compatibility specifically with the “Yamaha Sniper 155” ensures the manufacturer has designed and tested the product for your specific motorcycle geometry.
Verifying Installation Safety and Hardware Requirements
Before beginning the installation of your new visor, consult your motorcycle’s owner’s manual to understand the structural limits of the front cowl and fairings. The plastic bodywork of underbone motorcycles is designed to support specific aerodynamic loads, and adding an oversized windshield can exceed these limits, leading to loose panels or damaged mounting tabs over time. Knowing these limits helps you avoid installing an accessory that is too heavy or catches too much wind.
Carefully inspect your existing mounting hardware, rubber grommets, and well nuts before installing the new accessory. Over time, exposure to heat, humidity, and rain can cause rubber grommets to dry out, crack, or lose their elasticity, while metal screws and well nuts may suffer from thread stripping or corrosion. Replacing these worn components with fresh, high-quality hardware is essential to secure the visor properly and prevent it from rattling.
Well nuts, which consist of a rubber sleeve with a brass nut embedded at one end, play a vital role in isolating vibrations between the metal brackets and the plastic fairings. When tightening the bolts, the rubber sleeve expands behind the fairing panel, securing it in place without direct plastic-to-metal contact. Ensure these are installed correctly and tightened to the manufacturer’s torque specifications to avoid crushing the plastic.
It is critical to recognize the safety boundaries of DIY installation. If the aftermarket visor kit you purchased requires you to drill new holes into the factory fairings, cut away sections of the plastic cowl, or make any modifications to the motorcycle’s structural frame, stop the installation immediately. Modifying these components can permanently weaken the fairings and void your motorcycle’s warranty.
In such cases, or if you feel unsure about handling the delicate plastic clips and wiring harnesses behind the front cowl, seek the assistance of a qualified motorcycle mechanic. Professional installation ensures that all brackets are securely mounted, wires are routed safely away from moving parts, and the structural integrity of your Yamaha Sniper 155 remains fully intact. Prioritizing professional help prevents costly damage to your motorcycle’s bodywork.
Sourcing Reliable Parts and Avoiding Incompatible Fakes
Sourcing your visor from reputable channels is the best way to ensure you receive a genuine, high-quality product that fits correctly and lasts. Prioritize purchasing from authorized Yamaha dealers, official brand accessory stores, or highly rated sellers on established ecommerce platforms. These sellers are more likely to provide authentic products backed by manufacturer support and accurate product descriptions.
Be vigilant for warning signs that indicate a product may be a counterfeit or poorly manufactured imitation. Suspiciously low pricing, often significantly below the average market rate for established brands, is a primary red flag. Other warning signs include flimsy or generic packaging, the absence of official brand logos, and a lack of clear safety certifications or model-specific fitment labels on the box.
Counterfeit visors are frequently made from low-grade, brittle plastics that can easily shatter under minor impacts, creating sharp shards that pose a severe injury risk during a fall. They also tend to have poorly aligned mounting holes, forcing you to stress your fairings during installation, and may yellow or cloud rapidly when exposed to intense tropical sunlight. Investing in a genuine product protects both your motorcycle and your personal safety.
Before finalizing your purchase, verify the seller’s return policies and warranty terms. A reputable manufacturer or seller will offer a clear return window if the product arrives damaged or does not align with your Sniper 155 as advertised. Additionally, check if the seller provides replacement mounting hardware, such as extra rubber grommets or specific bolts, which can be difficult to source individually if lost or damaged during installation.
Frequently Asked Questions (FAQ)
Can I use a universal windshield on the Yamaha Sniper 155?
Universal windshields are designed with highly adjustable, multi-fit brackets intended to clamp onto handlebars or mirror stems across various motorcycle models. However, because the Yamaha Sniper 155 features a fully enclosed handlebar cowl and highly contoured front fairings, these universal brackets rarely align correctly with the factory mounting points. Forcing a universal bracket to fit often requires awkward angles that put uneven pressure on the plastic bodywork.
Using a non-model-specific windshield increases the risk of excessive vibration while riding, which can quickly lead to stress cracks forming around your fairing’s mounting holes. In worst-case scenarios, the wind pressure at highway speeds can cause the poorly secured universal brackets to slip or fail entirely, leading to the sudden detachment of the windshield. This poses an immediate safety hazard to you and other motorists on the road.
How should I clean and maintain a tinted visor?
To maintain the optical clarity of your tinted visor and prevent scratches, always use manufacturer-recommended cleaning solutions or a mild, pH-neutral soap mixed with warm water. Apply the solution gently using a clean, high-quality microfiber cloth, which lifts dirt and dust particles away from the surface without grinding them into the plastic. Allow stubborn dirt or bug splats to soak under a wet cloth for a few minutes before wiping them away.
Never use abrasive sponges, paper towels, or household glass cleaners that contain ammonia, alcohol, or harsh solvents. These chemicals can degrade the protective UV coatings, cause tinted films to peel or bubble, and turn clear polycarbonate cloudy over time. Additionally, avoid wiping a dry visor with a dry cloth, as even tiny dust particles can act as abrasives and leave permanent fine scratches across your field of vision.
Community discussion
Share your experience or ask a question. Comments are reviewed before publication.