
Upgrading your Yamaha NMAX V2 with practical utility upgrades requires balancing convenience, structural safety, and vehicle dynamics. When selecting nmax v2 accessories 2024, riders must prioritize items that preserve the scooter’s structural integrity and handling characteristics. The most common additions—phone holders, top boxes, and crash bars—directly affect your daily commute, whether you are navigating congested city streets in Metro Manila or cruising along provincial highways. Choosing the right gear involves understanding the specific physical layout of the V2 platform to avoid safety hazards, electrical failures, or voided manufacturer warranties.
Every aftermarket modification introduces changes to your scooter’s weight distribution, aerodynamics, and electrical load. To ensure your upgrades enhance your riding experience without compromising safety, you must evaluate how each accessory interacts with the NMAX V2’s engineering. This guide provides detailed technical insights and practical selection criteria to help you make informed decisions for your scooter.
How to Choose a Secure Phone Holder for the NMAX V2
Selecting a phone holder for the NMAX V2 requires careful consideration of the scooter’s cockpit layout. Unlike standard motorcycles with exposed metal handlebars, the NMAX V2 features a fully enclosed plastic handlebar cover. This design prevents you from mounting standard handlebar clamps directly to the center controls without modifying the plastics or installing an aftermarket handlebar post. Understanding your mounting options is the first step toward a secure setup.
Products mentioned in this guide

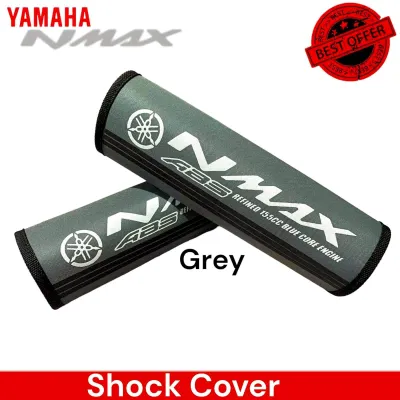
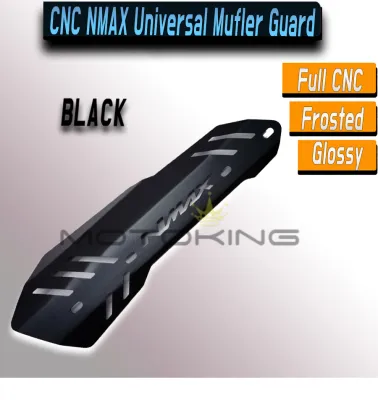
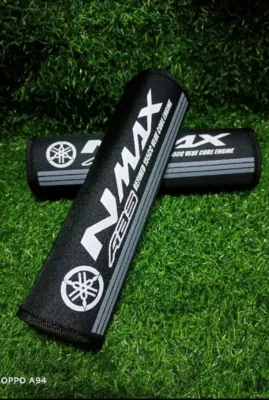
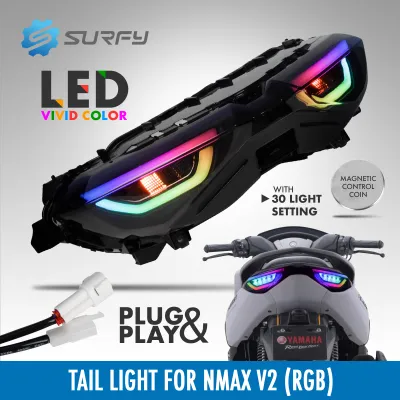
Prices are valid at publication and may change. Please refer to the product page for the latest price.
There are three primary mounting configurations compatible with the NMAX V2 cockpit:
- Mirror Stem Mounts: These attach directly to the side mirror threads. They are highly popular because they position your device near your natural line of sight without requiring cockpit modifications. However, mirror mounts are highly susceptible to engine and road vibrations, which can make reading navigation screens difficult at speed.
- Windshield Bracket or GPS Bars: These brackets mount behind the windshield, anchoring to the front cowl structure. This setup places your phone directly in your forward field of vision, reducing the time your eyes are off the road. The trade-off is that heavy phone assemblies can put extra stress on the plastic cowl brackets over bumpy roads.
- Brake Reservoir Cover Mounts: These replace or clamp onto the top of the front brake master cylinder caps. They provide an incredibly stable, low-profile mounting point, but you must ensure the bracket does not interfere with your access to the brake fluid reservoir or restrict the movement of the brake levers.
Device protection is another critical factor, particularly regarding high-frequency engine vibrations. Modern smartphones feature delicate optical image stabilization (OIS) systems that rely on miniature gyroscopes and electromagnets. The continuous, high-frequency vibrations from the NMAX V2’s 155cc single-cylinder engine can permanently degrade these camera sensors over time. To prevent this, look for phone mounts equipped with integrated rubber vibration dampeners designed to absorb these specific frequencies.
Weather resistance is vital for riding in the tropical climate of the Philippines, where sudden torrential downpours are common. While waterproof cases protect your device from rain, they can trap heat. Under direct sunlight in high-humidity environments, a fully enclosed waterproof case can cause your phone to overheat and shut down. A highly effective alternative is a quick-release mechanical cradle paired with a temporary, slip-on silicone rain cover used only when wet weather strikes.
Safety limits must govern where and how you place your phone holder. When positioning the mount, verify that the phone does not block your view of the digital instrument cluster. Turn the handlebars fully from left to right to ensure the phone or mount does not strike the windshield, body panels, or your knees. The mount must never restrict the full steering lock or catch on control cables during tight, low-speed maneuvering.
Finally, plan your electrical integration carefully if you choose a phone holder with an integrated charger. The NMAX V2 features a convenient 12V DC accessory socket in the left front pocket. Using a high-quality USB adapter in this socket is the safest way to power your phone. Avoid splicing directly into the main wiring harness to power aftermarket chargers. Splicing bypasses factory circuit protection, risks causing electrical faults, and can immediately void your scooter’s electrical system warranty.
Selecting a Top Box That Maintains NMAX V2 Balance
Adding a top box to your NMAX V2 is one of the most effective ways to increase utility, but it significantly alters the vehicle’s center of gravity. A top box acts as a lever extending behind the rear axle, meaning any weight placed inside is magnified. To maintain handling stability and passenger comfort, you must select a box size and mounting system that match the scooter’s structural limits.

For the NMAX V2, a capacity between 30 liters and 45 liters is generally the optimal range. Staying within this limit prevents the scooter from becoming rear-heavy, which can cause suspension sag and reduce front-tire traction. When the front tire loses adequate contact pressure with the road, the scooter becomes highly sensitive to high-speed steering wobble, especially when decelerating or riding in strong crosswinds.
Mounting systems must be model-specific and securely bolted to the frame. Never attempt to use universal straps or generic brackets that clamp onto the plastic bodywork. The NMAX V2 has a unique tail geometry and grab rail design that differs from the older V1 model. You must purchase a heavy-duty carrier rack designed specifically for the V2. This rack replaces or integrates with the rear grab bar, anchoring directly to the reinforced subframe chassis points to distribute weight safely.
When comparing materials, evaluate the trade-offs between durability, weight, and aerodynamics:
- ABS Plastic Hard-Shell Boxes: These are lightweight, impact-resistant, and aerodynamically rounded. Their curved profiles help deflect crosswinds, making them an excellent choice for daily commuting and high-speed highway riding.
- Aluminum Alloy Boxes: These offer rugged aesthetics, superior security, and excellent water sealing. However, they are significantly heavier than plastic boxes. The added weight of an empty aluminum box reduces your remaining cargo capacity before you exceed the structural load limit of your rear rack.
- Heavy-Duty Soft Tail Bags: These provide a lightweight, flexible alternative for temporary storage. While they do not offer the security of a locking hard box, they are easy to remove and do not permanently alter the scooter's profile.
To preserve your scooter’s handling dynamics, implement smart weight distribution strategies when packing. Always place your heaviest items—such as tools, spare parts, lock chains, or heavy water bottles—at the very bottom of the box and as close to the forward edge (nearest to the passenger backrest) as possible. Reserve the top and rear sections of the box for lightweight items like rain gear, jackets, or extra clothing. This packing method minimizes the pendulum effect, ensuring the scooter remains agile and predictable when cornering.
Picking Crash Bars for Protection Without Compromising Clearance
Crash bars and engine guards are designed to protect your NMAX V2’s expensive plastic fairings and mechanical components during tip-overs or low-speed slides. However, poorly designed or improperly installed guards can introduce serious safety risks, such as reducing your ground clearance or transferring destructive forces directly into fragile engine cases during an impact.
Understanding the different protection zones helps you prioritize accessories based on your typical riding environment:
- Front Fairing Sliders and Bars: These wrap around the upper side cowls to protect the bodywork from cosmetic damage during parking lot drops or minor low-speed slides in city traffic.
- Lower Engine Guards: These shield the lower crankcase, water pump, and radiator from flying road debris, stones, and high curbs.
- Rear Axle Sliders: These attach to the wheel axles, protecting the swingarm, rear brake caliper, and exhaust muffler from grinding against the asphalt during a fall.
Material selection determines how well the crash bars absorb and distribute impact energy. Heavy-duty steel tubing offers maximum structural protection but adds significant weight to the scooter. If you choose steel, ensure it features a high-quality powder-coated finish to prevent rust caused by high humidity and rain. Aluminum guards are lighter but tend to bend or crack more easily under severe impacts. Nylon or plastic sliders are designed to slide smoothly along the pavement, absorbing energy through controlled friction and reducing the risk of the scooter catching and flipping.
Fitment and clearance constraints are critical safety factors that you must verify before riding. The NMAX V2 is engineered with a specific maximum lean angle for cornering. Oversized or wide crash bars can severely reduce this angle, causing the metal bars to scrape the ground during moderate cornering. If the crash bar contacts the asphalt while turning, it can lift the rear or front tire off the ground, causing an immediate loss of control. Ensure the bars are tucked tightly against the bodywork and do not interfere with the deployment of the side stand or center stand.
Installation of crash bars must rely strictly on factory-designed structural mounting points on the scooter’s steel frame. Never clamp or bolt crash bars onto plastic fairings, non-structural brackets, or exhaust components. In a crash, mounting bars to these fragile areas will transfer the impact force directly into them, causing extensive internal damage that would not have occurred otherwise. Always verify that the mounting hardware does not pinch or rub against internal wiring harnesses or coolant hoses.
Installation Safety and Warranty Checks for Aftermarket Parts
Before purchasing or installing any aftermarket accessories, it is essential to understand how these modifications affect your Yamaha warranty and overall road safety. In the Philippines, unauthorized alterations to the electrical system, engine, or structural frame can lead to a partial or complete voiding of your dealer warranty. Always consult your authorized dealer’s policy guidelines before proceeding with modifications.
When performing mechanical installations, follow proper assembly procedures to ensure long-term reliability. Vibrations from daily riding can cause loose bolts to back out over time, which is particularly dangerous for critical components like top box racks and crash bars. Always refer to the accessory manufacturer’s instructions for the correct torque specifications. Applying a medium-strength threadlocking compound (such as blue threadlocker) to the bolt threads helps prevent them from loosening due to engine harmonics.
After completing any installation, perform a comprehensive safety and function check before riding on public roads:
- Steering Lock Check: Turn the handlebars fully from left to right. Verify that no accessory, phone mount, or cable pinches your fingers, strikes the windshield, or restricts the steering lock mechanism.
- Suspension Travel Check: Compress the front forks and rear shocks fully to ensure that crash bars, mudguards, or top box mounts do not make contact with the tires or moving suspension components.
- Electrical System Check: Turn on the ignition and verify that all lights, turn signals, and horn functions operate correctly. Ensure no dashboard warning lights, such as the ABS or engine malfunction indicators, are triggered.
- Low-Speed Test Ride: Conduct a brief test ride in a secure, traffic-free area. Pay close attention to any changes in steering effort, braking performance, or unusual vibrations.
Knowing the boundary for professional assistance is crucial for your safety. While mounting a basic phone holder or a bolt-on top box rack is generally straightforward, complex installations require professional expertise. If an accessory requires splicing into the main wiring loom, modifying the ECU, or adjusting structural frame elements, do not attempt to do it yourself. Take your scooter to a certified mechanic or an authorized Yamaha service center to ensure the work is completed safely and remains compliant with local road safety regulations.
Frequently Asked Questions (FAQ)
Will installing a top box or crash bar void my Yamaha warranty?
Installing bolt-on accessories like top box racks or crash bars generally does not void your entire vehicle warranty. However, any subsequent damage directly caused by the accessory or its improper installation will not be covered. For example, if an improperly mounted crash bar cracks a frame tab during a fall, or if a wired phone charger causes an electrical short, those specific repairs will not be covered under warranty. Always check with your local authorized dealer to clarify their specific modification policies.
Do I need a specific mounting rack for the NMAX V2 top box?
Yes, you must use a mounting rack designed specifically for the NMAX V2. The V2 features updated grab rails, tail geometry, and subframe mounting points that differ significantly from the older V1 model. Attempting to force a V1 rack or a universal bracket onto a V2 can result in misaligned bolts, damaged plastic bodywork, and uneven weight distribution that compromises structural safety.
Can I use a universal phone holder on the NMAX V2 handlebars?
Standard universal phone holders designed to clamp onto exposed metal handlebars cannot be mounted directly to the NMAX V2 because the handlebars are fully enclosed by plastic covers. To use a phone holder, you must select a model designed to mount to the mirror stem, the front brake reservoir cover, or an aftermarket GPS bracket that mounts behind the windshield. Alternatively, you can install an aftermarket exposed handlebar kit, though this requires professional installation and alters the cockpit configuration.

Community discussion
Share your experience or ask a question. Comments are reviewed before publication.