
Choosing the right top box bracket for the Yamaha Aerox V3 requires a clear understanding of structural mounting styles, precise fitment verification, and material durability. The Aerox V3 is a highly popular sporty scooter, but its sleek design leaves limited under-seat storage for daily commuting needs. Adding a top box is a practical solution for carrying helmets, rain gear, and personal items through unpredictable tropical weather. However, because the rear subframe and body panels are tightly integrated, selecting a bracket is not a simple matter of buying the first generic option available. A poorly chosen or incorrectly installed bracket can damage your scooter’s fairings, compromise handling, or even fail structurally while riding.
To ensure a safe and secure setup, riders must evaluate how different brackets distribute weight across the scooter’s frame. The ideal bracket must withstand constant road vibrations, heavy rains, and the occasional pothole without bending or loosening. By focusing on structural integrity, material quality, and exact model compatibility, you can find a mounting system that keeps your cargo secure while preserving the sporty performance of your scooter.
Understanding Bracket Mounting Styles for the Aerox V3
When selecting a top box bracket for the Aerox V3, the first decision involves choosing between different structural mounting styles. The design of the bracket dictates how it attaches to the scooter and where the weight of your cargo is distributed. Because the Aerox features a sporty, aggressive rear profile, aftermarket manufacturers have developed distinct mounting systems to balance aesthetic appeal with structural load capacity.
Products mentioned in this guide
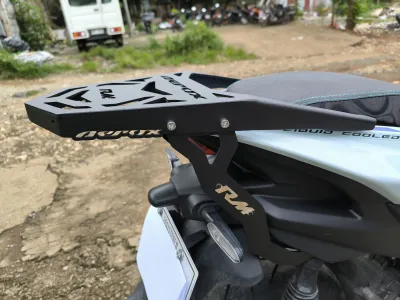
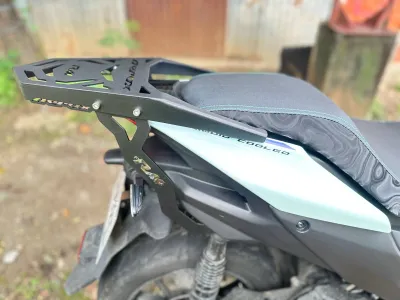
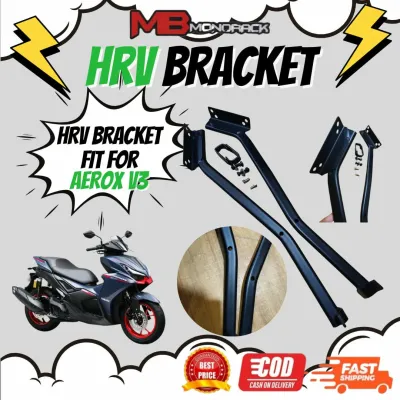
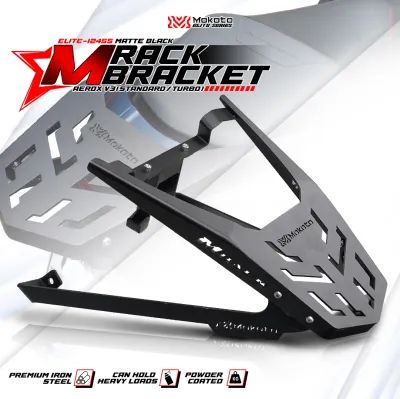
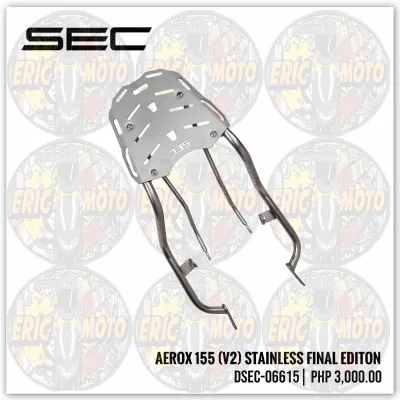
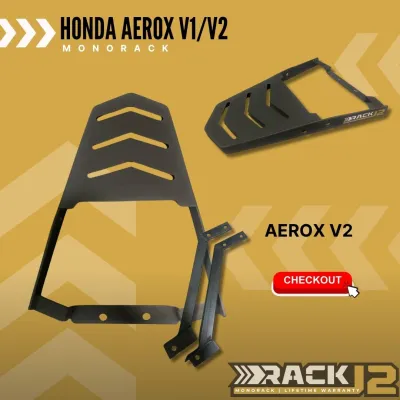
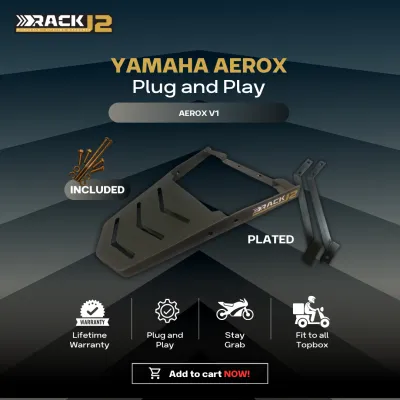
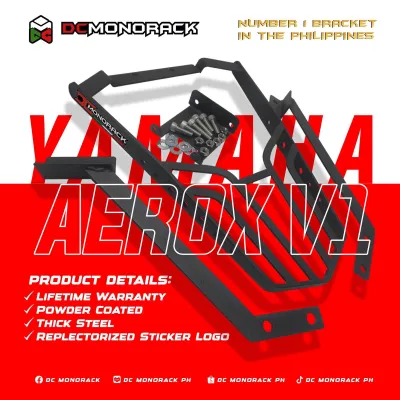
Prices are valid at publication and may change. Please refer to the product page for the latest price.
Your choice of mounting style directly impacts passenger comfort and daily usability. The Aerox V3 features a split-level seat design where the passenger sits slightly higher than the rider. A bracket that positions the top box too far forward can crowd the pillion rider, leaving them with limited back room and making long rides uncomfortable. Conversely, positioning the box too far rearward increases the leverage exerted on the mounting points, which can affect the scooter’s front-wheel traction and overall stability.
Before purchasing any bracket, perform a thorough visual inspection of your scooter’s rear section. Look at the existing mounting points under the rear fairings and check for any signs of wear, loose factory bolts, or hairline cracks in the surrounding plastic panels. In the humid, tropical climate of the Philippines, moisture can easily accumulate in tight spaces, accelerating rust if the area is not properly maintained. Ensuring these foundational points are clean and structurally sound is essential before adding the weight of a bracket and top box.
Grab Rail Integrated Mounts
Grab rail integrated mounts are designed to clamp or bolt directly onto the existing rear grab handle area of the Aerox V3. These brackets are highly popular among riders who prefer a straightforward installation process that does not require extensive disassembly of the scooter’s rear bodywork. Because they utilize existing external mounting points, they generally maintain the clean, factory lines of the scooter while providing a functional platform for lightweight top boxes.
However, stock grab rails are primarily engineered as handholds for passengers or for manual maneuvering of the scooter while parked. They are not designed to support heavy, cantilevered loads bouncing over uneven road surfaces. Overloading a grab rail integrated mount can place excessive stress on the cast metal of the grab rail or the relatively thin mounting tabs beneath the plastic fairings, potentially leading to structural failure or cracked body panels.
If you choose this style, it is critical to inspect the mounting hardware for rubber grommets and vibration dampeners. The single-cylinder engine of the Aerox V3 produces natural high-frequency vibrations, especially when idling or accelerating. Without proper dampening, these vibrations are transferred directly to the bracket and top box, which can cause mounting bolts to back out over time or lead to stress fractures in the top box’s plastic base plate.
Dedicated Subframe Plates
Dedicated subframe plates are heavy-duty brackets designed to bypass the cosmetic grab rails entirely and bolt directly to the steel rear subframe of the scooter. This style is highly recommended for riders who plan to carry heavier loads, use larger top boxes, or frequently travel long distances. By anchoring directly to the main chassis, these brackets distribute the weight of your cargo much more evenly, minimizing the risk of frame flex or handling instability.
Installing a dedicated subframe plate typically requires a more involved installation process. You will often need to temporarily remove or carefully modify the rear plastic body panels, tail light surrounds, or the rear fender assembly to access the direct subframe mounting points. This process requires patience and the correct tools to avoid snapping the delicate plastic clips and tabs that secure the Aerox V3’s fairings.
When securing a subframe plate, matching the bolt thread sizes and torque specifications directly to the official service manual is of utmost importance. The subframe is a critical structural component of your motorcycle; using bolts that are too long can puncture nearby wiring harnesses or tire clearance zones, while over-tightening can strip the threads in the frame. Utilizing high-tensile bolts and verifying torque values ensures the bracket remains permanently anchored under all riding conditions.
Key Fitment and Compatibility Checks Before Purchasing
Vehicle compatibility is the most critical factor when purchasing a top box bracket. The Yamaha Aerox has gone through multiple design generations, commonly referred to as V1, V2, and the current V3 (often designated as the Connected or ABS version). While these models share a similar sporty silhouette, the underlying subframe geometry, rear fairing shapes, and tail light assemblies have undergone subtle but significant changes. Never assume a bracket labeled generically for “Yamaha Aerox” will fit your V3 without modification.

Physical clearance is another vital safety check that must be performed before finalizing your purchase. Once installed, the bracket and its mounting plate must not obstruct or interfere with the rear tail light, turn signal housings, or the rear license plate holder. In the Philippines, road safety regulations require all signaling devices to be clearly visible to trailing motorists from specific angles. A bracket that partially blocks your brake light or indicators is a serious safety hazard, especially during night riding or heavy downpours.
To avoid compatibility issues, always cross-reference the manufacturer’s specific part numbers and fitment charts rather than relying solely on online product titles. Reputable accessory manufacturers publish detailed compatibility lists that specify the exact model years and sub-variants (such as standard drum-brake versions versus ABS disc-brake versions) their brackets are designed to fit. If a product listing lacks clear, model-specific documentation, treat it as a generic accessory that may require unsafe modifications to fit your scooter.
Additionally, consider how the bracket interacts with other aftermarket accessories you may have installed. For example, if you have upgraded to a wider rear tire, installed aftermarket rear suspension reservoirs, or added auxiliary rear lighting, ensure the bracket’s mounting arms do not contact or rub against these components. A bracket that pinches a suspension reservoir or rubs against a tire can cause catastrophic component failure while the vehicle is in motion.
Evaluating Load Capacity and Material Durability
Understanding the difference between static and dynamic load limits is essential for maintaining the structural safety of your scooter. The static load limit refers to the maximum weight the bracket can support when the scooter is stationary on its center stand. The dynamic load limit, which is significantly lower, represents the maximum weight the bracket can safely handle while the scooter is moving. When riding, hitting a pothole or speed bump multiplies the downward force exerted on the bracket, meaning a top box carrying only five kilograms of cargo can momentarily exert forces equivalent to three times that weight.
| Material Type | Structural Rigidity | Corrosion Resistance | Weight Impact | Best Suited For |
|---|---|---|---|---|
| Mild Steel | High | Moderate (Requires coating) | Heavy | Heavy-duty cargo, daily utility |
| Aluminum Alloy | Moderate to High | High (Naturally resistant) | Light | Lightweight commuting, sporty riding |
| Stainless Steel | Very High | High | Moderate to Heavy | All-weather touring, coastal areas |
Material selection directly influences how well the bracket will withstand the demanding road conditions of the Philippines. Steel brackets offer excellent tensile strength and are highly resistant to bending under heavy loads, making them a reliable choice for daily utility riders. However, steel is susceptible to rust, especially in coastal areas or regions with high rainfall. Ensure any steel bracket you choose features a high-quality, thick powder-coated finish to seal the metal from moisture and prevent corrosion from weakening the structure.
Aluminum alloy brackets offer a lighter alternative that naturally resists rust without relying entirely on protective coatings. This weight reduction helps keep the scooter’s center of gravity lower, preserving the agile handling characteristics of the Aerox V3. However, aluminum can be more brittle than steel. Under constant, high-frequency engine vibrations, low-grade aluminum alloys can develop micro-fractures, particularly around sharp bends or bolt holes, leading to sudden failure if overloaded.
When evaluating aftermarket brackets, pay close attention to the quality of the manufacturing. Inspect the welded joints; they should be smooth, consistent, and free of air pockets or slag, which indicate poor weld penetration. Look for brackets that feature integrated gussets—small triangular reinforcing plates welded into the corners where the mounting arms meet the main plate. These gussets distribute stress away from the weld points, significantly increasing the bracket’s lifespan and resistance to fatigue.
Installation Requirements and Safety Boundaries
Installing a top box bracket requires basic mechanical aptitude and the correct set of hand tools. At a minimum, you will need a metric socket set, Allen keys, and open-ended wrenches to secure the mounting hardware. However, the most critical tool for this job is a calibrated torque wrench. Tightening subframe bolts by feel alone often leads to under-tightening, which allows vibrations to back the bolts out, or over-tightening, which can strip the threads in the scooter’s aluminum or steel frame components.
During the installation process, you must establish clear stop conditions. If you find that the bracket’s mounting holes do not align perfectly with the scooter’s frame holes, do not attempt to force the bolts in at an angle. Forcing a misaligned bolt will cross-thread the subframe, permanently damaging the threads and compromising the structural integrity of the mount. If the holes do not align, stop immediately, remove the bracket, and verify that you have the correct model-year variant or check if the bracket itself is warped.
Another critical stop condition involves the scooter’s electrical wiring. The rear section of the Aerox V3 houses the wiring harness for the tail light, license plate light, and turn signals. When routing the bracket’s mounting arms or tightening bolts near the rear fender, ensure no wires are pinched, stretched, or rubbed against sharp metal edges. A pinched wire can easily rub through its insulation over time, causing an electrical short circuit that can blow fuses, disable your lighting, or damage the scooter’s main electronic control unit.
If the bracket design you selected requires permanent modifications to the scooter, such as drilling holes into the subframe, cutting structural plastic panels, or splicing into the factory wiring harness, do not attempt to perform these tasks yourself unless you are a trained technician. Structural drilling can weaken the chassis if done incorrectly, while improper electrical splicing can void your vehicle’s warranty and pose a fire hazard. In these scenarios, always consult a qualified motorcycle mechanic or visit an authorized service center to ensure the work is completed safely and professionally.
Frequently Asked Questions (FAQ)
Can I install a top box bracket without removing the pillion seat?
Yes, most standard top box brackets designed specifically for the Yamaha Aerox V3 allow you to install the hardware without permanently removing or disabling the pillion seat. The bracket is engineered to mount behind or underneath the seat area, ensuring that the seat latch mechanism remains fully functional. This is crucial because the Aerox V3 requires the seat to be lifted to access the fuel filler cap and the under-seat storage compartment.
However, some bulky or poorly designed aftermarket brackets may restrict the clearance needed to fully open the seat. When the seat cannot lift completely, refueling becomes difficult and accessing your under-seat items is highly inconvenient. Before purchasing, verify that the bracket’s rear plate sits far enough back to clear the arc of the seat as it swings upward. If you frequently carry passengers and need to adjust your cargo setup, look for brackets compatible with quick-release base plates, which allow you to slide the top box off in seconds while leaving the low-profile metal bracket in place.
Does adding a top box bracket affect the scooter's warranty?
In the Philippines, adding a standard, bolt-on top box bracket generally does not void the overall manufacturer warranty of your Yamaha Aerox V3, provided the installation is non-destructive. Bolt-on accessories that utilize existing factory mounting points and do not require modifications to the frame or electrical system are typically viewed as acceptable aftermarket additions.
However, the situation changes if the installation requires irreversible modifications. If you drill holes into the steel subframe, cut structural frame components, or splice into the factory wiring harness to install integrated brake lights on your top box, you risk voiding the warranty on those specific systems. If an electrical fault occurs later, the manufacturer may deny warranty coverage, attributing the failure to the modified wiring. To protect your warranty, always choose brackets that offer a direct, bolt-on fitment without structural or electrical modifications, and consult your authorized dealership’s service advisor if you are unsure about specific warranty boundaries.

Community discussion
Share your experience or ask a question. Comments are reviewed before publication.