
Starting your own car detailing journey at home is an incredibly rewarding way to maintain your vehicle’s value and keep it looking pristine. However, walking into an automotive store or browsing online marketplaces can quickly become overwhelming due to the sheer volume of specialized products available. For a beginner, the key is not to buy every gadget on the shelf, but to invest in a select group of high-quality, essential tools that protect your vehicle’s surfaces from damage. In tropical climates like the Philippines, where intense sunlight, high humidity, and heavy seasonal rains constantly challenge your car’s exterior, having the right starter kit is crucial to prevent premature paint oxidation, water spotting, and interior fading. By focusing on proper techniques and the correct fundamental tools, you can achieve professional-grade results right in your own driveway without overspending.
Essential Washing and Drying Tools to Protect Your Paint
The foundation of any proper car detailing routine begins with the wash stage, which is also where the highest risk of scratching your paint occurs. Traditional washing methods often rely on household sponges or old cotton clothing, both of which are highly detrimental to modern clear coats. Sponges have flat, non-porous surfaces that trap dirt particles between the sponge and the paint, essentially acting like fine sandpaper as you wipe. Old t-shirts and rags lack the depth to safely absorb contaminants, dragging grit across the surface and leaving behind a web of fine scratches known as swirl marks. To prevent this, you should transition to a high-quality microfiber wash mitt or a natural wool mitt. Microfiber mitts feature thousands of tiny, split fibers that actively lift, trap, and hold dirt away from the paint surface until the mitt is rinsed. Natural wool mitts offer a similarly plush pile that safely buries debris deep within the fibers, though they require more delicate care to maintain.
To complement your wash mitt, implementing the two-bucket wash method is an absolute necessity for safe paint maintenance. This setup requires two separate buckets: one filled with clean water and car shampoo, and another filled with plain water for rinsing your dirty mitt. At the bottom of each bucket, you must place a grit guard, which is a radial plastic insert designed to trap dirt at the bottom. As you wash, submerge the dirty mitt into the rinse bucket and rub it against the grit guard to release trapped debris. This prevents the disturbed dirt from rising back up, ensuring that when you dip your mitt into the soapy wash bucket, you are only applying clean suds to your vehicle. This simple system drastically reduces the amount of abrasive grit reintroduced to your paintwork.
Products mentioned in this guide
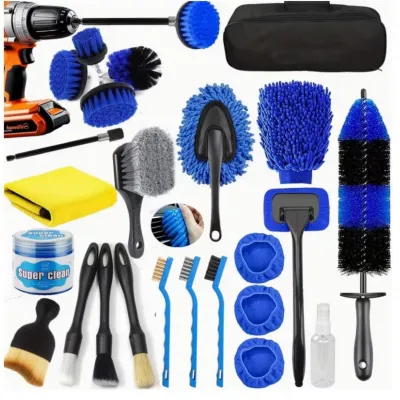
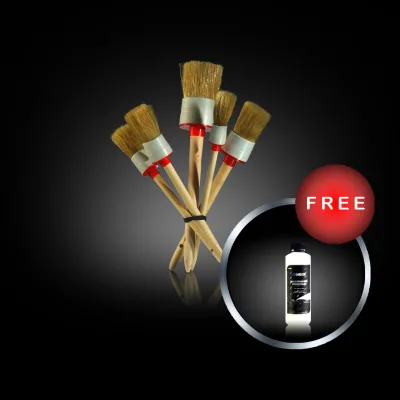
![[🇵🇭 Stock&COD] Car Wash Duster Retractable Long Handle Car Wash Brush Mop Soft Bristle Vehicle Cleaning Tool](https://img.lazcdn.com/g/p/ecf5448a3bde419eb03cbe5c7fe71e84.jpg_400x400q80.jpg_.webp)
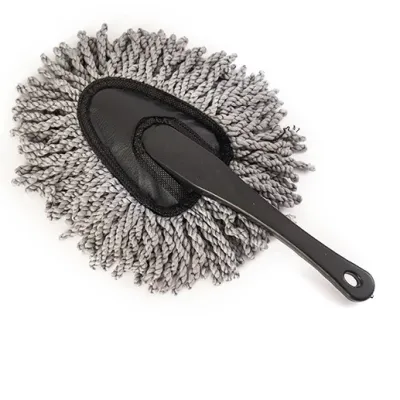

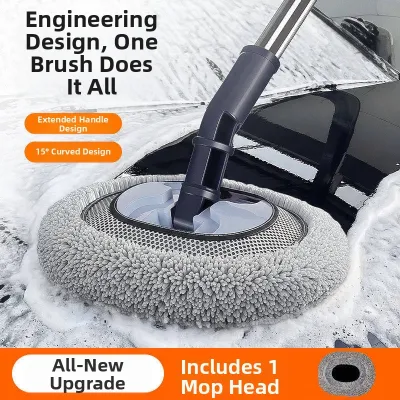
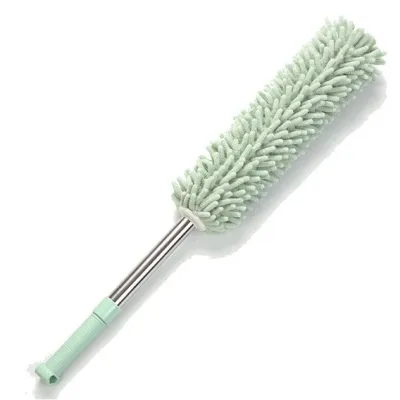

Prices are valid at publication and may change. Please refer to the product page for the latest price.
Once the vehicle is clean, the drying phase presents another critical opportunity for paint damage if executed incorrectly. Standard bath towels or cheap synthetic chamois can easily scratch the paint and leave behind unsightly lint. Instead, you should invest in a large-format, edgeless microfiber drying towel with a high GSM (grams per square meter) rating, ideally between 400 and 600 GSM or higher. High GSM towels are exceptionally plush and dense, allowing them to absorb massive amounts of water quickly with minimal friction. In hot, humid environments, drying the vehicle rapidly is essential to prevent minerals in the water from baking onto the paint and forming stubborn water spots. By gently dragging a high-quality, edgeless microfiber towel across the surface, you can safely dry the entire vehicle without leaving micro-marring or lint behind.
Dedicated Brushes and Towels for Interior and Wheels
A common mistake among beginners is using the same tools for every part of the vehicle, which leads to severe cross-contamination. The wheels and tires accumulate highly abrasive brake dust, road grime, and asphalt particles that will instantly scratch your delicate clear coat or interior plastics if transferred. To prevent this, you must establish a strict rule of physical separation and color-coding for your detailing tools. Assign specific colors of microfiber towels and distinct brushes solely for wheels, others for the interior, and a separate set exclusively for the painted exterior panels. This visual system ensures you never accidentally wipe your dashboard or hood with a towel that was previously used to clean brake dust off your rims.

When addressing the wheels, you need specialized brushes designed to reach deep into the barrels and spokes without scratching the finish. Non-scratching wheel woolies—which feature soft microfiber heads on flexible shafts—are excellent for cleaning the inner barrels of alloy wheels safely. For the face of the wheels and around the lug nuts, a soft-bristled wheel brush or a dedicated detailing brush is ideal. Always verify that the brush material is compatible with your specific wheel finish, as delicate finishes like high-gloss black, painted, or bare polished metal require much softer bristles than rugged, clear-coated factory wheels. Using a brush that is too stiff can permanently dull or scratch these sensitive surfaces.
For the vehicle’s interior, delicate surfaces such as air vents, infotainment screens, and leather seats require a gentle touch. Soft-bristled detailing brushes, particularly those made with natural boar’s hair or ultra-soft synthetic fibers, are perfect for dusting out intricate dashboard seams, buttons, and vents. If your vehicle has leather upholstery, a dedicated leather-safe brush with medium-soft bristles will help agitate leather cleaners safely into the grain without wearing down the protective top coat. For glass surfaces, use low-pile, waffle-weave or flat-weave microfiber towels. These specialized glass towels lift oils and cleaning agents cleanly off the glass, leaving behind a streak-free, lint-free finish that ensures optimal visibility during night driving or heavy tropical downpours.
Entry-Level Decontamination and Polishing Equipment
Once you have mastered the basic wash and dry process, you may notice that your paint still feels rough to the touch even after a thorough cleaning. This roughness is caused by embedded environmental contaminants, such as industrial fallout, tree sap, and asphalt tar, which cannot be removed by washing alone. To restore a smooth-as-glass finish, you will need to use an automotive clay bar or a synthetic clay mitt. These tools work by shearing off and trapping the embedded particles as they glide across the paint. However, claying is a highly abrasive process if done dry; you must mandate the use of a dedicated clay lubricant to provide a slick barrier between the clay and your clear coat. Without proper lubrication, the clay will drag, leaving behind severe marring and scratches that require extensive polishing to correct.
For beginners looking to step into paint correction and remove swirl marks, selecting the right machine is critical for safety. You should always choose a dual-action (DA) polisher over a traditional rotary polisher. A rotary polisher spins on a single axis, which generates intense localized heat very quickly; in inexperienced hands, this can easily burn through the clear coat or damage body lines. In contrast, a dual-action polisher both spins and oscillates in an eccentric pattern. This dual motion prevents heat from building up in one spot and will actually stop spinning if you apply too much pressure, making it incredibly safe for beginners to use without the risk of ruining their vehicle’s paint.
When setting up your dual-action polisher, select the appropriate polishing pads based on the current condition of your paint. Polishing pads generally fall into two categories: cutting pads and finishing pads. Cutting pads are denser and designed to work with compounding agents to remove deeper scratches, while finishing pads are softer and used with fine polishes to refine the paint to a high gloss. Always start with the least aggressive pad and polish combination first to see if it achieves the desired results. Before operating any machinery, establish strict safety protocols: thoroughly read the manufacturer’s instructions, perform a test spot on an inconspicuous area of the vehicle, and stop immediately if you experience unusual heat, excessive vibration, or notice paint color transferring onto your pad.
Prioritizing Your Purchases to Build a Cost-Effective Kit
Building a detailing kit does not require a massive upfront financial investment, and trying to buy everything at once often leads to wasted money on tools you rarely use. A strategic purchasing hierarchy allows you to build your kit progressively as your skills develop. Your absolute first priority must be the safe washing and drying essentials: two quality buckets, grit guards, a microfiber wash mitt, high-quality car shampoo, and a plush drying towel. These basic tools prevent you from inflicting new damage on your car during routine maintenance. Once you are comfortable with your washing technique, expand your kit to include interior and wheel cleaning tools, such as dedicated brushes, wheel cleaners, and specialized glass towels. Defer purchasing expensive machine polishers, clay kits, and paint correction compounds until you have mastered these fundamental hand-cleaning skills.
As you shop for your starter kit, be highly cautious of low-quality, oversized “all-in-one” detailing kits frequently advertised on general online marketplaces. These kits often promise dozens of pieces for an incredibly low price, but they typically contain poorly constructed tools, such as thin, scratchy microfiber towels that lint excessively, flimsy brushes with bristles that shed, and harsh, unlabeled chemicals that can permanently stain your interior plastics or strip your clear coat. Investing in these cheap bundles is a false economy that can result in costly damage to your vehicle’s surfaces.
Instead of buying generic bundles, source your core detailing items individually or in small, focused kits from dedicated automotive care brands, official brand stores, or specialized local retailers. Reputable brands provide detailed material specifications, such as microfiber GSM and blend ratios (such as 70/30 polyester to polyamide), ensuring you know exactly what is touching your vehicle’s delicate surfaces. Purchasing from authorized channels also guarantees that you receive authentic products with accurate safety labeling and usage instructions, giving you peace of mind as you care for your vehicle.
Cleaning and Storing Your Detailing Tools for Longevity
The longevity and performance of your detailing tools depend entirely on how well you clean and store them after each use. Microfiber towels, in particular, require highly specific laundering care to preserve their unique dirt-trapping and water-absorbing properties. You must wash your microfiber towels separately from regular household laundry to prevent them from linting or picking up cotton fibers. Use a dedicated microfiber wash solution or a gentle, liquid detergent that is completely free of dyes, perfumes, and fabric softeners. Fabric softeners are highly detrimental because they coat the microscopic fibers with a chemical layer, completely destroying their absorbency and leaving streaks during future use. Additionally, never dry your microfiber towels on high heat; the intense heat can melt the delicate polyester and polyamide fibers, turning a soft towel into a scratchy hazard that will mar your paint. Instead, air dry them in a clean area or tumble dry on a no-heat or low-heat setting.
Your wash mitts, wheel woolies, and detailing brushes also require thorough maintenance after every detailing session. Rinse them thoroughly under clean, running water to flush out all embedded dirt, grit, and chemical residues from the bristles and fibers. Gently squeeze out excess water—never wring out delicate mitts aggressively, as this can tear the stitching or backing material. Hang your brushes and mitts to dry completely in a well-ventilated area before storing them away.
Proper storage is the final step in protecting your investment and ensuring your tools are safe for the next wash. Store all of your clean, dry detailing tools in clean, sealable plastic bins or a dry, climate-controlled environment. Keep them away from direct sunlight, as prolonged UV exposure can degrade plastics, dry out brush bristles, and weaken microfiber structures. In highly humid tropical climates, ensuring your tools are completely dry before sealing them in bins is critical to prevent the growth of mold and mildew, which can ruin your equipment and transfer unpleasant odors to your vehicle’s interior.
Frequently Asked Questions (FAQ)
Can I use household sponges and bath towels for car detailing?
No, you should avoid using household sponges and bath towels on your vehicle’s paint. Household sponges have flat, closed-cell surfaces that cannot absorb dirt, meaning any grit on your car is pressed directly against the paint and dragged across the surface, creating severe swirl marks and scratches. Similarly, standard cotton bath towels are designed to absorb water from clean skin, not lift dirt; their coarse fibers lack the specialized split-fiber structure of automotive microfiber, which can lead to micro-marring and heavy linting on your clear coat.
Do I need a pressure washer to start detailing my car?
No, a pressure washer is not a necessity for a beginner’s starter kit. A standard garden hose equipped with a high-quality, adjustable spray nozzle provides more than enough water volume and pressure to safely rinse away loose dirt and soap suds during a routine wash. A pressure washer becomes a valuable upgrade only if you frequently drive off-road, deal with heavy mud accumulation, or want to use a foam cannon; however, when using one, you must exercise caution by keeping the nozzle at a safe distance and using appropriate pressure settings to avoid peeling paint or damaging delicate rubber trim.

Community discussion
Share your experience or ask a question. Comments are reviewed before publication.