
Building a professional car detailing kit requires a curated selection of specialized trim removal tools to safely disassemble interior panels, exterior badges, and delicate weatherstripping without causing permanent damage. While general mechanics might reach for metal screwdrivers, a professional detailer relies on non-marring polymers, specialized clip pliers, and precision emblem lifters. These tools allow you to access hidden dirt traps, perform deep interior extractions, and prepare body panels for paint correction or ceramic coating without scratching soft-touch plastics or marring clear coats. Investing in the right set of tools not only protects your clients’ vehicles but also significantly improves your efficiency, allowing you to complete complex detailing tasks with confidence.
Core Evaluation Criteria for Trim Removal Tools
Selecting the right tools for a professional detailing kit requires a clear understanding of materials, geometry, and ergonomics. The primary goal is to find tools that are strong enough to release stubborn fasteners but soft enough to yield before damaging the vehicle’s delicate surfaces.
Material composition is the first line of defense against surface damage. Professional-grade trim tools are typically made from high-quality polymers such as Polyoxymethylene (POM), nylon, or glass-filled nylon. POM is highly rigid and durable, resisting bending under heavy loads while remaining softer than automotive paint and interior plastics. Nylon offers a balance of flexibility and strength, making it ideal for tight gaps where a slight bend prevents panel breakage. ABS is more brittle but highly affordable, though it can snap under extreme leverage and leave sharp edges that can scratch surfaces. Contrast these with metal tools, which should only be used when wrapped in protective tape or when dealing with heavy-duty steel retaining clips deep within a door structure.
Products mentioned in this guide
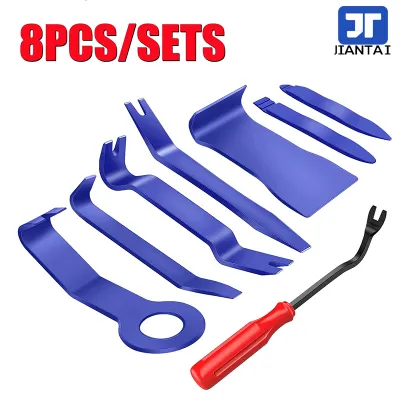
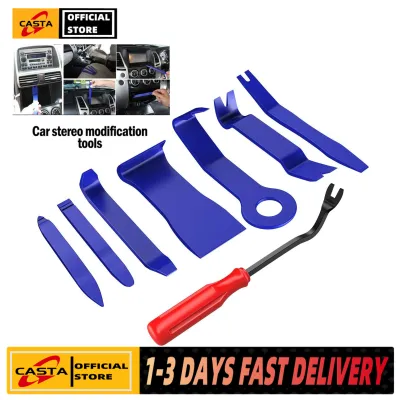
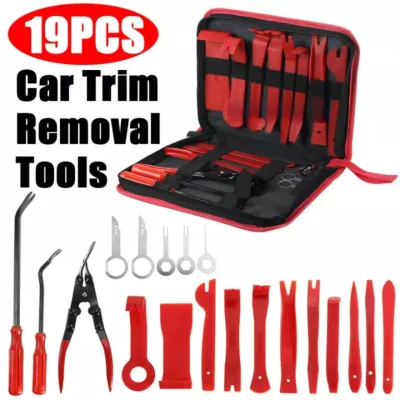
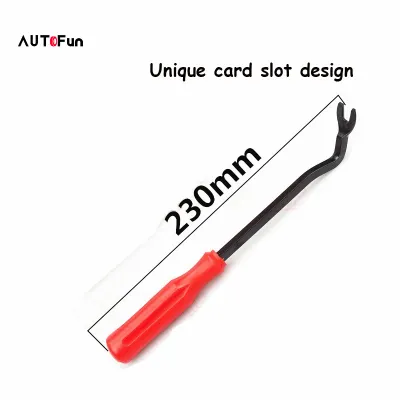
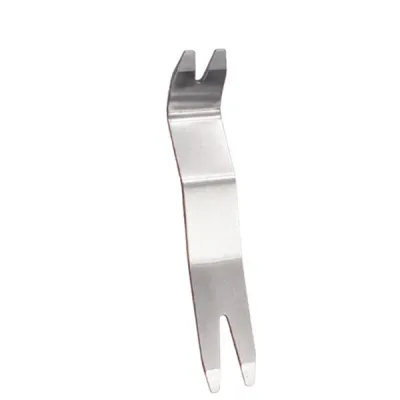
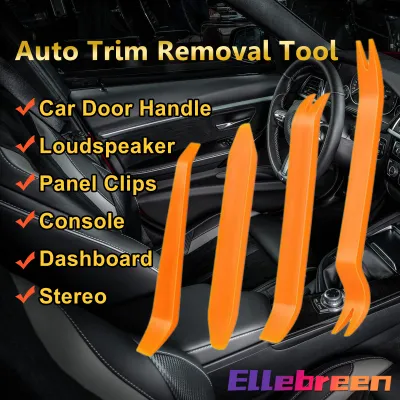
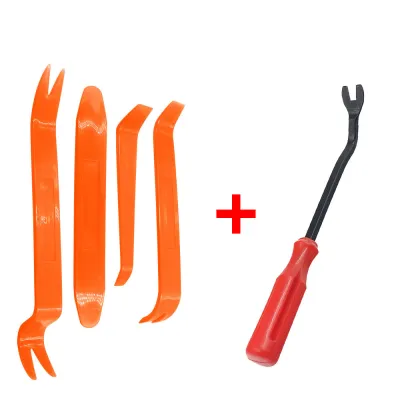
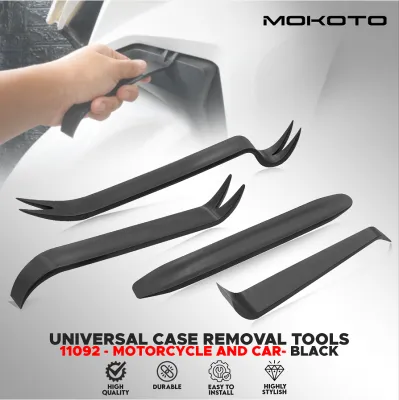
Prices are valid at publication and may change. Please refer to the product page for the latest price.
Edge geometry determines how effectively a tool can penetrate panel gaps and grip fasteners. Wedge angles must be ultra-thin to slide into tight panel gaps, yet taper gradually to distribute leverage evenly across a wider surface area. V-notches are essential for sliding under the heads of push-pins and plastic rivets, ensuring the lifting force is applied directly to the center shaft rather than the fragile outer flange. Flat profiles are necessary for sweeping across wider surfaces, such as when releasing the long retaining clips on dashboard trim strips or center console surrounds.
Ergonomics and grip are critical for maintaining control and reducing hand fatigue during long detailing sessions. Professional detailing often involves hours of repetitive hand movements in awkward, cramped cabin spaces. Handles must feature textured surfaces or rubberized overmolds to prevent slippage when hands are sweaty or coated in detailing sprays. The length of the tool determines the leverage; longer handles provide more mechanical advantage but require more clearance, whereas stubby, low-profile tools are indispensable for tight footwells and glovebox compartments.
Must-Have Tool Types for a Complete Detailing Kit
To deliver a flawless detailing job, you cannot rely on a single “universal” pry tool. Modern vehicles utilize a complex mix of metal spring clips, plastic push-pins, threaded fasteners, and heavy-duty adhesives to hold trim pieces in place. Using the wrong tool often results in broken clips, gouged leather, or cracked plastic panels that are expensive to replace.

A professional kit must categorize tools by their specific mechanical action: prying, pulling, slicing, and hooking. By matching the tool to the fastener type, you minimize the risk of collateral damage and significantly speed up your workflow. This specialization is what separates a professional detailer from an amateur hobbyist.
Panel Pry Tools and Wedges
Panel pry tools and wedges are the workhorses of interior disassembly. These tools feature wide, flat profiles designed to slide between two adjacent panels and spread the prying force over a larger surface area. This prevents the concentrated stress points that cause soft-touch plastics to deform or “white out” under pressure.
Design variations include straight wedges for initial gap penetration, angled pry bars for lifting panels upward from a flat surface, and dual-forked edges that can straddle a hidden clip. High-stiffness polymers like glass-filled nylon or POM are mandatory here; they must resist bending even when prying stubborn door cards or tightly fitted center console surrounds.
In a typical detailing workflow, these tools are used to remove door cards to clean window tracks, pop off dashboard surrounds to access dusty air vents, and lift center console trim to vacuum out spilled liquids. They are also highly effective for removing kick panels and sill plates where dirt and moisture tend to accumulate.
Clip Pliers and Fastener Removers
Plastic push-pins, Christmas tree clips, and retaining rivets are notoriously fragile, especially after years of exposure to heat and vibration. Standard pry tools often tear the heads off these fasteners, leaving the stem stuck inside the sheet metal. Specialized clip pliers and fastener removers are designed specifically to solve this problem.
Clip pliers feature thin, flat, angled jaws that slide directly under the head of the fastener. When you squeeze the handles, the jaw tips lift the center pin of the clip, collapsing the retaining tabs underneath and pulling the entire fastener out in one clean motion. Look for spring-loaded designs that reduce hand fatigue and provide a controlled, smooth lifting action.
These tools are indispensable for exterior detailing and engine bay cleaning. They are used to remove bumper covers, wheel well liners, underbody splash shields, and trunk liners. Safely removing these panels allows you to clear out packed mud, leaves, and road salt that can lead to premature rust formation.
Emblem Lifters and Fishing Line Tools
De-badging, emblem replacement, and decal removal are common tasks in high-end detailing, paint correction, and ceramic coating preparation. Removing these items allows for a seamless polish and coating application, but doing so without scratching the paint requires specialized tools.
Plastic wedge lifters designed for emblems are incredibly thin and flexible. They are used to gently slice through the foam adhesive backing behind a badge without making direct contact with the clear coat. When paired with a mild adhesive remover, these wedges glide smoothly along the body panel.
For a completely touchless approach on delicate paint, monofilament or braided wire tools are the gold standard. These tools consist of a high-strength line suspended between two ergonomic handles. By using a gentle sawing motion parallel to the paint surface, you can cut through the adhesive layer cleanly, leaving only a soft residue that can be safely dissolved and wiped away.
Seal and Weatherstrip Hooks
Rubber weatherstripping and window seals are prone to trapping dirt, mold, and polishing residue. To clean these areas thoroughly or to install sound-deadening material, the seals must be lifted or temporarily removed.
Blunt-tip hooks are designed to slide under rubber seals and lift them off their pinch welds without puncturing or tearing the soft rubber. Unlike sharp metal picks, these hooks feature rounded, polished tips that protect both the rubber and the underlying painted metal channel from scratches that could invite rust.
Once the cleaning or detailing is complete, rollers and tuck tools are used to press the weatherstripping back into its original position. These tools ensure the seal is seated evenly and securely, preventing wind noise, water leaks, and premature wear on the rubber. They are commonly used around door jambs, trunk lids, hood perimeters, and windshield cowls.
Matching Tools to Specific Detailing Tasks
Selecting the right tool combination depends entirely on the specific detailing task at hand. For interior deep cleaning, your primary goal is to access hidden areas without damaging aged, brittle plastics. In older vehicles, interior clips become extremely fragile due to heat exposure. Using a wide, flat nylon wedge to gently distribute pressure while using a clip remover to support the fastener from behind is the safest approach.
For exterior emblem and decal removal, the focus shifts to paint preservation. Before using any tool, verify the paint condition and ensure the area is free of loose dirt that could act as an abrasive. Slide a thin plastic wedge or a monofilament line behind the emblem, keeping the tool strictly parallel to the body panel. This minimizes the risk of gouging the clear coat and reduces the amount of mechanical polishing needed afterward to correct the paint.
Weatherstrip and seal management requires a delicate touch to avoid micro-tears. Use blunt-tip hooks to lift the rubber lip, allowing you to clean the channel underneath with a detail brush. When reinstalling, use a plastic tuck tool to slide the rubber back under the trim pieces smoothly, ensuring a watertight seal.
Before applying leverage to any panel, always perform a thorough inspection. Check for hidden screws behind plastic covers, especially around door handles, armrests, and dashboard panels. Be extremely cautious around areas marked with “SRS” or “Airbag” logos; never insert metal tools or apply heavy pressure near airbag modules or wiring harnesses. If you encounter unexpected resistance, stop immediately and verify the fastening mechanism using the vehicle’s service manual.
Safety Boundaries and Paint Protection Practices
Even when using high-quality plastic tools, improper technique can still result in damaged trim or dented sheet metal. Always protect the fulcrum point of your tool. When prying against a painted surface or a soft leather dashboard, place a clean microfiber towel, a strip of heavy-duty masking tape, or a dedicated plastic guard between the tool and the pivot point to distribute the pressure.
Recognize the limits of plastic tools. If a tool begins to bend excessively or “white out” under load, do not force it. This is a clear sign that a hidden mechanical fastener, security screw, or structural adhesive is still holding the panel in place. Forcing the tool will either break the tool itself or, worse, crack the expensive trim piece you are trying to remove. Replacing a damaged door card or dashboard panel can easily cost upwards of ₱5,000 to ₱15,000, making patience and proper technique highly economical.
Environmental conditions play a massive role in how materials behave. In tropical climates like the Philippines, high heat and humidity can make interior plastics more pliable but can also cause adhesives to become extremely gummy and difficult to separate. Conversely, in air-conditioned workshops or cooler regions, plastics become brittle and are highly susceptible to cracking under pressure. Adjust your technique accordingly, and consider using a mild heat source to soften stubborn adhesives before attempting removal.
Always establish clear stop conditions. If a panel does not release with moderate, controlled pressure, or if you cannot locate the source of resistance, halt the process immediately. Consult the vehicle-specific service manual or seek assistance from a qualified automotive technician. It is always better to pause and verify than to face the cost of replacing a damaged dashboard or door panel.
Frequently Asked Questions (FAQ)
Can I use a flathead screwdriver instead of a plastic trim removal tool?
Using a metal flathead screwdriver on automotive trim is one of the most common causes of permanent interior and exterior damage. Metal is significantly harder than paint, clear coat, vinyl, leather, and plastic. Applying leverage with a screwdriver concentrates immense pressure on a tiny surface area, which inevitably scratches paint, gouges soft plastics, and tears delicate upholstery.
Metal tools should only be used under strict, highly controlled conditions. For example, if you are dealing with a heavily corroded metal clip deep inside a door cavity where a plastic tool would simply bend or snap, a metal tool may be necessary. In these rare instances, you must wrap the tip of the metal tool in heavy-duty electrical tape or masking tape, and place a thick microfiber cloth or a plastic guard at the fulcrum point to protect the surrounding surfaces.
How do I remove broken plastic clips left inside the panel holes?
When a plastic clip snaps, the retaining stem often remains lodged inside the sheet metal or plastic mounting hole. Attempting to pry these out with improper tools can enlarge the hole, strip the mounting point, or scratch the surrounding paint.
To safely extract a broken clip, use specialized clip pliers or angled needle-nose pliers. Slide the jaws under the remaining flange of the broken clip, squeeze to collapse the retaining tabs, and pull straight out. If the flange has broken off completely, you can use a set of angled picks to gently push the retaining tabs inward from behind the panel, or use a small screw extractor to grip the hollow center of the clip and pull it free.
Always inspect the mounting hole after extraction. If the metal around the hole has been bent, gently flatten it back into shape using a plastic mallet or a protected block of wood before installing a new clip. Never force a new clip into a damaged or misaligned hole, as this will only lead to further breakage and panel rattles.

Community discussion
Share your experience or ask a question. Comments are reviewed before publication.