
Installing a chicken pipe exhaust on your Euro 150 motorcycle is a popular modification for riders looking to alter their bike’s sound profile and aesthetic. A chicken pipe is a specialized aftermarket exhaust designed to mimic the look of a stock pipe while offering a more open internal structure. While the physical installation is straightforward, it requires careful preparation, the right tools, and a clear understanding of mechanical safety boundaries. Modifying your motorcycle’s exhaust system can affect engine performance, emissions, and road legality, so it is crucial to approach the process systematically to avoid damaging your engine or compromising your safety on the road.
Before purchasing or installing any aftermarket exhaust, always consult your motorcycle’s original-vehicle documentation and the exhaust manufacturer’s instructions. Because aftermarket parts can vary in manufacturing tolerances, verifying compatibility with your specific Euro 150 model year is an essential first step. If you are uncomfortable performing mechanical work, electrical adjustments, or structural modifications on your motorcycle, seek the assistance of a qualified professional mechanic to ensure the work is completed safely and legally.
Pre-Installation Checks and Required Tools
A successful installation begins with a clean, organized workspace and a thorough inspection of your new parts. Before you begin loosening any bolts, place your Euro 150 motorcycle on its center stand or a secure paddock stand on a flat, level surface. Working on a stable platform prevents the motorcycle from tipping over during the physical exertion required to remove stubborn bolts. Ensure your workspace is well-ventilated, especially since you will need to run the engine later to check for leaks.
Products mentioned in this guide
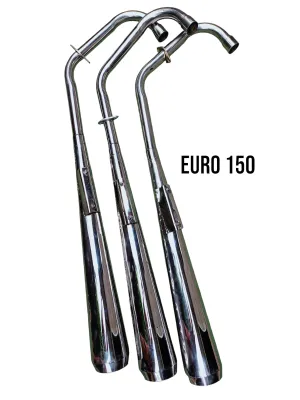
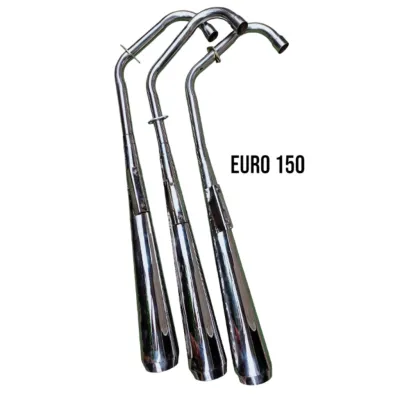
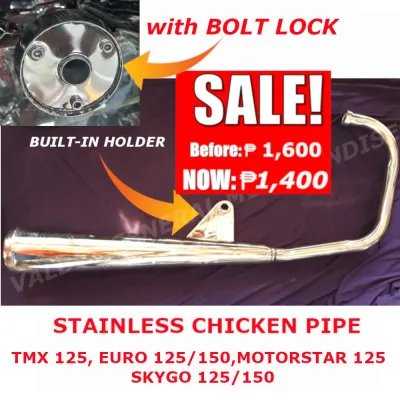
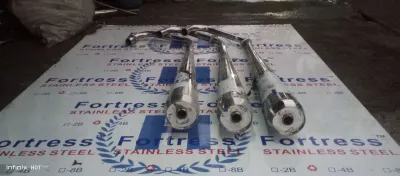
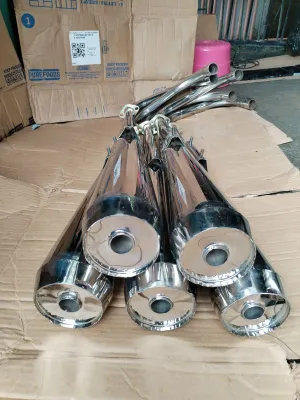
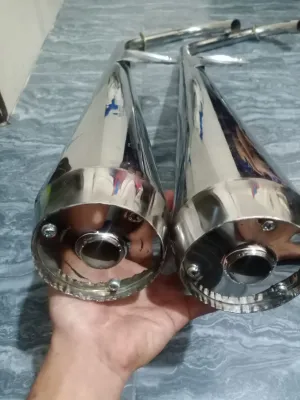
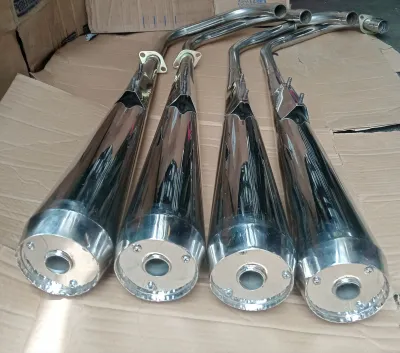
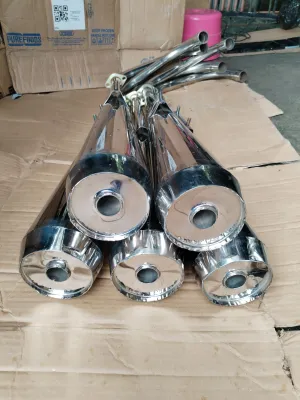
Prices are valid at publication and may change. Please refer to the product page for the latest price.
Next, perform a detailed fitment check of the new chicken pipe against your motorcycle’s mounting points. Verify that the exhaust flange diameter matches the exhaust port on your Euro 150’s cylinder head. Inspect the mounting bracket alignment on the pipe to ensure it lines up with the existing frame mounts on your motorcycle. Additionally, check the hanger rubber and brackets; using worn-out or incompatible rubber hangers can lead to excessive vibration, which may eventually crack the exhaust pipe or damage the frame mounts.
Gather all the necessary hand tools before starting the job. You will typically need a socket wrench set (commonly 10mm, 12mm, and 14mm sockets), open-ended wrenches, a torque wrench, and a new exhaust gasket. Because exhaust bolts are subjected to extreme heat cycles and road moisture, they are highly susceptible to rust and seizing. Applying a high-quality penetrating oil to the cylinder head studs and frame mounting bolts at least 30 minutes before disassembly will significantly reduce the risk of shearing a bolt. Finally, wear appropriate personal protective equipment, including safety glasses to protect your eyes from falling debris under the chassis, and heavy-duty gloves.
Step-by-Step Installation Process
Safety is the primary concern when working on an exhaust system. Before touching any part of the motorcycle, ensure the engine and the stock exhaust have cooled down completely. Exhaust pipes retain intense heat long after the engine is turned off, and attempting to work on a hot system can result in severe burns or damaged threads on the aluminum cylinder head.

Begin by removing any stock heat shields or body panels that obstruct access to the exhaust mounting points. Using the correct socket size, carefully loosen the nuts securing the exhaust flange to the cylinder head. It is best to loosen these nuts gradually and evenly to avoid putting uneven stress on the cylinder head studs. Once the flange nuts are loose but not completely removed, support the weight of the muffler and remove the rear frame mounting bolts and exhaust hangers. With all mounting hardware removed, gently slide the stock exhaust system off the motorcycle and set it aside.
With the old exhaust removed, inspect the exhaust port on the cylinder head. You will find a copper or composite exhaust gasket seated inside the port. Never reuse an old exhaust gasket, as it deforms upon installation to create a gas-tight seal; a used gasket will almost certainly cause an exhaust leak. Carefully pry out the old gasket using a pick or flathead screwdriver, taking care not to scratch the mating surfaces of the aluminum cylinder head. Clean any carbon buildup or debris from the port, then press a brand-new, compatible gasket firmly into place.
Position the new chicken pipe onto the motorcycle, aligning the exhaust flange with the cylinder head studs. It is critical to hand-thread the flange nuts first to ensure they are not cross-threaded, which can permanently ruin the threads on your engine block. Once the flange nuts are finger-tight, align the rear mounting bracket of the chicken pipe with the frame mount. Insert the frame bolts by hand.
With all hardware loosely in place, begin tightening the bolts. Use a torque wrench to tighten the cylinder head flange nuts to the torque specification indicated in your Euro 150 service manual. Tighten these nuts in a gradual, alternating pattern to ensure the flange presses evenly against the new gasket. Once the flange is secure, tighten the rear frame mounting bolts to their specified torque. Avoid over-tightening, as this can strip the threads or crack the mounting tabs on your new exhaust.
Post-Installation Verification and Safety Checks
Once the chicken pipe is physically mounted, you must perform a series of checks to ensure the system is safe and functional before taking the motorcycle out for a ride. Start by conducting a thorough visual inspection of the clearances around the entire length of the exhaust pipe. Ensure there is adequate space between the pipe and the rear tire, suspension components, swingarm, brake lines, and plastic bodywork. A pipe that sits too close to plastic panels can melt them under operating temperatures, while contact with moving parts like the tire or swingarm can cause mechanical failure or a serious accident.
Next, prepare to check for exhaust leaks. Ensure the motorcycle is still securely on its stand in a well-ventilated area. Start the engine and let it idle. Do not rev the engine immediately. Carefully pass your hand near the cylinder head flange and any slip-on joints along the pipe, keeping a safe distance to avoid burns. Feel for any escaping air or puffs of exhaust gas. You can also listen closely for a distinct ticking or hissing sound, which indicates a leak. If you detect a leak, shut off the engine immediately, allow it to cool, and verify that the gasket is seated correctly and the flange nuts are tightened evenly.
Metal expands and contracts significantly when subjected to the extreme heat of engine combustion. Because of this thermal expansion, the mounting hardware can settle and loosen slightly after the first heat cycle. Plan to run the engine until it reaches normal operating temperature, then shut it off and let it cool down completely. Once cool, use your torque wrench to re-check and re-torque all the mounting bolts and flange nuts to ensure they remain tight and secure.
Road Legality, Warranty, and Engine Considerations
Modifying your motorcycle’s exhaust system has implications that extend beyond the garage. In the Philippines, road legality is a primary concern for any rider installing an aftermarket pipe. Local government units and national agencies enforce strict noise ordinances and regulations regarding modified mufflers. Unrestricted exhausts that exceed permissible decibel levels can result in heavy fines, confiscation of the part, or vehicle impoundment during roadside inspections. Before riding on public roads, ensure your chicken pipe complies with local noise standards, and consider using a removable silencer or decibel killer if necessary.
Additionally, installing an aftermarket exhaust can directly impact your motorcycle’s manufacturer warranty. Most manufacturers specify that unauthorized modifications to the engine or exhaust system will void the warranty coverage on those components. If your Euro 150 is still under warranty, consult your dealer or read the warranty terms carefully before proceeding with the installation.
Finally, you must consider the mechanical impact of the new exhaust on your engine’s operation. A chicken pipe typically has less internal restriction than a stock exhaust, which reduces backpressure. While this can alter the exhaust flow, it also changes the air-fuel mixture entering the engine. With more air flowing out, the engine may run “lean,” meaning there is too much air and not enough fuel in the combustion chamber. A lean engine runs significantly hotter, which can lead to overheating, spark plug damage, and accelerated wear on internal engine components. Monitor your spark plug color and engine temperature closely after installation to ensure your engine is operating within safe parameters.
Frequently Asked Questions (FAQ)
Will a chicken pipe damage my Euro 150 engine?
Installing a chicken pipe will not immediately damage your Euro 150 engine, but it can cause long-term wear if the air-fuel mixture is not monitored. Because the aftermarket pipe reduces exhaust backpressure, it allows exhaust gases to escape more quickly, which often leans out the air-fuel ratio. Running a lean mixture increases combustion temperatures, which can lead to engine overheating, valve damage, or piston wear over time. To protect your engine, inspect your spark plug regularly; a white or light gray electrode indicates a lean condition, signaling that your fuel system needs adjustment to match the increased airflow.
Do I need to remap the ECU after installing a chicken pipe?
Whether you need to adjust your fuel system depends on your Euro 150’s fuel delivery system and other modifications. If your motorcycle is fuel-injected and you only install a chicken pipe while keeping the stock air filter, the engine control unit (ECU) may be able to make minor adjustments automatically. However, if you combine the exhaust with a high-flow air filter, or if you experience symptoms like engine hesitation, popping on deceleration, or excessive heat, a manual ECU remap or fuel controller adjustment is highly recommended. For carbureted models, re-jetting the carburetor is usually necessary to maintain a safe and efficient air-fuel ratio. Always consult a qualified mechanic to evaluate your motorcycle’s specific tuning needs.

Community discussion
Share your experience or ask a question. Comments are reviewed before publication.