
Quick Answer: How to Balance Budget and Safety
When choosing a helmet with a camera, your primary decision must always prioritize physical impact protection over recording features. A helmet’s core job is to save your life in an accident, while the camera serves as a secondary tool for documentation or recreation. If your budget is limited, choose a highly certified, basic helmet rather than a cheap, uncertified model that promises high-end video features.
The market generally progresses from basic integrated recorders in entry-level shells to fully connected, aerodynamic smart systems in premium brackets. As you move up in price, you transition from heavy thermoplastic materials and standard high-definition video to lightweight carbon composites and stabilized, low-light-capable camera sensors.
Regardless of the price tier, never rely solely on online marketplace descriptions or digital badges. Always physically verify the safety certification labels inside and on the shell of the helmet immediately upon delivery to ensure local road legality.
Products mentioned in this guide
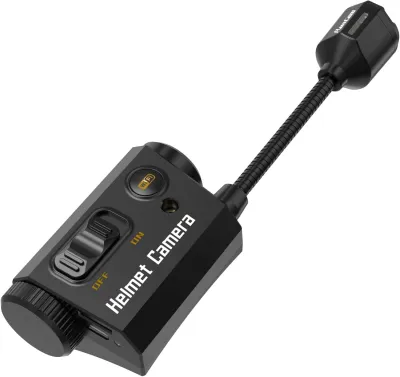
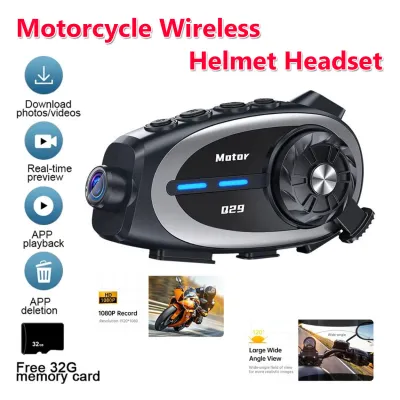
Prices are valid at publication and may change. Please refer to the product page for the latest price.
Setting Realistic Expectations Across Budget Tiers
Finding the right balance between cost, safety, and video quality requires understanding what each price bracket actually delivers. Higher budgets do not just buy better camera sensors; they also fund superior helmet engineering, lighter materials, and better weight distribution.

When funds are tight, you can safely compromise on advanced camera features like wireless streaming, voice control, or ultra-high-resolution sensors. However, you should never compromise on the structural integrity of the helmet shell, the quality of the impact-absorbing liner, or the security of the retention system.
Weight distribution is a critical factor that improves significantly in higher budget tiers. Cheaper models often feel front-heavy due to poorly integrated camera modules, whereas premium designs distribute the weight of the battery and sensor evenly to prevent neck fatigue during long rides.
Entry-Level: Basic Recording and Standard Safety
Entry-level options, typically positioned as budget-friendly choices, offer straightforward video recording paired with standard safety shells. In this tier, you will generally find helmets made of injection-molded thermoplastic materials that meet basic safety standards but tend to be heavier than their premium counterparts.
The integrated cameras in this bracket usually capture standard high-definition video without advanced electronic stabilization. Lenses are basic wide-angle designs that perform adequately in bright daylight but often struggle with graininess and motion blur in low-light conditions or during night rides.
Key Considerations for Entry-Level Buyers:
- Weight and Fatigue: Expect a heavier overall package, which can lead to neck strain during extended daily commutes.
- Battery Limitations: Battery life is often shorter, and the cells are usually non-removable, meaning the camera's lifetime is tied directly to the battery's health.
- Weather Resistance: Check the charging port covers carefully; entry-level models may have basic rubber flaps that require precise seating to keep out heavy tropical rain.
To maximize the lifespan of an entry-level model, look for designs that feature accessible charging ports and robust rubber seals. This allows you to charge the unit reliably while protecting the internal electronics from moisture and dust.
Mid-Range: Better Materials and Stabilized Video
Moving into the mid-range tier introduces a noticeable upgrade in both helmet construction and camera performance. Here, manufacturers often utilize lightweight polycarbonate or fiberglass composite shells, which significantly reduce overall weight and improve rider comfort.
Camera systems in this bracket benefit from upgraded image sensors and basic electronic image stabilization. This technology helps smooth out the vibrations caused by uneven road surfaces, potholes, and engine rumble, resulting in much clearer, more usable footage.
Key Features to Expect in the Mid-Range:
- Improved Ventilation: Better airflow channels help manage heat and humidity, which is essential for riding in tropical climates.
- Enhanced Audio: Basic wind-noise reduction technology helps capture clearer audio, making voice notes or ambient road sounds more legible.
- Versatile Designs: This tier frequently includes modular or flip-up helmet designs, allowing for greater convenience during quick stops.
When evaluating modular mid-range helmets, pay close attention to how the camera wiring is routed. Ensure that the chin bar mechanism operates smoothly without pinching any internal cables or putting stress on the camera housing.
Premium: Aerodynamics and Smart Integration
Premium helmets represent the intersection of advanced aerospace materials and cutting-edge smart technology. These models utilize carbon fiber or complex multi-composite shells to achieve incredibly low weights while maintaining exceptional structural strength.
The camera systems are fully integrated into the helmet’s aerodynamic profile rather than sitting as an afterthought on the shell. This seamless integration minimizes wind drag, eliminates annoying whistling noises at high speeds, and ensures the helmet remains perfectly balanced on your head.
Premium Tier Highlights:
- Advanced Safety Liners: Multi-density expanded polystyrene liners provide targeted impact absorption for different types of collisions.
- Emergency Systems: Quick-release cheek pads allow emergency medical personnel to remove the helmet safely without straining the rider's neck.
- Smart Connectivity: Seamless integration with smartphone apps, advanced Bluetooth intercoms, and active noise cancellation are standard.
Keep in mind that premium systems often require proprietary accessories, specialized memory cards, and regular firmware updates to maintain peak performance. The maintenance of these high-end electronics requires strict adherence to the manufacturer’s guidelines to avoid damaging the integrated seals.
Verifying Safety Certifications and Local Compliance
Before you look at camera resolutions, frame rates, or lens angles, you must verify that the helmet is legally compliant and physically capable of protecting your head. In the Philippines, riding with an uncertified helmet is not only illegal but highly dangerous.
Start by inspecting the physical markings on the helmet. Legitimate safety helmets must carry recognized international certification stickers, such as DOT (FMVSS No. 218) from the United States, ECE (22.05 or 22.06) from Europe, or SNELL certification. These labels are typically located on the lower rear exterior of the helmet shell or sewn directly onto the chin strap.
For local compliance, the helmet must bear an official Import Commodity Clearance sticker or a Philippine Standard certification mark. These stickers feature unique holographic elements and serial numbers issued by the Department of Trade and Industry. You can verify these numbers through official government databases to ensure they are not counterfeit.
Never rely on digital badges, product titles, or text descriptions on e-commerce platforms. Unscrupulous sellers often copy and paste certification terms into their listings without actually certifying the physical product. Always perform a physical inspection of the interior labels immediately upon unboxing your purchase.
If you find that the safety stickers are easily peeled off, lack holographic depth, or do not match the manufacturer’s documentation, do not use the helmet. Return the product immediately and contact the manufacturer or an authorized distributor to report the discrepancy.
Evaluating Camera Specs and Battery Realities
Camera specification sheets can be misleading if you do not know how to interpret the numbers in the context of real-world riding. High megapixel counts and wide-angle claims do not always translate to clear, useful road footage.
Consider the camera’s field of view carefully. While an ultra-wide lens (such as 170 degrees) captures a broader view of your surroundings, it also introduces significant fish-eye distortion. This distortion can make license plates and road signs appear smaller and much harder to read, especially at a distance. A moderate field of view between 120 and 140 degrees generally offers the best balance between coverage and detail.
Battery performance is heavily influenced by environmental conditions. The intense heat and high humidity of the Philippines can cause batteries to degrade faster and drain more quickly than advertised. Continuous recording at high resolutions generates substantial internal heat, which may trigger automatic thermal shutdowns to protect the sensor.
Battery and Power Checklist:
- Real-World Runtime: Expect actual battery life to be shorter than the manufacturer's laboratory estimates, especially when using wireless features.
- External Power Support: Verify if the camera module can record while connected to an external power bank via a sealed, waterproof cable.
- Thermal Management: Look for models with metal heat sinks or ventilated camera housings to help dissipate heat during slow-moving traffic.
Finally, examine the physical mounting of the camera module. The camera must be flush with the shell or designed with a safe breakaway mechanism. A protruding, rigidly fixed camera can act as a dangerous snag point during a slide, catching on the pavement and causing severe rotational forces on your neck.
Factoring in Hidden Costs and Essential Accessories
The purchase price of a helmet with a camera is rarely the final cost of getting the system up and running. To avoid unexpected budget overruns, you must factor in several essential accessories and long-term maintenance requirements.
First, you will need a high-quality, high-endurance microSD card. Standard memory cards are not designed for the constant write cycles and high operating temperatures of a helmet camera. Using a cheap card can lead to corrupted files, dropped frames, or complete system crashes. Look for cards rated specifically for continuous video recording, such as Class 10, U3, or V30 cards from reputable brands.
Second, consider the power delivery system. If the helmet features a non-removable internal battery, the entire camera system becomes useless once the battery’s chemistry degrades over a few years. Models with swappable battery packs or replaceable internal cells offer a much longer usable lifespan, saving you money in the long run.
Potential Hidden Expenses:
- High-Endurance MicroSD Cards: Essential for reliable loop recording in hot environments.
- Proprietary Charging Cables: Replacement cables can be expensive if the helmet uses a non-standard connector.
- Replacement Visors and Seals: Integrated camera visors may require specialized replacement parts that are harder to find than standard visors.
- Shipping and Return Fees: If buying online, check the seller's return policy regarding fitment issues, as returning a heavy helmet can be costly.
Always calculate these additional costs before making your final decision. A slightly more expensive helmet package that includes a high-endurance card and a spare battery may actually cost less over its lifetime than a cheaper model that requires immediate aftermarket upgrades.
Frequently Asked Questions (FAQ)
Can I add an external action camera to a standard helmet instead of buying an integrated one?
Yes, you can mount an external action camera to a standard helmet, but this approach introduces several safety and aerodynamic trade-offs. External cameras create significant wind drag, which can cause neck strain at high speeds and generate annoying wind noise inside your helmet.
More importantly, external mounts can act as dangerous snag points during an accident. If you slide along the pavement, a protruding camera can catch on the road surface, causing violent rotational forces that increase the risk of neck and spine injuries. Additionally, some strong adhesives used for camera mounts can chemically degrade the helmet’s outer shell, potentially voiding the manufacturer’s warranty.
An integrated camera is generally the safer and more practical choice for daily commuting. Because the camera is built directly into the shell’s profile, it maintains the helmet’s original aerodynamics, weight distribution, and impact-management properties.
How do I clean the camera lens without damaging the helmet visor?
Cleaning the camera lens requires gentle techniques to avoid scratching the optical glass or stripping away protective coatings. Never use harsh household chemicals, ammonia-based glass cleaners, or abrasive materials like paper towels, which can permanently scratch both the lens and the helmet visor.
To clean the lens safely, first blow away any loose dust or grit with a manual air blower. Then, apply a small amount of specialized, lens-safe cleaning solution to a clean, high-quality microfiber cloth. Gently wipe the lens in a circular motion, starting from the center and moving outward without applying heavy pressure.
Always consult the helmet manufacturer’s care manual before cleaning. Some integrated electronic modules have specific water-resistance ratings, and spraying liquid cleaners directly onto the camera housing can compromise the seals and damage the internal circuitry.

Community discussion
Share your experience or ask a question. Comments are reviewed before publication.