
Applying Turtle Wax Rubbing Compound safely requires a careful balance of surface preparation, controlled pressure, and immediate post-treatment protection. Because rubbing compounds contain microscopic abrasives designed to level your car’s clear coat, improper technique can easily introduce deep swirl marks, haze, or even burn through the paint entirely. By thoroughly cleaning the panel, testing the product on an inconspicuous spot, working in small sections, and always following up with a refining polish and protective wax, you can successfully restore your vehicle’s finish without causing costly damage.
Assessing Your Scratches: When to Use Rubbing Compound
Before touching any abrasive product to your car’s body panels, you must determine whether a rubbing compound is the appropriate solution for the damage. Rubbing compounds are formulated for heavy-duty cutting, meaning they physically shave down a microscopic layer of the clear coat to level out scratches, severe oxidation, or stubborn stains. This is fundamentally different from a finishing polish, which uses much finer abrasives to remove light haze and restore high-gloss reflection. Using a heavy compound when a mild polish would suffice unnecessarily thins your vehicle’s protective clear coat.
To evaluate the depth of a scratch, perform the classic fingernail test. Gently run your fingernail across the scratch; if your nail catches or drops into the groove, the scratch has penetrated through the clear coat and into the base color coat or primer. In such cases, attempting to buff out the scratch with a rubbing compound will only strip away the surrounding clear coat without fixing the defect, leaving the paint vulnerable to rust and peeling. These deep scratches, along with flaking clear coats or heavily oxidized single-stage paint systems, are strict stop conditions that require professional touch-up paint or panel repainting rather than DIY compounding, potentially saving you from a ₱15,000 professional repainting bill.
Products mentioned in this guide
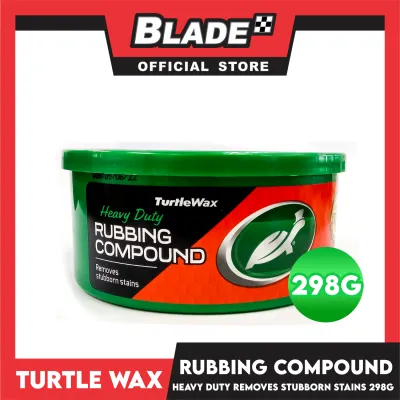
234 Lazada user ratings
High-quality rubbing compound, Restores car's shine,
Leaves a smooth surface, Easy to apply and remove,
👌Ease of Use:High-quality rubbing compound,
Removes scratches effectively,
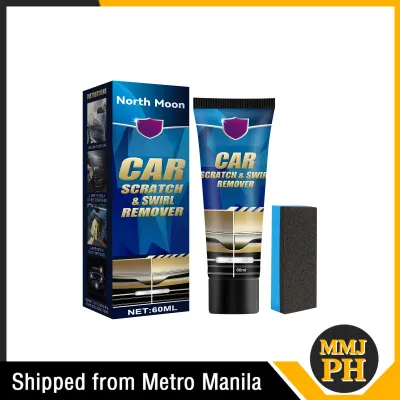
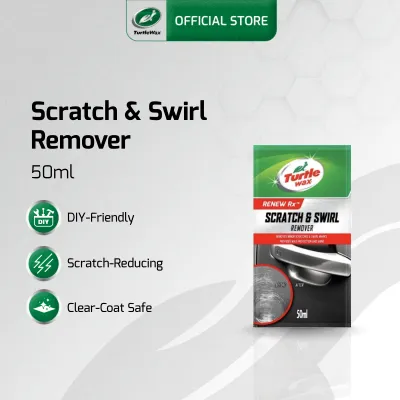
5,417 Lazada user ratings
Thank you seller dumating na din, dko pa lang na testing………………………... post ko update once na na testing n item, seems legit nmn pero tingnan …Read full reviewShow less
Thank you seller dumating na din, dko pa lang na testing………………………... post ko update once na na testing n item, seems legit nmn pero tingnan pag nagamit na, …………………….ok din packaging naka bubble wrap nmn medyo yng rainaway lang ang medyo deform ang box pero d nmn na damage ang item kya ok pa pa din sya., salamat s nag nagdeliver…………….
Quality:Gold Standard Appearance:Good Performance:Not Ready to use apply Mabilis Ang deliver ilan araw bago ako na place order well di ko pa…Read full reviewShow less
Quality:Gold Standard Appearance:Good Performance:Not Ready to use apply Mabilis Ang deliver ilan araw bago ako na place order well di ko pa nabubuksan at napapahid good products Ang turtle wax sana mawala Ang mga scratches
🛠️Durability:9/10 👌Ease of Use:10/10 ✨Shine:100% smooth while using it with micro fiber or foam convenient application shine bright like a di…Read full reviewShow less
🛠️Durability:9/10 👌Ease of Use:10/10 ✨Shine:100% smooth while using it with micro fiber or foam convenient application shine bright like a diamond
this is a trusted and proven brand. It is highly effective for light scratches. It is also easy to use.
Prices are valid at publication and may change. Please refer to the product page for the latest price.
Essential Tools and Materials for Safe Application
Achieving a clean finish requires gathering the correct tools before you begin, as using improper applicators is a primary cause of compounding damage. For the initial wash, you will need a dedicated car wash soap, clean microfiber wash mitts, and a high-quality clay bar with clay lubricant to pull embedded contaminants out of the paint pores. Skipping the clay bar step can trap microscopic grit under your polishing pad, dragging it across the paint and creating deep, circular scratches.

For the application itself, choose your tools based on your experience level and the severity of the defects. Hand application requires clean, high-density microfiber applicator pads, while machine application demands a dual-action (DA) polisher paired with a medium-cut foam pad. Avoid aggressive wool pads unless you are highly experienced, as they generate heat rapidly. You will also need several plush, clean microfiber towels to wipe away residue, a roll of automotive masking tape to protect adjacent trim, and a finishing polish followed by a protective carnauba wax, synthetic sealant, or ceramic spray to seal the freshly exposed paint.
Step-by-Step Guide to Applying the Compound
Safely restoring your car’s paint is a systematic process that requires patience, a controlled environment, and strict attention to detail. In tropical climates like the Philippines, high humidity and intense heat can cause compounds to dry out almost instantly on the panels. Always work inside a well-ventilated garage or under a sturdy shade, ensuring the car’s body panels are completely cool to the touch before starting.
Surface Preparation and Spot Testing
Begin by thoroughly washing the entire vehicle using the two-bucket method to remove loose dirt, road grime, and dust. Once dry, run a clay bar over the target panel to lift bonded contaminants like tree sap, industrial fallout, or asphalt splatters. The surface must feel as smooth as glass before you proceed; any remaining grit will act as an additional, uncontrolled abrasive under your pad, causing severe marring.
Next, use your automotive masking tape to cover all adjacent non-painted surfaces. This includes black plastic trim, rubber window seals, door handles, and sharp panel edges where the paint is naturally thinnest. Rubbing compound can permanently stain textured plastics white and will quickly burn through the thin paint on sharp body lines.
Before applying the compound to the damaged area, perform a mandatory spot test on an inconspicuous section of the vehicle, such as the lower part of the bumper or inside the door jamb. Apply a tiny amount of compound and buff it out to observe how your specific paint reacts. If you notice the clear coat clouding excessively or if the color of your car transfers onto the applicator pad (indicating a single-stage paint without a clear coat), stop immediately and evaluate whether a less aggressive polish is safer.
Application Technique: Hand vs. Machine
If you choose to apply the compound by hand, squeeze a coin-sized amount of Turtle Wax Rubbing Compound onto a clean microfiber applicator pad. Press the pad onto the paint and work in a small, manageable section of about two feet by two feet. Use moderate, even pressure and move the pad in overlapping circular motions, or use a cross-hatch pattern (up-and-down, then left-to-right) to ensure uniform coverage. Avoid pressing down with your fingertips, as this creates localized pressure points that can leave uneven thin spots in your clear coat; instead, use the flat palm of your hand to distribute the force evenly.
For machine application, apply three to four pea-sized drops of compound onto a clean foam cutting pad. Set your dual-action polisher to a low speed (typically speed setting 3 or 4) to prevent excessive heat buildup. Place the pad flat against the paint before turning the machine on to avoid slinging the product. Move the polisher slowly across the 2×2 foot section in a cross-hatch pattern, letting the weight of the machine and the orbital oscillation do the work rather than pushing down heavily. Keep the pad perfectly flat at all times to prevent the edge of the pad from cutting too deeply into the paint.
Regardless of your method, you must work in small sections and keep the product moist. If the compound begins to dry out, turn dusty, or if the paint feels hot to the touch, stop immediately. Working with dry compound will scratch the paint, while excessive heat can soften the clear coat, leading to permanent burn marks or pad stalling.
Wiping, Inspecting, and Refining the Finish
Immediately after completing a section—and before the compound has a chance to dry completely—wipe away the residue using a clean, plush microfiber towel. If you let the compound dry on the hot panel, it will bake into a hard, stubborn crust that is incredibly difficult to remove without scratching the paint again. Use light pressure and flip the towel frequently to a clean side to avoid rubbing the removed clear coat particles back into the surface.
Once the residue is cleared, inspect your work under direct, bright sunlight or using a dedicated LED detailing light. Examine the area from multiple angles to check if the scratch has been successfully leveled. If the scratch is still visible but has improved, you may repeat the process once more, keeping in mind that every pass removes more clear coat. If the scratch is gone but the paint looks slightly dull, hazy, or shows fine swirl marks, do not worry; this compounding haze is normal and will be corrected in the next step.
Restoring Shine and Protection After Compounding
Because rubbing compounds use aggressive abrasives to level paint defects, they naturally leave behind a microscopic texture known as compounding haze or micro-marring. To restore a deep, mirror-like gloss, you must follow up with a finishing polish. Apply the polish using a soft foam polishing pad, working in the same small sections with light pressure to smooth out the micro-scratches left by the compound and bring back the paint’s optical clarity.
Compounding and polishing completely strip away any pre-existing wax, sealant, or ceramic coatings, leaving your freshly leveled clear coat entirely unprotected against environmental hazards. In tropical regions, the paint is constantly exposed to intense UV rays, heavy rain, acid rain, and airborne contaminants. Leaving the clear coat bare will cause it to oxidize and degrade rapidly.
To lock in the shine and protect the surface, apply a high-quality protective layer immediately after polishing. You can choose a traditional carnauba wax for a warm, deep glow, a synthetic polymer sealant for longer-lasting durability, or a modern ceramic spray for water-beading and UV protection. Follow the specific product label instructions for curing times, which typically require keeping the vehicle dry and out of direct sunlight for several hours to allow the protective layer to bond completely to the paint.
Frequently Asked Questions (FAQ)
Can I use rubbing compound on matte or satin paint finishes?
No, you should never use rubbing compound or any other abrasive product on matte, satin, or flat paint finishes. These specialized paints achieve their non-reflective look through a textured clear coat that diffuses light. Applying an abrasive compound will flatten this texture, permanently polishing the matte finish into an uneven, glossy patch that cannot be undone. For matte finishes, stick to dedicated matte-safe cleaners and detailers, and consult your vehicle manufacturer’s specific care guidelines for scratch repairs.
How often can I safely use rubbing compound on the same panel?
Rubbing compound should be used as a rare, corrective measure rather than a routine maintenance step. Your car’s factory clear coat is extremely thin—often no thicker than a post-it note—and every compounding session permanently removes a portion of this protective layer. Repeatedly compounding the same panel will eventually burn through the clear coat entirely, exposing the base paint and requiring an expensive professional respray. Always use the least aggressive method first, such as a mild polish, and reserve rubbing compounds strictly for deep defect removal.
Will this remove water spots and oxidation?
Yes, Turtle Wax Rubbing Compound is highly effective at removing heavy oxidation and stubborn, etched-in water spots by shaving away the damaged top layer of clear coat. However, because compounding is an aggressive process, it should not be your first choice for routine water spot removal. Try using a dedicated, non-abrasive water spot remover or a mild acidic wash first to dissolve the mineral deposits chemically. If the spots remain etched into the paint after chemical cleaning, then proceed with a localized compounding spot-treatment to level the surface.

Community discussion
Share your experience or ask a question. Comments are reviewed before publication.