
Finding the right motorcycle helmet with a camera in the Philippines requires balancing two critical priorities: road safety and reliable video recording. Whether you are navigating the daily congestion of Metro Manila, cruising scenic routes in Batangas, or riding through unpredictable tropical downpours, your helmet remains your primary line of defense. While capturing footage for daily commutes or weekend rides is highly valuable for security and documentation, a camera should never compromise the structural integrity of your protective gear. Choosing the right setup depends on understanding how safety certifications, camera integration, and your personal budget align to keep you protected and recorded.
Defining Your Budget and Safety Non-Negotiables
When planning your purchase, your budget must prioritize the helmet’s protective capabilities over its recording features. A helmet is, first and foremost, life-saving equipment designed to manage impact energy during a collision. Allocating too much of your budget to high-definition video capabilities while settling for a substandard shell increases your risk of severe injury.
A practical approach is to determine the cost of a certified, high-quality helmet first, and then evaluate what camera options fit within your remaining funds. If your budget is limited, choosing a highly rated standard helmet and pairing it with a separate, budget-friendly external camera is often safer than buying an unbranded, cheap helmet with a built-in camera.
Products mentioned in this guide
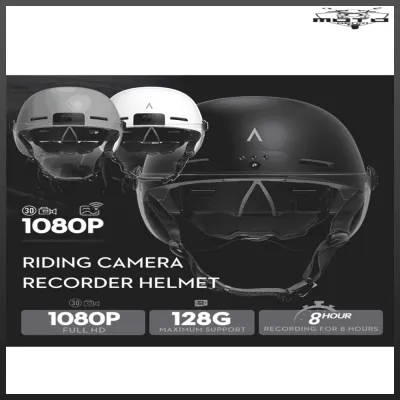
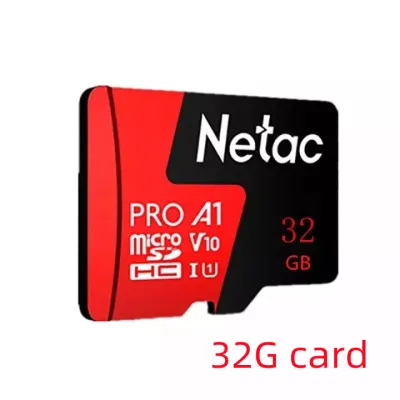
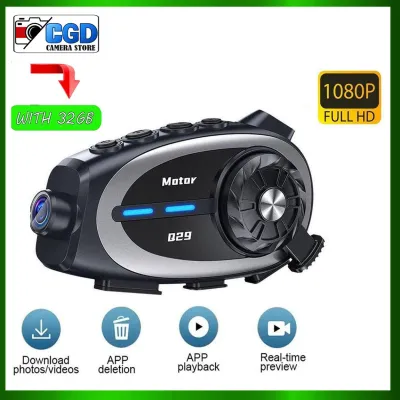
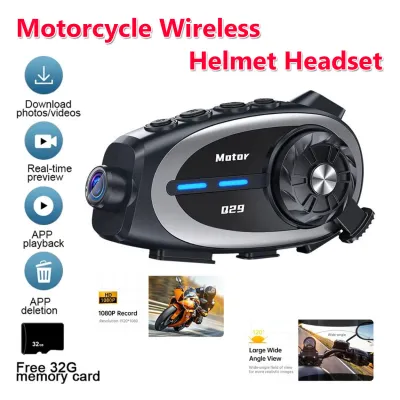
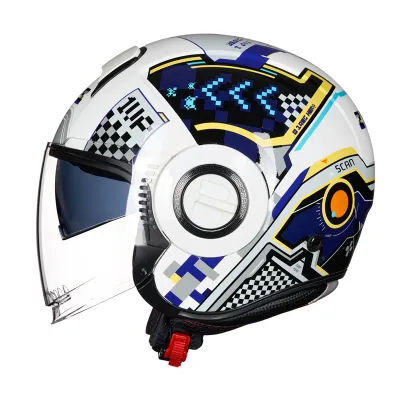
Prices are valid at publication and may change. Please refer to the product page for the latest price.
Be highly skeptical of unusually low-priced helmets that claim to offer advanced, fully integrated camera systems. High-quality optical sensors, rechargeable batteries, and impact-resistant housing are expensive to manufacture. When a product is sold at an incredibly low price point, the manufacturer has likely cut corners on either the helmet’s structural safety, the quality of the protective EPS liner, or the electrical safety of the camera components.
Evaluating Entry-Level Helmets and Basic Camera Setups
For riders working with a modest budget, the entry-level tier offers two primary paths: a basic helmet with a built-in camera or a certified standard helmet paired with an aftermarket action camera mount. In most cases, choosing a certified standard helmet and adding an external camera provides better safety and flexibility. This setup allows you to upgrade your camera independently as your budget grows without needing to replace an otherwise perfectly functional helmet.

If you are looking at entry-level options, you must carefully evaluate the essential technical specifications of the recording system. Check the advertised video resolution, field of view, and battery life on the manufacturer’s official spec sheet. At this price point, look for at least 1080p resolution to ensure license plates are legible, a wide-angle lens of at least 120 degrees to capture side traffic, and a battery that can run continuously for your average commute.
Safety verification is paramount when exploring budget-friendly gear. In the Philippines, every motorcycle helmet must carry a legitimate Import Clearance Certificate (ICC) sticker or a Philippine Standard (PS) mark. Before purchasing any budget helmet, inspect these physical labels and cross-reference the manufacturer’s certification details with official government databases to ensure the helmet has undergone rigorous impact and penetration testing.
Exploring Mid-Range Options for Balanced Tech and Protection
Stepping up to a mid-range budget unlocks significant improvements in both riding comfort and recording quality. In this tier, helmets often feature better aerodynamic designs that reduce wind noise, which directly improves the audio quality of your recordings. You will also find enhanced ventilation systems that are crucial for managing heat and humidity during long rides in tropical climates.
Camera technology in mid-range setups typically introduces electronic image stabilization (EIS) and improved low-light performance. EIS is essential for smoothing out the vibrations transmitted from the motorcycle handlebars and uneven road surfaces, resulting in clearer, more usable footage. Additionally, better sensors help capture clearer details during early morning commutes or night rides along poorly lit provincial roads.
This budget level also marks the transition from bulky external mounts to semi-integrated camera systems. These systems are designed to fit flush against the helmet shell, reducing aerodynamic drag and minimizing the risk of the camera snagging on external objects during a fall. When investing in a mid-range system, always verify the manufacturer’s warranty terms, the availability of firmware updates to fix software bugs, and the accessibility of replacement parts like spare batteries or mounting adhesive pads.
Assessing Premium Helmets with Advanced Integrated Systems
When budget is not a limiting factor, premium helmets with fully integrated camera and communication systems offer the highest level of convenience, safety, and performance. These top-tier models feature cameras seamlessly built into the helmet shell, eliminating external wires, bulky mounts, and aerodynamic imbalance.
Premium systems often boast high-resolution recording, such as 4K video, alongside advanced features like voice control, loop recording, and integrated Bluetooth communication. Voice control allows you to start or stop recording without taking your hands off the handlebars, which is a major safety advantage. Furthermore, these helmets often utilize premium shell materials like carbon fiber, fiberglass composites, or advanced aramid fibers, which significantly reduce overall weight while providing superior impact dispersion.
To justify the investment in a premium tech-heavy helmet, you must verify its advanced safety ratings. Look for international certifications such as ECE 22.06 or DOT, alongside local ICC validation. Ensure the manufacturer provides dedicated customer support, clear documentation on how the internal battery is shielded from impact, and a reliable service network for handling technical issues or battery replacements.
Factoring in Hidden Costs and Essential Accessories
The purchase price of a motorcycle helmet with a camera is rarely the final cost of ownership. To get the most out of your recording setup, you must factor in several essential accessories. High-endurance microSD cards are mandatory; standard memory cards will quickly degrade under the constant write-and-rewrite cycles of loop recording. Look for cards specifically rated for dashcams and action cameras to prevent data corruption.
Depending on your riding style, you may also need to purchase external microphones to capture clear voice audio inside the helmet, specialized charging cables for long rides, or additional mounting hardware. If you choose an aftermarket setup, you might also consider the cost of professional installation if you are uncomfortable routing wires or securing mounts yourself, as improper installation can compromise the helmet’s fit or block ventilation ports.
Finally, when ordering helmets or camera gear from online marketplaces, pay close attention to potential hidden fees. Shipping costs for bulky items like helmets can be substantial, and importing high-end gear from international sellers may incur customs duties or import taxes. Always review the seller’s return policy to ensure you can exchange the helmet if the fit is incorrect, as a poorly fitting helmet cannot protect you properly in an accident.
Verifying Safety Certifications and Avoiding Counterfeits
The rise of online marketplaces has made it easier for counterfeit and uncertified helmets to enter the market. Protecting yourself requires a proactive approach to verifying safety labels. Legitimate ICC and PS stickers in the Philippines feature specific security elements, such as holographic patterns and unique serial numbers. Inspect these stickers closely for signs of tampering, low-quality printing, or peeling edges.
Never rely solely on the product listing description or the seller’s claims. Visit the helmet manufacturer’s official website to confirm that the specific model is certified and to locate authorized physical dealers in your area. Purchasing from an authorized dealer is the most reliable way to guarantee that your helmet is genuine and meets all local and international safety standards.
If you encounter a helmet whose safety claims seem exaggerated, unverifiable, or completely undocumented, do not purchase it. A camera is useless if the helmet fails to protect your head during an impact. Report suspicious listings on ecommerce platforms and prioritize established, reputable brands that transparently share their testing methodologies and certification documentation.
Frequently Asked Questions (FAQ)
Can I add a camera to my existing motorcycle helmet?
Yes, you can add an aftermarket action camera to your existing helmet, provided you follow the manufacturer’s safety guidelines. Never drill holes into the helmet shell or use mechanical screws, as this permanently damages the structural integrity of the EPS liner and shell. Use high-quality, non-destructive adhesive mounts designed specifically for helmets, and ensure the camera’s placement does not interfere with your field of vision, the movement of the visor, or the helmet’s ventilation channels. If you are unsure about compatibility or proper placement, consult the helmet manufacturer or a professional gear specialist.
Are built-in helmet cameras better than aftermarket action cameras?
Built-in helmet cameras offer superior aerodynamics, a cleaner look, and less wind resistance, making them highly convenient for daily commuting. However, aftermarket action cameras generally offer superior video quality, easier battery replacement, and the flexibility to upgrade the camera without replacing the entire helmet. Your choice should depend on your typical riding conditions; high-speed highway riding benefits from the low drag of an integrated system, while riders who prioritize cinematic video quality or frequent upgrades may prefer an aftermarket setup.
How do I clean a motorcycle helmet with an integrated camera?
Cleaning a helmet with integrated electronics requires extreme care to avoid water damage and scratches. Use a soft microfiber cloth and mild, lens-safe cleaners specifically formulated for optical surfaces to clean the camera lens and visor. Avoid harsh chemical solvents, aerosol sprays, or abrasive materials, as these can degrade the helmet’s protective shell, strip anti-fog coatings, and damage the camera’s weather seals. Always refer to the manufacturer’s care manual before applying any moisture, and ensure all port covers are securely closed before wiping down the exterior.

Community discussion
Share your experience or ask a question. Comments are reviewed before publication.