
Upgrading your motorcycle’s exhaust system is one of the most common modifications for riders looking to optimize performance and customize their exhaust note. However, securing these aftermarket components requires more than just a generic fastener; you must select an exhaust pipe clamp that matches your pipe’s exact outer diameter, resists extreme operating temperatures, and withstands local environmental conditions. Choosing the wrong size or material can lead to persistent exhaust leaks, lost power, or even structural failure while riding. By understanding how to measure your pipes, evaluate materials, and choose the correct clamp design, you can ensure a secure, long-lasting connection that keeps your motorcycle running safely and efficiently.
Measure Your Modified Exhaust Pipe Diameter
To find a clamp that fits securely, you must obtain a precise measurement of the outer diameter of your exhaust pipe at the exact point where the joint connects. Relying on the nominal size listed in your motorcycle’s manual or the aftermarket exhaust packaging is often insufficient, as custom pipes and slip-on mufflers frequently feature unique wall thicknesses and manufacturing tolerances. The most reliable tool for this task is a digital or vernier caliper, which allows you to measure the outer edges of the pipe with millimeter-level accuracy. Avoid using flexible tape measures or rulers, as even a tiny discrepancy can result in a clamp that is either too loose to seal or too small to slide over the joint.
When taking your measurements, always measure the pipe’s outer diameter at multiple points around the circumference of the joint. Aftermarket exhaust pipes, especially those subjected to intense heat cycles or previous installations, can easily become out-of-round or slightly ovalized. If you detect minor deviations where one axis is wider than another, calculate the average of your measurements to determine the true diameter. For significantly deformed or ovalized pipes, you may need to use a specialized pipe expander or rounding tool to restore the circular shape before attempting to fit a new clamp. Keep in mind that any modification to your exhaust system can alter its structural integrity, so always verify your dimensions against the manufacturer’s technical documentation before purchasing new hardware.
Products mentioned in this guide
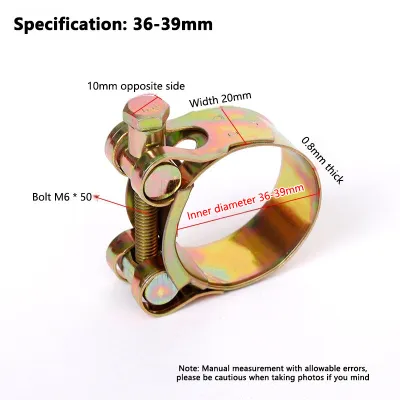
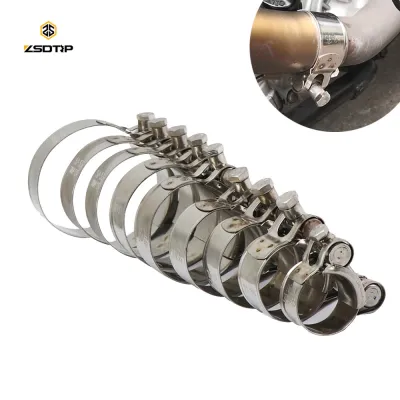
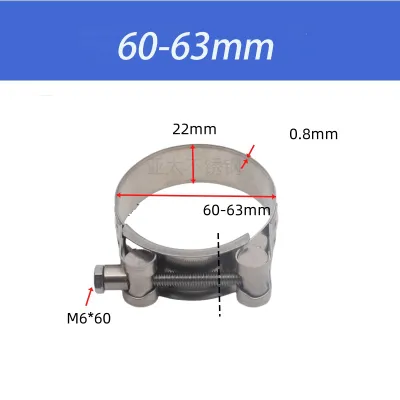
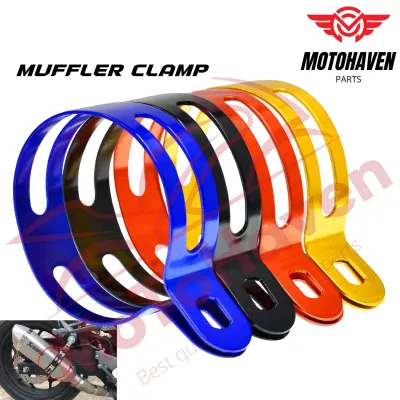
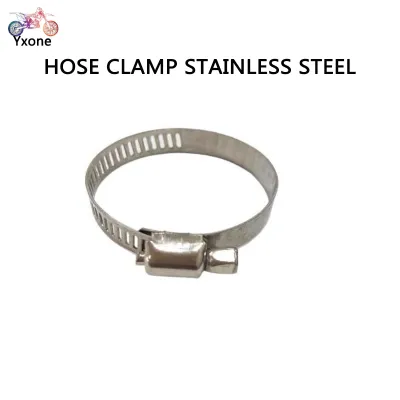
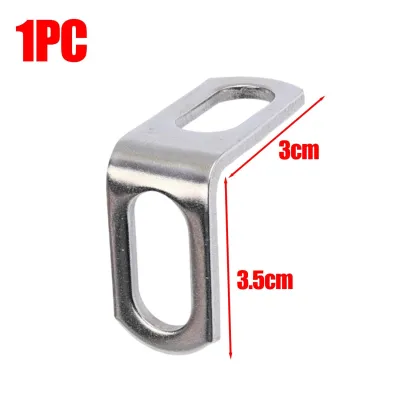
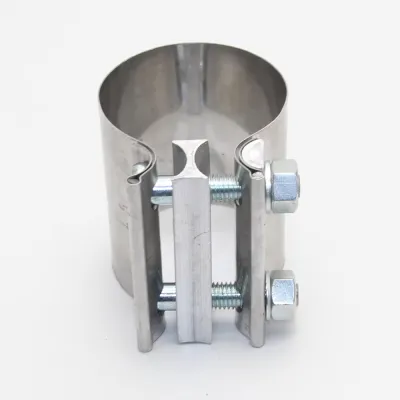
Prices are valid at publication and may change. Please refer to the product page for the latest price.
Translate Measurements to the Correct Clamp Size
Once you have determined the precise outer diameter of your exhaust pipe, you must translate this measurement into the correct clamp size. Exhaust clamps are typically sold based on their nominal sizing or a specified clamping range, which indicates the minimum and maximum diameters the clamp can safely secure. For example, a clamp labeled for a 51mm pipe might actually have an adjustable range of 48mm to 54mm. Never choose a clamp where your measured outer diameter sits at the absolute maximum limit of the clamp’s range, as you will not have enough adjustment room to apply sufficient sealing pressure.

You must also account for thermal expansion when selecting your clamp size. As your motorcycle engine runs, exhaust gases heat the metal pipes to extreme temperatures, causing the metal to expand. A clamp that is too tight or lacks the proper clearance can restrict this natural thermal movement, leading to localized stress, cracked welds, or crushed pipe walls. Conversely, a clamp that is too large will bottom out before it can apply even pressure around the joint. Additionally, verify the band width of the clamp to ensure it provides adequate coverage over the slip-fit or joint overlap area. A wider band distributes the clamping force more evenly, reducing the risk of deforming thin-walled aftermarket pipes while maximizing the sealing area.
Select Heat-Resistant and Anti-Corrosive Materials
The materials used in your exhaust clamp directly determine how well it will withstand high operating temperatures and harsh environmental conditions over time. The two most common options you will encounter are stainless steel and mild steel (often zinc-plated or aluminized). While mild steel clamps are generally more affordable, they are highly susceptible to rust and thermal degradation under the extreme heat cycles of a motorcycle exhaust. For long-term durability, stainless steel—specifically grade 304 or marine-grade 316—is highly recommended due to its superior tensile strength and exceptional resistance to oxidation at elevated temperatures.
In the tropical climate of the Philippines, selecting a highly corrosion-resistant material is especially critical. The combination of high humidity, heavy seasonal rainfall, and salty coastal air can accelerate rust on low-grade metals within just a few months. A rusted clamp not only looks unsightly on a modified motorcycle but also loses its structural integrity, eventually leading to clamp failure and dangerous exhaust leaks. When shopping for a clamp, do not rely on visual appearance alone, as polished mild steel can easily be mistaken for stainless steel. Always check the manufacturer’s product specifications or labels to verify the exact material grade and its maximum temperature rating to ensure it can handle the heat of your specific engine configuration.
Match the Clamp Design to Your Exhaust Joint
Different aftermarket exhaust systems utilize different joint configurations, and your clamp design must match the specific interface of your pipes. The most common joint type on modified motorcycles is the slip-fit joint, where one pipe slides inside another. For these connections, a band clamp or a heavy-duty T-bolt clamp is ideal because they apply uniform, radial pressure around the entire circumference of the pipe, creating a tight seal without deforming the metal. U-bolt clamps, while common in automotive applications, apply concentrated pressure at specific points and can easily crush or crimp the thin-walled tubing typical of motorcycle exhausts.
If your modified exhaust features a butt joint—where two pipes of the same diameter meet end-to-end—you will need a specialized sleeve or lap-joint clamp that bridges the gap and seals both sides simultaneously. For high-performance setups utilizing flanged connections, a V-band clamp is the standard choice. V-band systems offer a highly secure, leak-free seal and allow for quick disassembly, but they require matching flanges to be welded onto the pipe ends. Before purchasing any aftermarket hardware, always verify your motorcycle’s specific model, year, interface dimensions, mounting position, road legality, and overall safety impact by consulting the product and vehicle documentation; never infer compatibility solely from a generic category term.
Install the Clamp Safely and Verify the Seal
Before installing your new clamp, proper surface preparation is essential to ensure a leak-free seal. Begin by allowing the exhaust system to cool completely to avoid burns or thermal shock. Disassemble the joint and use a wire brush or fine-grit sandpaper to clean off any carbon buildup, rust, dirt, or old gasket residue from both the inner and outer mating surfaces. A clean, smooth surface allows the pipes to slide together fully and ensures the clamp can apply direct, even pressure without any microscopic gaps that could let exhaust gases escape.
When positioning the clamp, ensure it is centered over the joint overlap or slot cuts in the outer pipe. Always use a calibrated torque wrench to tighten the clamp’s fasteners strictly according to the manufacturer’s specified torque values. Guessing the tightness with a standard wrench often leads to over-tightening, which can permanently deform or crush thin-walled aftermarket pipes, making future disassembly nearly impossible. Because modifying or disassembling your motorcycle’s exhaust system can affect emissions, noise levels, and overall vehicle safety, always review your original-vehicle instructions and state safety boundaries before beginning. If you are uncomfortable performing these modifications yourself, seek qualified professional installation to ensure the system remains road-legal and safe to operate.
Once tightened, start the motorcycle and perform a thorough leak check. Feel carefully around the joint for escaping air (taking care not to touch the hot metal) or listen for any unusual hissing sounds. If you detect a leak, do not simply continue tightening the clamp past its specified torque limit; instead, loosen the hardware, realign the joint, and check for underlying pipe damage. If the leak persists or if you suspect the structural integrity of the connection is compromised, stop operating the motorcycle immediately and consult a qualified professional mechanic.
Frequently Asked Questions (FAQ)
Can I use a standard hose clamp for a motorcycle exhaust?
No, you should never use a standard worm-gear hose clamp on a motorcycle exhaust system. Standard hose clamps are designed for low-temperature, low-pressure applications like coolant lines or air intake hoses, and they lack the structural thickness and material grade required to withstand extreme exhaust heat. Under the high temperatures of an exhaust pipe, a standard hose clamp will quickly suffer from thermal fatigue, stretch, lose its tension, or snap entirely. This can cause your muffler to detach while riding, creating a severe safety hazard for you and other motorists. Always use clamps specifically rated for exhaust applications.
How often should I inspect my exhaust clamps?
You should inspect your motorcycle’s exhaust clamps at least once every six months, or more frequently if you ride daily in wet, humid, or coastal environments. During your inspection, look for physical signs of wear such as surface rust, hairline cracks, or discoloration from extreme heat. Check the tightness of the fasteners to ensure they have not vibrated loose over time, and listen for any subtle exhaust leaks or rattling noises while the engine is idling. Replacing a worn or corroded clamp early is a simple, low-cost preventive measure that protects your expensive aftermarket exhaust system from serious damage.

Community discussion
Share your experience or ask a question. Comments are reviewed before publication.