
Installing a chicken pipe exhaust on your Rusi 125 is one of the most popular modifications for riders looking to improve exhaust flow while maintaining a relatively low-profile, stock-like appearance. However, a hasty installation often leads to the dreaded exhaust leak—a problem that not only produces an annoying ticking sound but also robs your engine of power and can cause backfiring. Achieving a perfect, airtight seal requires a systematic approach, the right sealing components, and careful torque application. By understanding the physical alignment of your motorcycle’s exhaust port and frame mounts, you can complete this upgrade successfully at home.
Preparation and Safety Checks Before Installation
Before you pick up a wrench, safety must be your top priority. The exhaust system of a motorcycle operates at extremely high temperatures, and working on a recently ridden Rusi 125 can result in severe contact burns. Allow the engine and the entire stock exhaust pipe to cool down completely to room temperature before starting any disassembly.
Additionally, verify that your aftermarket chicken pipe is designed specifically for your Rusi 125 model variant. Because Rusi produces several models with 125cc engines, such as the Classic 125 or various underbone models, you must double-check that the flange pattern, stud spacing, and overall pipe routing match your frame’s mounting points. Never infer compatibility from a generic category term; always verify the interface and dimensions from the specific product and vehicle documentation.
Products mentioned in this guide
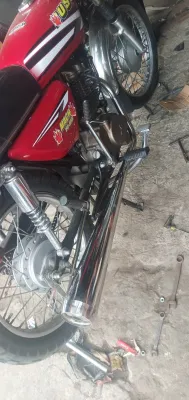
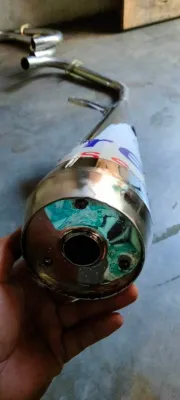
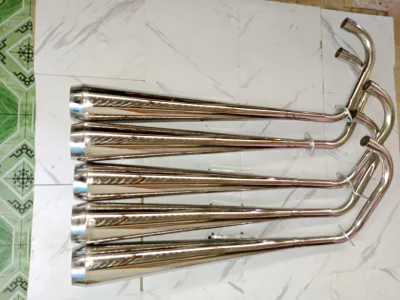
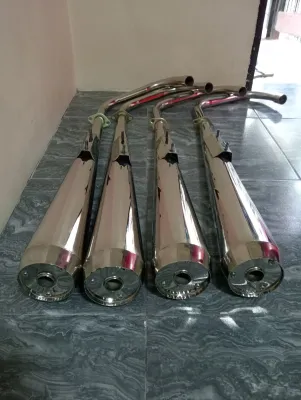
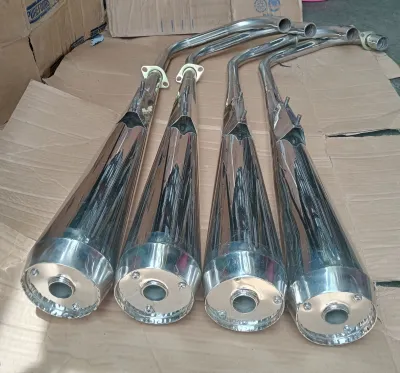
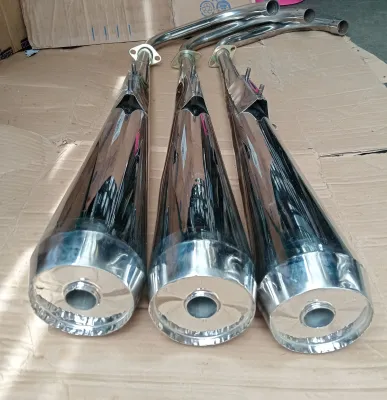
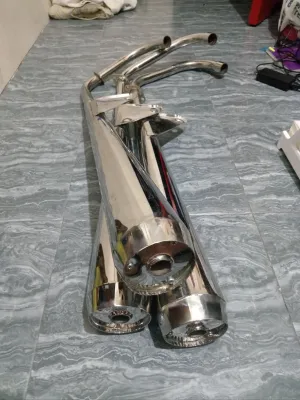
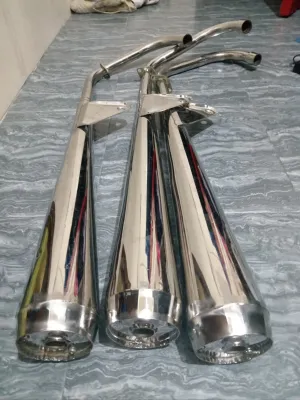
Prices are valid at publication and may change. Please refer to the product page for the latest price.
Finally, keep in mind the local road regulations in the Philippines. The Land Transportation Office (LTO) and local municipal units enforce strict noise limits on aftermarket exhausts. Ensure your new pipe complies with these decibel standards to ensure road legality before you begin the installation process. If you are unsure about the safety impact or legality of the modification, consult the original-vehicle instructions or seek qualified professional installation.
Tools and Materials Needed for the Exhaust Swap
Having the correct tools on hand prevents stripped threads, rounded bolt heads, and installation delays. You will need a standard metric socket set and matching open-ended wrenches, typically in 10mm, 12mm, and 14mm sizes, though you should verify the exact dimensions against your motorcycle’s service manual. A high-quality torque wrench is highly recommended to ensure you do not over-tighten the delicate cylinder head studs.

For sealing, never attempt to install the new pipe without a brand-new exhaust crush gasket or O-ring. These gaskets are designed to deform and fill the microscopic imperfections between the exhaust port and the pipe flange. Using a worn gasket is the primary cause of post-installation leaks.
Additionally, keep a can of penetrating oil nearby to help loosen stubborn, heat-cycled stock bolts. Have a tube of high-temperature anti-seize compound ready to coat the threads during reassembly to prevent future seizing, especially in humid tropical environments where rust develops quickly.
Step-by-Step Installation Guide for the Rusi 125
Transitioning from your stock exhaust to an aftermarket chicken pipe involves a clear mechanical sequence. Following this step-by-step guide will help you maintain proper component alignment and prevent damage to your engine’s cylinder head. Always refer to any specific instructions provided by your exhaust manufacturer, as mounting brackets or spacer configurations can vary.
Removing the Stock Exhaust System
Start by applying a generous amount of penetrating oil to the exhaust flange nuts at the cylinder head and the bolts securing the muffler to the rear frame bracket. Let the oil soak for at least ten to fifteen minutes. This is especially important if your Rusi 125 has been exposed to tropical rain and humidity, which accelerates rust on exposed fasteners.
When loosening the flange nuts, use a socket that fits snugly to avoid rounding the corners. Turn the nuts counterclockwise, alternating between the two studs to back them off evenly. This gradual, balanced release of tension prevents the studs from bending or snapping under uneven pressure.
Once the flange nuts are removed, support the weight of the heavy stock exhaust system with one hand. Carefully remove the rear mounting bolts that secure the muffler to the passenger peg bracket or frame, then gently slide the entire exhaust assembly away from the engine.
Prepping the Cylinder Head Flange and Mounting Points
With the old exhaust removed, you must prepare the mating surfaces to ensure a leak-free seal. Look inside the exhaust port of the cylinder head; the old crush gasket is often stuck inside the recess. Use a non-abrasive tool, such as a brass pick or a plastic scraper, to gently pry the old gasket out.
Avoid using steel screwdrivers or sharp metal tools that can scratch or gouge the aluminum cylinder head. Even a tiny scratch can create a permanent path for exhaust gases to escape, rendering new gaskets ineffective. Clean away any accumulated carbon soot from the port using a soft wire brush or a clean rag sprayed with a mild parts cleaner.
Inspect the two exhaust studs protruding from the cylinder head. Check for stretched threads, warping, or severe corrosion. If the studs are damaged, they must be replaced before proceeding. Finally, wipe down the rear frame mounting bracket to remove dirt and rust, ensuring a clean surface for the new pipe’s hanger.
Mounting the Chicken Pipe and Securing the Seal
Begin the installation by inserting your new, uncrushed exhaust gasket directly into the cylinder head exhaust port. If the gasket keeps falling out, you can apply a very small dab of general-purpose grease to the back of the gasket to hold it temporarily in place; the grease will harmlessly burn off once the engine starts.
Carefully lift the chicken pipe into position, sliding the header flange over the cylinder head studs. Thread the flange nuts onto the studs by hand for several turns to ensure they are not cross-threading. Once hand-tight, use your socket wrench to tighten the nuts in an alternating, crisscross pattern.
Turn each nut a quarter-turn at a time to compress the crush gasket evenly across the entire port. Do not fully tighten the flange nuts yet; leave them slightly loose to allow for adjustment. Next, align the rear section of the pipe with the frame mounting bracket.
If the mounting holes do not align perfectly, do not force or pull the pipe to make them fit, as this puts immense stress on the cylinder head studs and will cause a leak. Instead, use the spacers or rubber hangers provided with your chicken pipe kit to bridge any gaps, ensuring the pipe rests naturally. Once the rear bracket is secured, perform the final tightening of the flange nuts to the manufacturer’s specified torque.
Post-Installation Leak Testing and Final Adjustments
Before taking your Rusi 125 out for a ride, you must verify the integrity of the installation. Start the engine while it is cold and let it idle. Do not rev the engine immediately. Lean down close to the cylinder head—keeping a safe distance from moving parts—and listen carefully.
A leaking exhaust will produce a distinct, sharp ticking or hissing sound that rises in frequency with engine speed. You can also carefully pass your hand near the flange joint (without touching the hot metal) to feel for any escaping puffs of air.
Next, perform a thorough physical clearance check. Ensure there is adequate space between the hot chicken pipe and the engine casing, the rear shock absorber, the brake pedal, and any plastic body panels. The high heat from the exhaust can easily melt plastic fairings or damage shock seals if the clearance is too tight.
After your initial test ride and once the engine has cooled down completely, re-check the tightness of the flange nuts. The metal will expand and contract during its first heat cycle, which can sometimes loosen the fasteners and require a minor adjustment to maintain the seal.
Troubleshooting Common Exhaust Leak Signs
If you notice a drop in low-end torque or hear popping noises when you let off the throttle, you may have an exhaust leak. Inspect the area around the cylinder head flange for black soot marks or carbon tracking. Soot is a clear physical indicator that exhaust gases are escaping past the gasket, meaning the flange nuts are either unevenly torqued or the gasket did not crush properly.
If you observe these marks, you will need to disassemble the system, inspect the flange for warping, and install a new gasket. Persistent backfiring or a loud exhaust drone can also indicate a leak, though it may also suggest that your engine is running too lean due to the increased exhaust flow.
If you encounter stripped threads on the cylinder head studs, a warped exhaust flange, or a leak that persists despite using a new gasket, stop working. Consult a qualified professional mechanic to avoid causing permanent damage to your engine block.
Frequently Asked Questions (FAQ)
Do I need to re-jet the carburetor after installing a chicken pipe?
Yes, installing a freer-flowing exhaust like a chicken pipe reduces backpressure and increases the volume of air moving through your engine. This change typically leans out the fuel-air mixture on a carbureted motorcycle like the Rusi 125. To prevent your engine from running too hot or losing power, check the color of your spark plug after a short test ride. A white or light gray electrode indicates a lean condition, while a coffee-brown color indicates a healthy mixture. If it is running lean, consult a qualified tuner to adjust your carburetor’s jetting to match your new setup and local elevation.
Can I reuse the old exhaust gasket if it looks intact?
No, you should never reuse an old exhaust gasket. Exhaust gaskets, especially crush-style copper or fiber gaskets, are designed for single-use application. When you tighten the exhaust flange, the gasket deforms and crushes to fill the unique microscopic gaps between that specific pipe and the cylinder head. Once crushed, it loses its elasticity and cannot conform to a new surface or a repositioned pipe. Reusing an old gasket almost guarantees an exhaust leak, so always purchase a new, manufacturer-specified gasket for every installation.

Community discussion
Share your experience or ask a question. Comments are reviewed before publication.