
To install a diesel-sound motorcycle muffler legally in the Philippines, you must ensure that its sound output remains strictly within the decibel limits set by national and local authorities. While the deep, bass-heavy rumble of a diesel-sound exhaust is highly sought after by many riders for its unique acoustic profile, the Land Transportation Office (LTO) does not grant exemptions based on the tone or style of the sound. If your modified exhaust exceeds the legal volume threshold, you risk facing steep fines, confiscation of the aftermarket pipe, or having your motorcycle impounded at an LTO facility.
Under the current regulatory framework in the Philippines, the standard maximum allowable noise level for motorcycle exhausts is 99 decibels (dB). This limit is measured under specific testing conditions defined by LTO Administrative Orders and local traffic ordinances. The standard testing protocol requires the sound level meter to be positioned at a 45-degree angle, exactly 50 centimeters (0.5 meters) away from the exhaust tailpipe opening, with the motorcycle parked in an open space to prevent sound reflection. During the test, the engine must be revved to half of its rated maximum RPM—typically around 5,000 RPM for most standard underbone and scooter models—while the transmission is in neutral.
It is critical to understand that local government units (LGUs) across the Philippines often enforce their own municipal noise ordinances, some of which may be significantly stricter than the national LTO standard. For instance, certain cities within Metro Manila and key provincial urban centers have established local limits as low as 90 dB or 95 dB to combat noise pollution in residential zones. Consequently, a muffler that passes a standard LTO inspection might still trigger an apprehension by local traffic enforcers if you ride through an LGU with highly restrictive local laws. Always verify the active ordinances of the specific municipalities where you plan to commute.
Products mentioned in this guide
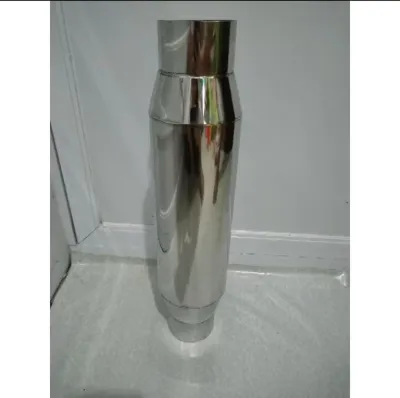
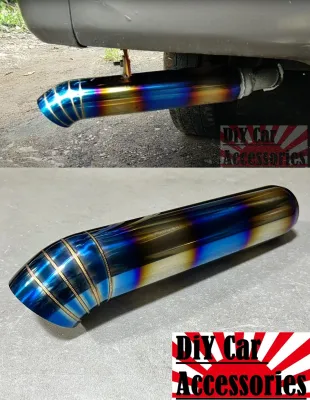
Prices are valid at publication and may change. Please refer to the product page for the latest price.
Before purchasing or installing any aftermarket diesel-sound muffler, inspect the product documentation for certifications or compliance labels. High-quality manufacturers often provide a certificate of conformity or a stamped marking indicating compliance with standard noise limits. However, because many aftermarket parts sold in local motorcycle shops or online marketplaces do not carry official LTO clearance, the responsibility of verifying compliance falls entirely on you. Carrying a copy of the manufacturer’s specification sheet or a record of a professional decibel test can serve as helpful documentation during roadside inspections, though it does not override a live, non-compliant decibel reading by an enforcement officer.
Tools and Materials Needed for Muffler Installation
Performing a clean, leak-free exhaust installation requires the proper tools and safety equipment. Using makeshift tools can strip delicate fasteners, damage the engine block studs, or result in a poorly sealed exhaust system that leaks hot gases and increases noise levels.
Prepare the following essential items before starting the installation:
- Metric socket set and combination wrenches: Typically ranging from 8mm to 14mm to fit standard motorcycle header nuts and mounting bracket bolts.
- Allen keys (hex wrenches): Required if your aftermarket muffler or bracket utilizes hex-head fasteners.
- Torque wrench: Essential for tightening all fasteners to the motorcycle manufacturer's exact torque specifications to prevent thread stripping or loose components.
- Safety gear: Heavy-duty, heat-resistant gloves to protect your hands from sharp metal edges or residual engine heat, and safety glasses to shield your eyes from falling debris under the chassis.
- New exhaust crush gasket: A fresh copper or composite gasket matching your motorcycle's engine model, as exhaust gaskets deform upon installation and cannot be safely reused.
- Threadlocker (medium-strength): Applied to the mounting bracket bolts to prevent them from backing out due to engine vibrations.
- High-temperature exhaust sealant: Only if explicitly recommended by the muffler manufacturer's instructions for slip-on joints.
- Stable workspace: A flat, level concrete floor and a secure center stand or paddock stand to keep the motorcycle completely upright and stable during the procedure.
Step-by-Step Guide to Installing the Diesel-Sound Muffler
Removing the Stock Exhaust System
Before touching any mechanical components, ensure the motorcycle has been switched off for at least one hour and the engine block, header pipe, and muffler are completely cool to the touch. Working on a hot exhaust system poses a severe risk of contact burns and can cause the metal threads in the aluminum cylinder head to gall or strip more easily.

Begin by locating the header flange nuts where the exhaust pipe connects to the engine’s exhaust port. Because these fasteners are subjected to extreme heat cycles and road moisture, they are highly prone to rusting and seizing. Spray the nuts with a high-quality penetrating oil and allow it to penetrate the threads for 10 to 15 minutes before attempting to loosen them. Use a well-fitting metric socket to turn the nuts counterclockwise, applying steady, even pressure to avoid snapping the delicate exhaust studs.
Once the header nuts are loose, locate and loosen the mid-pipe clamp and the bolts securing the muffler to the rear frame bracket. Support the weight of the entire exhaust assembly with one hand or a soft support block as you remove the final mounting bolt. Carefully slide the stock exhaust system away from the engine port and frame, taking care not to scratch the swingarm or rear suspension. Store the complete stock exhaust system, along with its original brackets and hardware, in a dry, safe place; you will need these parts if you ever need to revert the vehicle to stock configuration for strict LTO registration renewals or warranty claims.
Stop the installation immediately if you find that the aftermarket diesel-sound muffler does not align with your motorcycle’s factory mounting points, or if the installation instructions require cutting the frame, custom welding, or modifying the engine cylinder head. Altering the structural frame or modifying the engine studs compromises the vehicle’s structural integrity, voids manufacturer warranties, and can render the motorcycle road-illegal. If the aftermarket part is not a direct bolt-on fit for your specific vehicle model and year, consult a qualified professional motorcycle mechanic to assess compatibility.
Mounting and Securing the New Muffler
Start the mounting process by preparing the engine’s exhaust port. Use a clean, lint-free cloth and a mild solvent authorized for metal surfaces to wipe away any carbon buildup, dirt, or old sealant from the gasket mating surface. Carefully pry out the old exhaust crush gasket using a small pick, ensuring you do not scratch the aluminum bore of the exhaust port. Insert a brand-new, model-specific crush gasket into the port; never attempt to reuse the old gasket, as it will fail to seal properly, resulting in hot exhaust leaks that can burn your exhaust valves over time.
Align the new header pipe with the exhaust port studs, holding it gently in place while you hand-thread the flange nuts. Hand-threading is a critical safety step to ensure the fasteners are properly aligned and do not cross-thread the delicate engine studs. Next, slide the aftermarket diesel-sound muffler onto the header pipe or align it with the rear frame mounting bracket. Position the mounting brackets and insert the bolts, utilizing the rubber isolation dampers or hangers provided in the kit to help absorb engine vibrations.
Using a calibrated torque wrench, tighten the header flange nuts in an alternating, progressive pattern. Tighten each nut a few turns at a time to ensure the flange applies perfectly even pressure across the new crush gasket. Refer strictly to your motorcycle’s factory service manual for the exact torque values, which typically range between 15 and 22 Newton-meters (Nm) for small to medium displacement motorcycles. Once the header is secure, torque the rear bracket mounting bolts to their specified values, applying a drop of medium-strength threadlocker to the threads beforehand.
Perform a thorough visual clearance check before finalizing the installation. Ensure there is a minimum clearance of 10 to 15 millimeters between the new muffler body and any adjacent components, including the rear tire, swingarm, rear shock absorber, brake lines, and plastic body panels. Motorcycle components expand when subjected to operational heat, and the rear suspension will compress during rides. If the muffler is positioned too close to plastic body fairings, the intense radiant heat can warp or melt the plastic, while contact with the swingarm or shock absorber can cause mechanical damage and compromise your safety on the road.
Verifying Compliance and Testing the Exhaust Note
Once the diesel-sound muffler is securely mounted, you must conduct a series of mechanical and acoustic tests to verify that the system is leak-free and fully compliant with Philippine noise regulations before riding on public streets.
Start the engine and let it run at an idle speed while the motorcycle remains on its center stand. Do not rev the engine immediately. Carefully pass your hand around the cylinder head connection and any slip-on joints, keeping a safe distance of a few centimeters to avoid touching the hot metal. Feel for any escaping air currents, which indicate an exhaust leak. Listen closely for a sharp, metallic ticking or popping sound; a distinct ticking noise at idle is a classic symptom of an improper gasket seal. If you detect a leak, shut off the engine, allow it to cool completely, and re-torque the fasteners.
Allow the engine to idle for 5 to 10 minutes until it reaches normal operating temperature. This initial heat cycle causes the metal components of the new exhaust system to expand. Turn off the engine, let it cool down to a safe handling temperature, and re-check the tightness of all mounting bolts and header nuts. The thermal expansion often causes the initial torque to settle, and retightening these fasteners prevents them from vibrating loose during your first ride.
To perform a preliminary noise compliance test, move the motorcycle to an open, flat outdoor area away from walls, garage doors, or other large structures that can reflect sound waves and artificially elevate your decibel readings. Using a calibrated handheld decibel meter (or a highly rated sound-meter smartphone application as a temporary reference), position the microphone exactly 50 centimeters away from the exhaust outlet, angled at 45 degrees relative to the direction of the exhaust flow, and at the same height as the tailpipe. Have an assistant start the engine, place the transmission in neutral, and steadily rev the engine to half of its maximum rated RPM. Note the peak decibel reading on the meter.
If the decibel reading exceeds the national 99 dB limit or the specific limit of your local LGU, you must take immediate corrective action. Install the compatible dB killer (baffle insert) that came with your aftermarket muffler, securing it firmly with the retaining screw or lock-wire as specified by the manufacturer. Re-run the decibel test with the baffle installed. If the exhaust volume still exceeds the legal threshold even with the baffle in place, the muffler is not road-legal for public streets in the Philippines. You must remove it and reinstall the stock exhaust system to avoid heavy LTO fines, license suspension, or vehicle impoundment.
Conclude your testing with a short test ride on a closed, quiet road. Monitor the motorcycle for any unusual vibrations, rattling, or whistling sounds. Pay close attention to engine performance; if you experience flat spots in acceleration, excessive backfiring during deceleration, or engine hesitation, the aftermarket exhaust has altered the engine’s backpressure. For fuel-injected motorcycles, this may require an ECU reset or professional tuning, while carbureted models may need the carburetor jets adjusted to maintain a safe air-fuel ratio and prevent engine damage.
Maintenance Tips to Keep Your Exhaust Legal and Functional
The tropical climate of the Philippines—characterized by high humidity, intense seasonal rains, and coastal salt air—presents a harsh environment for aftermarket motorcycle exhausts. Regular maintenance is essential to prevent corrosion, maintain structural integrity, and ensure the muffler’s noise output does not degrade into illegal decibel levels over time.
Perform the following maintenance tasks at regular intervals:
- Inspect fasteners and brackets: Every 1,000 kilometers, check the tightness of the header nuts and mounting bracket bolts. The constant, high-frequency vibrations of motorcycle engines can gradually back out fasteners, leading to exhaust leaks, rattling, or bracket failure. Inspect the rubber isolation dampers for cracking or dry rot, replacing them immediately if they show signs of deterioration.
- Maintain the internal packing: The deep, low-frequency acoustic profile of a diesel-sound muffler relies heavily on internal fiberglass or ceramic packing material wrapped around a perforated core. Over months of riding, this packing material naturally degrades, burns away, or becomes saturated with carbon deposits. As the packing material disappears, the exhaust note will become progressively sharper, harsher, and significantly louder, eventually violating LTO noise limits. Disassemble the muffler canister every 10,000 to 15,000 kilometers (or sooner if you notice a change in the exhaust tone) and pack it with fresh, high-temperature exhaust packing material.
- Clean the exterior surfaces safely: Allow the exhaust system to cool completely before cleaning. Use only cleaning agents and metal polishes that are explicitly authorized on their product labels for the specific material of your muffler (such as stainless steel, titanium, chrome, or high-temperature matte black paint). Avoid spraying harsh household degreasers, acid-based cleaners, or using abrasive steel wool, as these can permanently scratch, discolor, or strip the protective coatings. Ensure that cleaning agents do not contact adjacent plastic fairings, rubber suspension seals, or oxygen sensors.
- Periodic decibel re-verification: Do not assume your exhaust remains legal indefinitely. Re-test the decibel output of your motorcycle every few months, especially before embarking on long-distance provincial tours where LTO and PNP (Philippine National Police) roadside checkpoints are frequently established. Keeping a proactive eye on your exhaust volume protects you from unexpected apprehensions and ensures a safe, compliant riding experience.

Community discussion
Share your experience or ask a question. Comments are reviewed before publication.