
To properly install a flexible pipe section in your motorcycle exhaust system, you must select a component that matches your exhaust pipe’s exact dimensions, align it without twisting, and secure it using high-temperature clamps or professional welding. This modification helps isolate engine vibrations, preventing cracks in rigid exhaust mounts and headers. However, achieving a leak-free seal requires meticulous preparation of the joint surfaces, precise alignment, and the application of appropriate high-temperature exhaust sealants.
Assessing Compatibility and Legal Boundaries
Before purchasing any parts, verify your motorcycle’s specific model, year, and exhaust dimensions. Do not assume a generic flexible pipe will fit based on category descriptions alone. You must measure the outer diameter of your existing exhaust pipe and match it to the inner diameter of the flexible pipe section to ensure a proper slip-fit or flange connection.
Check the material specifications of the flexible pipe. Motorcycle exhaust gases reach extremely high temperatures, especially near the exhaust port. Ensure the flexible pipe is rated for these thermal conditions and is constructed from corrosion-resistant materials like stainless steel to withstand the high humidity and tropical rains of the Philippines.
Products mentioned in this guide
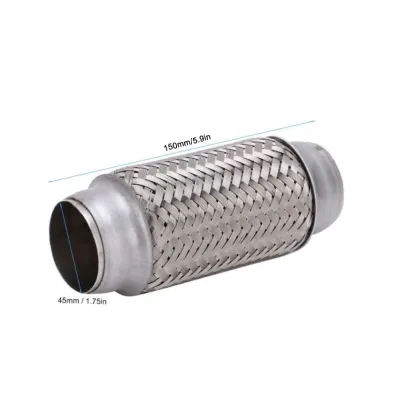
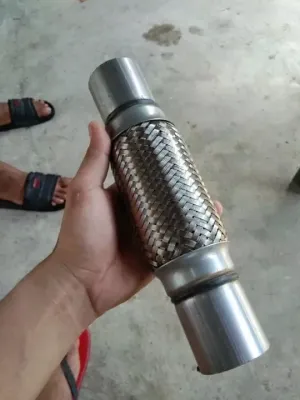
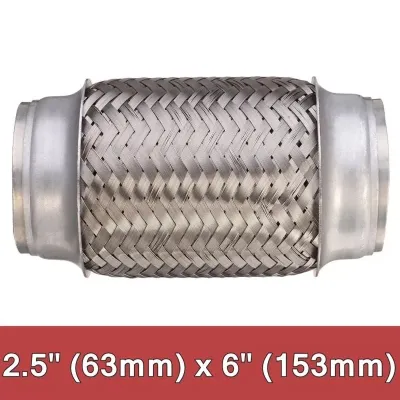
Prices are valid at publication and may change. Please refer to the product page for the latest price.
Modifying your factory exhaust system can have legal and financial consequences. In the Philippines, altering the stock exhaust may void your motorcycle’s manufacturer warranty. It can also impact compliance with local road regulations, noise level limits, and emissions testing required for annual registration with the Land Transportation Office.
Establish clear boundaries for your DIY work. If your modification plan requires cutting structural frame members, altering engine mounting points, or performing complex welding on thin-walled pipes, stop immediately. These tasks require specialized equipment and expertise; consult a professional exhaust fabricator or qualified mechanic to avoid compromising the structural integrity and safety of your motorcycle.
Gathering Tools, Materials, and Safety Gear
Having the correct tools on hand prevents delays and damage to your motorcycle’s components. Gather essential hand tools, including a socket set, open-ended wrenches, and a calibrated torque wrench to tighten fasteners to the manufacturer’s exact specifications. If you need to cut the existing exhaust pipe to insert the flexible section, prepare a pipe cutter or a grinder with a metal-cutting disc.

Select your sealing and fastening materials carefully. Look for high-temperature exhaust sealants specifically labeled for automotive or motorcycle exhaust use, ensuring they can withstand temperatures exceeding several hundred degrees. Choose heavy-duty exhaust band clamps or U-bolt clamps that match your pipe diameter, or source new flange gaskets if your system uses bolted flange connections.
Safety must be your top priority during this installation. Wear safety glasses to protect your eyes from falling rust, metal shavings, and carbon debris. Use heavy-duty, heat-resistant gloves to protect your hands from sharp metal edges and hot surfaces.
Always work in a well-ventilated area, preferably outdoors or in an open garage. Exhaust systems accumulate fine carbon particulates and residual chemical deposits that can be harmful if inhaled during cutting, grinding, or cleaning.
Removing the Old Section and Preparing Joints
Never work on an exhaust system that has recently been running. Allow the motorcycle to sit until the entire exhaust tract is completely cool to the touch to prevent severe burns. Once cool, spray all mounting bolts and clamp fasteners with a high-quality penetrating oil, especially if they show signs of rust or heat-seizure.
Loosen the fasteners gradually, working from the rear muffler mounts forward toward the engine cylinder head. This sequence prevents the weight of the exhaust system from hanging on a single, stressed bolt, which could damage the cylinder head threads. Carefully slide out the section of pipe you plan to replace.
Prepare the remaining pipe ends for the new flexible section. Use a wire brush, emery cloth, or a rotary tool with a wire wheel to strip away all carbon buildup, old sealant residue, and surface rust. The mating surfaces must be clean, smooth, and bare metal to allow the new sealant and clamps to form a gas-tight barrier.
Inspect the adjacent exhaust components thoroughly before proceeding. Check for hairline cracks near existing welds, thinning metal caused by deep corrosion, or ovaling of the pipe ends. If the surrounding metal is structurally weak, it will not support the new flexible pipe and may fail under vibration, requiring further replacement or professional repair.
Aligning and Securing the Flexible Pipe
Flexible exhaust pipes are designed to absorb linear thermal expansion and minor engine vibrations, not to act as structural elbows. Avoid bending the flexible section at sharp angles or twisting it during installation. Overstretching or kinking the internal corrugated bellows will cause rapid metal fatigue and premature failure of the component.
Position the flexible pipe so it sits in a neutral, unstressed state when the motorcycle is at rest. Use temporary clamps or adjustable zip ties to hold the pipe in place while you check its alignment with the rest of the exhaust system. Ensure the pipe runs parallel to the frame and does not bind against any stationary components.
If your installation kit relies on slip-fit joints, ensure the inner pipe slides into the outer pipe by at least 25 to 30 millimeters to provide a stable mechanical joint. For flange connections, align the bolt holes perfectly before inserting the hardware to prevent cross-threading or uneven pressure on the gasket.
If your specific modification plan requires welding the flexible pipe directly to the existing exhaust system, evaluate your skills and equipment honestly. Welding thin-walled stainless steel or mild steel exhaust tubing requires precise heat control to prevent burning through the metal. If you do not have certified welding experience and the proper equipment, stop and take the aligned parts to a professional welder.
Sealing Connections and Final Reassembly
Apply a thin, even bead of high-temperature exhaust sealant to the outside of the male pipe end before sliding the joints together. Avoid applying excessive sealant inside the female joint, as the excess material will squeeze inward when assembled, creating a restriction that disrupts exhaust gas flow and increases backpressure.
Slide the exhaust clamps over the joints and position them according to the manufacturer’s instructions. Tighten the fasteners gradually using a cross-tightening pattern if you are working with multi-bolt flanges. Refer to your motorcycle’s service manual or the clamp manufacturer’s specifications for the correct torque values to avoid stripping the threads or crushing the pipe.
Reinstall all exhaust hangers, rubber isolation mounts, and brackets that support the system. These components are critical because they carry the weight of the exhaust, preventing the new flexible pipe from bearing structural loads it was not designed to handle. Replace any worn or cracked rubber mounts to maintain proper dampening.
Verify the clearance of the entire exhaust system, paying close attention to the flexible section. Ensure there is adequate space between the hot exhaust components and the motorcycle frame, suspension swingarm, brake lines, electrical wiring, and the rider’s legs. Reinstall all factory heat shields to protect sensitive areas from radiant heat.
Testing for Leaks and Verifying Performance
Before starting the engine, allow the exhaust sealant to cure for the duration specified on the product label. Once cured, start the motorcycle in a well-ventilated area and let it idle. Listen closely near the new joints for any ticking, hissing, or whistling sounds, which are primary indicators of an exhaust leak.
To perform a visual check, spray a mild mixture of soapy water onto the cool joints before starting the engine, or apply it carefully during the first few seconds of a cold start. If bubbles form around the clamps or flanges, you have a leak that requires tightening or resealing. As the system heats up, look for any escaping condensation or dark soot trails forming around the connections.
Pay attention to how the motorcycle feels and sounds as it warms up to operating temperature. If you notice abnormal vibrations in the footpegs or handlebars, or if a new, harsh resonance frequency develops, the flexible pipe may be under tension or contacting a frame member. Loosen the mounts, realign the system to relieve the stress, and retighten the fasteners.
Ensure that no exhaust fumes are escaping near the rider’s seating position, the passenger footrests, or the engine’s air intake. Leaking exhaust gases contain carbon monoxide, which is highly toxic and must be directed safely out the back of the motorcycle. If you detect any fumes rising from under the seat or tank, shut down the engine immediately and locate the leak.
Ongoing Maintenance and Warning Signs
A flexible exhaust pipe is subject to continuous thermal cycling, engine movement, and road debris. Establish a routine to inspect the component visually during your regular motorcycle maintenance. Look for signs of wear, such as fraying or broken wires in the outer stainless steel braided mesh, which indicates the pipe is reaching its limit of movement.
Inspect the inner corrugated bellows if they are visible, checking for hairline cracks or pinholes. In the humid, tropical climate of the Philippines, road salt, mud, and moisture can accelerate corrosion. Clean off any accumulated road grime regularly to prevent surface rust from eating through the thin metal layers of the flex section.
After the first few rides or heat cycles, use your torque wrench to recheck the tightness of all exhaust clamps and mounting bolts. The metal expands and contracts significantly during these initial cycles, which can cause fasteners to settle and lose their initial torque. Inspect the sealant joints to ensure they remain intact and have not cracked.
Be alert for critical warning signs that demand immediate attention. If you hear a metallic rattling sound coming from inside the flexible pipe, the internal liner may have collapsed or detached, which can block exhaust flow and damage your engine. Severe structural deformation, deep soot staining, or a sudden increase in exhaust volume are clear indicators that the flexible pipe has failed and must be replaced immediately.
Frequently Asked Questions (FAQ)
Can I use a standard automotive flex pipe on a motorcycle?
Standard automotive flexible pipes are generally unsuitable for motorcycles. They are typically designed for much larger pipe diameters, are significantly heavier, and are tuned to absorb the lower-frequency vibrations of multi-cylinder car engines. Using an oversized or overly stiff automotive pipe on a motorcycle can restrict exhaust flow velocity, add unnecessary weight, and fail to protect the delicate exhaust mounts of a high-RPM motorcycle engine. Always select a flexible pipe specifically sized and rated for motorcycle applications, verifying the exact inner diameter and bend radius limits.
Do I need to weld the flexible pipe, or are clamp-on kits sufficient?
Both methods are viable, but they serve different needs. Professional welding provides a permanent, highly durable, and completely leak-proof joint that easily withstands extreme temperatures and vibrations. However, high-quality clamp-on kits offer excellent convenience, allowing you to install or replace the flexible section using basic hand tools without permanently altering the exhaust system. If you choose a clamp-on kit, the existing exhaust pipe ends must be perfectly round, free of deep gouges, and thoroughly cleaned to ensure the clamps can compress the joint evenly and create an effective seal.
Will installing a flexible pipe change my motorcycle's exhaust sound?
A properly installed flexible pipe will not drastically alter your motorcycle’s overall exhaust volume, but it can subtly change the tone. The internal corrugated bellows of the flex pipe can introduce minor turbulence, which may slightly alter the exhaust resonance or add a subtle metallic rasp under hard acceleration. However, if you notice a dramatic increase in volume, a loud ticking sound, or a blowing noise, this is almost always caused by an exhaust leak at the connection joints rather than the design of the flexible pipe itself. Double-check your clamps and sealant if the exhaust note changes significantly.

Community discussion
Share your experience or ask a question. Comments are reviewed before publication.