
Installing a muffler tip on your Honda PCX 160 is an accessible way to customize your scooter’s aesthetic, protect the exhaust outlet from environmental elements, and give the rear profile a more refined look. This modification is highly popular among riders in the Philippines who want to personalize their maxi-scooters without committing to a full, expensive aftermarket exhaust system. The process is straightforward and reversible, requiring only basic hand tools and a few minutes of your time. By carefully measuring your stock exhaust pipe, selecting a compatible tip, and securing it with even tension, you can achieve a clean, professional finish that withstands daily commuting.
Pre-Installation Checks: Compatibility and Safety
Before purchasing or attempting to install any aftermarket accessory, verifying physical compatibility with your specific Honda PCX 160 model year is essential. The stock exhaust pipe of the PCX 160 has a specific outer diameter that must match the inner diameter of the muffler tip you intend to install. Use a vernier caliper or a flexible measuring tape to determine the exact outer diameter of your exhaust outlet. Relying solely on generic product listings on an online marketplace can lead to fitment issues, as some tips are designed for older PCX 150 models or different scooter classes entirely. The tip must slide over the outlet smoothly without excessive play, yet it should not require force to slide into position.
Safety must be your primary concern before starting any work on your motorcycle. An exhaust system retains intense heat long after the engine has been turned off. To prevent severe burns, park your scooter on its center stand on a flat, level surface and allow the engine to cool completely. A cooling period of at least one to two hours is highly recommended, especially in the warm, humid climate of the Philippines, where ambient temperatures can slow down the cooling process. Touch the outer heat shield cautiously before proceeding to ensure the metal underneath is safe to handle.
Products mentioned in this guide
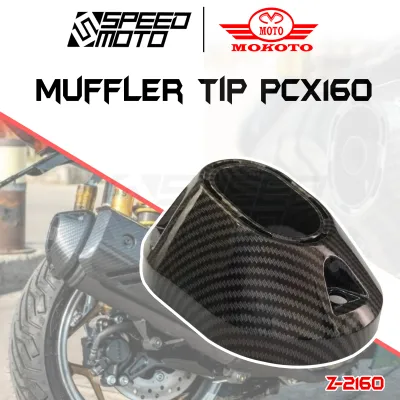
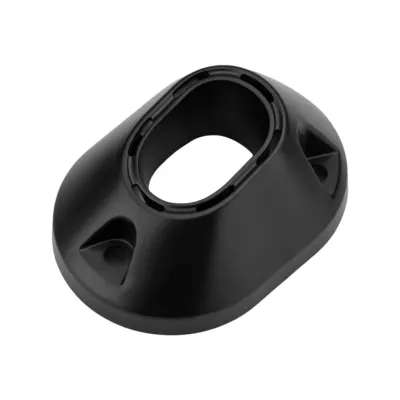

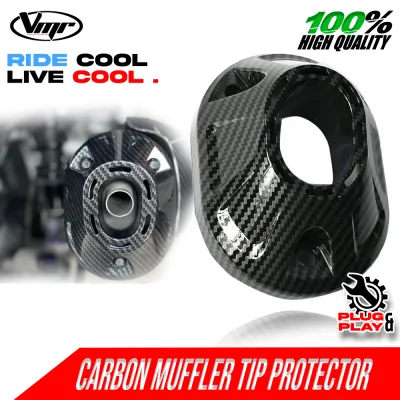
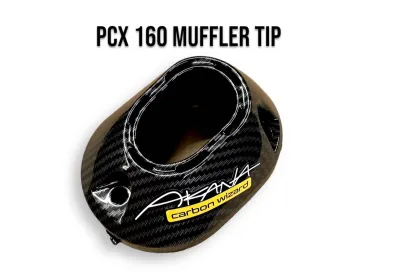
Prices are valid at publication and may change. Please refer to the product page for the latest price.
Additionally, you must consider local road regulations before finalizing your installation. In the Philippines, the Land Transportation Office (LTO) and local government units maintain strict guidelines regarding motorcycle modifications. While a cosmetic muffler tip does not alter the internal baffling or increase the decibel level of your exhaust, it must not protrude excessively beyond the rear bodywork or create a safety hazard for other motorists. Ensure that the tip does not block the visibility of your rear license plate, reflector, or lighting systems. Keeping your modification within these visual and physical boundaries helps you avoid unnecessary fines during routine roadside inspections.
Tools and Materials Required
Having the correct tools on hand prevents damage to both the new muffler tip and your scooter’s original exhaust pipe. You do not need professional-grade garage equipment for this task; a basic, well-maintained home toolkit is usually sufficient. Gather the following items before you begin the installation process:

- A set of socket wrenches or metric Allen keys, depending on the specific fasteners provided with your aftermarket muffler tip.
- A torque wrench, if available, to ensure fasteners are tightened to the manufacturer's exact specifications.
- A clean microfiber cloth and a mild degreaser or soapy water solution to prepare the mounting surface.
- A pair of protective work gloves to keep your hands clean and protect against sharp metal edges.
- High-temperature anti-seize compound or exhaust sealant, but only if explicitly recommended or supplied by the muffler tip manufacturer.
Using the correct size of socket or Allen key is critical. Using an ill-fitting tool can easily strip the heads of the mounting bolts, making future adjustments or removal extremely difficult. If your muffler tip utilizes set screws, ensure you have the corresponding hex key that fits snugly into the screw head without slipping.
Step-by-Step Muffler Tip Installation
The key to a long-lasting installation is proper surface preparation. Over time, your PCX 160’s exhaust outlet accumulates carbon soot, road grime, mud, and microscopic debris from daily riding. If you slide a new tip over this dirty surface, the grit can act as an abrasive, scratching the metal and preventing a flush, secure fit. Spray a mild degreaser onto a microfiber cloth and thoroughly wipe down the outer surface of the stock exhaust pipe. For stubborn carbon buildup, use a soft-bristled brush or a non-abrasive scrubbing pad. Dry the area completely with a clean cloth before moving to the next step.
Once the exhaust outlet is clean and dry, prepare the muffler tip for installation. Loosen all the mounting bolts or set screws on the tip so they do not obstruct the inner opening. Carefully slide the muffler tip onto the stock exhaust pipe. It should slide on with minimal resistance. If the fit is tight, gently wiggle the tip side-to-side as you push it forward. Position the tip so that it sits flush against the exhaust outlet, ensuring there are no large gaps where exhaust gases could escape prematurely. Align the angle of the tip so that it matches the natural centerline and upward sweep of the PCX 160’s bodywork. A misaligned tip not only looks unprofessional but can also direct hot exhaust gases toward sensitive plastic components.
With the tip properly aligned, begin tightening the mounting hardware. If your tip uses multiple screws or a clamping band, tighten them gradually and evenly. Do not tighten one bolt completely before starting the others; this uneven pressure can warp the tip, strip the threads, or crush the stock exhaust pipe. Instead, turn each bolt a few times, move to the next one, and repeat the cycle. If you feel sudden, abnormal resistance while turning a bolt, stop immediately. Back the bolt out and inspect the threads for cross-threading. Once all fasteners are snug, apply final tension according to the manufacturer’s instructions. If you are using a torque wrench, do not exceed the recommended torque limit to avoid damaging the hardware.
Post-Installation Clearance and Safety Verification
After securing the muffler tip, you must perform a comprehensive physical inspection before taking your scooter out on the road. The Honda PCX 160 features a dynamic rear suspension system that moves up and down as you ride over bumps, potholes, and uneven road surfaces. You must ensure that the newly installed tip has adequate clearance from all surrounding components under full suspension compression. Check the distance between the tip and the rear tire, the rear mudguard, and the passenger footpegs. There should be a clear gap of at least a few centimeters to prevent any physical contact during your ride.
Next, verify that the muffler tip does not interfere with your scooter’s safety and signaling systems. Stand behind the scooter and check if the tip obstructs the view of the rear brake light, the turn signals, or the license plate illumination. In the Philippines, clear visibility of these components is a strict legal requirement. If the tip is too long or angled incorrectly, it could block light output or collect soot on your rear plastics, which can degrade the material over time. Adjust the alignment of the tip if you notice any potential obstruction.
Finalizing the installation requires an engine test to verify the integrity of the setup. Start your PCX 160 and let it idle on the center stand. Place your hand near—but not touching—the connection point between the stock pipe and the new tip to feel for any escaping exhaust gases, which would indicate an exhaust leak. Listen closely for any unusual rattling, buzzing, or vibrations. Gently rev the engine a few times to see if the vibrations cause the tip to shift or make contact with the exhaust body. If you detect any leaks or noises, turn off the engine, let it cool, and retighten or realign the mounting hardware.
Ongoing Maintenance and Inspection
A muffler tip is subjected to constant engine vibrations, road shocks, and extreme temperature cycles, all of which can cause mounting hardware to loosen over time. To ensure your accessory remains securely attached, make it a habit to inspect the mounting bolts periodically. A quick check every few weeks, or during your routine oil changes, can prevent the tip from vibrating loose and falling off while you are riding. If you notice any looseness, use your hand tools to retighten the fasteners to their proper tension.
The tropical climate of the Philippines, characterized by high humidity, heavy rainfall, and salty coastal air, can accelerate rust and corrosion on metal accessories. To keep your muffler tip looking its best, clean it regularly as part of your normal scooter washing routine. Use a mild motorcycle wash and a soft cloth to remove road grime and salt residue. If your tip is made of stainless steel or aluminum, you can apply a specialized metal polish occasionally to restore its shine and add a protective barrier against oxidation. Always follow the care instructions provided by the manufacturer, and avoid using harsh abrasive cleaners that can scratch polished or anodized finishes.
Lastly, monitor the tip and the surrounding area for signs of heat damage or physical wear. Inspect the plastic bodywork of your PCX 160 near the exhaust outlet for any signs of warping, melting, or discoloration, which could indicate that the tip is directing hot exhaust gases too close to the fairings. Additionally, check the tip itself for severe heat discoloration or cracking along the welds. If you observe any structural damage or if the tip begins to rub against the scooter’s bodywork, remove the accessory immediately and consult the manufacturer or a professional mechanic to address the issue.
Frequently Asked Questions (FAQ)
Can I install a muffler tip on a stock PCX 160 exhaust?
Yes, you can install a muffler tip on a stock Honda PCX 160 exhaust, provided the accessory is specifically designed for the outer diameter of the OEM exhaust pipe. Many aftermarket tips utilize a slip-on design with adjustable clamps or set screws that secure directly onto the factory outlet. Always measure the outer diameter of your stock pipe and compare it with the inner diameter of the tip before purchasing to ensure a proper, secure fit.
Will adding a muffler tip affect my scooter's engine performance?
A standard, slip-on cosmetic muffler tip will have a negligible impact on your PCX 160’s engine performance, fuel efficiency, or backpressure. Because these accessories attach to the very end of the exhaust system without altering the internal baffling, catalytic converter, or pipe diameter, they do not change how exhaust gases flow through the engine. However, you should avoid using highly restrictive tips or those that significantly reduce the exit opening, as restricting exhaust flow without professional tuning can negatively affect engine efficiency.

Community discussion
Share your experience or ask a question. Comments are reviewed before publication.