
Safely removing car door and dashboard panels requires using a dedicated plastic trim removal tool, applying low-tack masking tape to protect adjacent surfaces, and prying directly at the clip locations rather than pulling the panel itself. In the tropical climate of the Philippines, intense cabin heat and high humidity can make interior plastics brittle over time. This environmental factor makes patience and proper technique essential to avoid costly cosmetic damage or broken mounting tabs. By understanding how these panels are secured and using the correct non-marring tools, you can successfully complete interior upgrades, speaker installations, or wiring repairs without leaving a single scratch on your vehicle’s cabin surfaces.
Before beginning any interior disassembly, it is crucial to verify your specific vehicle model, year, and interior configuration using the manufacturer’s official documentation. Different vehicle makes utilize unique clip designs, hidden screw locations, and integrated safety systems that dictate how a panel must be approached. Always consult your vehicle’s service manual to identify the exact mounting positions and safety impacts of the panels you plan to remove.
Preparing Your Workspace and Gathering the Right Tools
Having the correct non-marring tools and a safe environment is the first line of defense against interior damage. Standard metal tools like screwdrivers concentrate force on a very narrow point, which almost guarantees gouged plastic or chipped paint. Instead, a dedicated plastic trim removal tool set is necessary. These sets typically feature various profiles, including forked tips for grabbing clip shafts, flat wedges for tight gaps, and angled edges for leverage in deep recesses. Nylon or heavy-duty plastic construction allows these tools to flex slightly under extreme pressure, protecting your vehicle’s delicate cabin materials.
Products mentioned in this guide
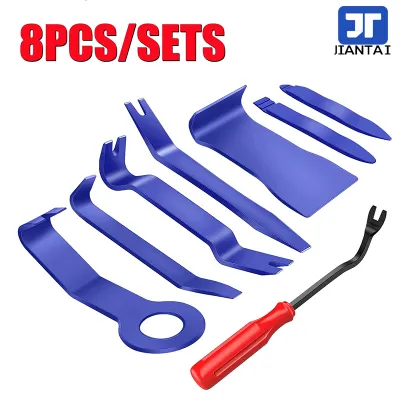
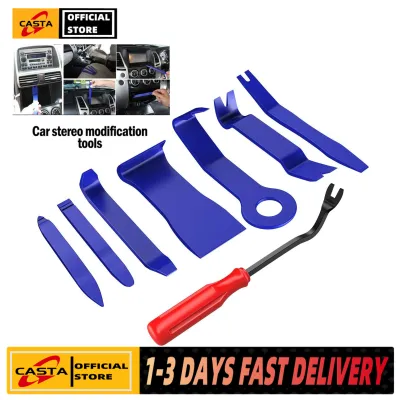

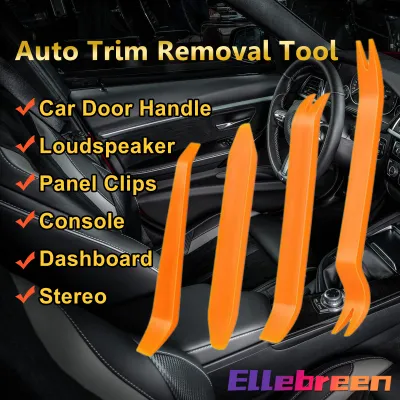
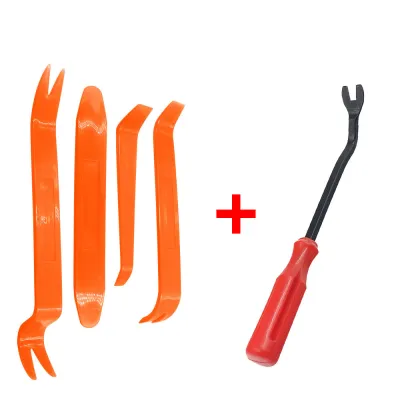
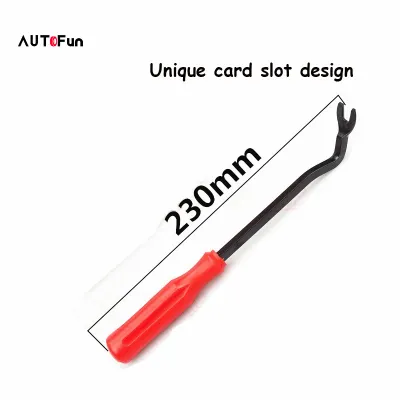
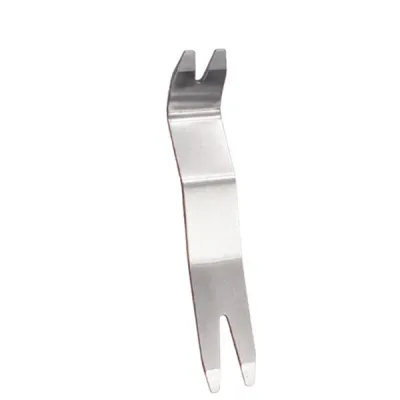

Prices are valid at publication and may change. Please refer to the product page for the latest price.
In addition to the trim tools, gather surface protection materials before starting. Low-tack masking tape (often sold as blue painter’s tape) is invaluable for lining the edges of the panels you are working on, as well as the surrounding metal or plastic frames. A clean microfiber towel should also be kept on hand to act as a physical buffer under your tools when prying.
Preparing the vehicle itself is equally important. Roll down the windows completely when working on door panels to provide maximum physical clearance and a clear line of sight into the top window channel. If you are working near dashboard panels, center consoles, or steering columns, identify any integrated airbag modules or complex electrical harnesses.
For safety, if your disassembly path brings you near side-curtain airbags, passenger dashboard airbags, or active electrical modules, you must state a clear safety boundary: disconnect the negative battery terminal and wait the manufacturer-specified time for the system to discharge before proceeding. If you are uncomfortable working around these safety systems, seek qualified professional installation.
Step-by-Step Guide to Removing Door Panels
Executing the physical removal of a door panel requires a systematic approach to locate hidden fasteners before applying any prying force. Most modern door panels are held in place by a combination of threaded screws and plastic retaining clips. Start by locating and removing the hidden fasteners. These are commonly concealed behind small plastic caps inside the interior door pull pocket, behind the door release handle, or underneath the window switch bezel. Use a fine-tipped plastic wedge to gently pop open these cosmetic covers to access the screws beneath.

Once all visible and hidden screws are removed, you can begin releasing the perimeter clips. Insert the flat edge of your trim removal tool into the gap between the door panel and the metal door frame, starting at a bottom corner where any minor cosmetic marks will remain out of sight. Slide the tool along the edge until you feel resistance; this resistance indicates the location of a plastic retaining clip.
Position the forked end of the trim removal tool directly around the neck of the clip. It is critical to engage the clip base rather than prying against the panel edge itself. Prying the panel edge can tear the plastic mount molded into the back of the panel, permanently ruining its ability to hold a clip. Apply firm, steady outward pressure until the clip releases with a distinct popping sound. Work your way systematically around the bottom and sides of the door perimeter.
After all perimeter clips are released, gently lift the door panel upward to clear the top window channel. Do not pull the panel away quickly, as it will still be tethered by electrical connectors and mechanical cables. Support the weight of the panel with one hand while using your other hand to disconnect the electrical harnesses for the window switches, door locks, and speakers. Most connectors feature a small release tab that must be pressed before the plug can slide out. If a cable or wire feels tight or refuses to release, stop immediately, re-evaluate the connection, and check for any missed fasteners or secondary locking tabs.
Step-by-Step Guide to Removing Dashboard and Console Trim
Dashboard and center console trim pieces require even greater care than door panels due to tighter tolerances, highly visible surfaces, and delicate electronic components. To navigate these areas without causing cosmetic damage, you must understand the overlapping sequence of the dashboard assembly. Trim pieces are often layered like shingles; you must start from the lowest or outermost edges—such as the side panels accessible only when the front doors are open—to safely release the overlapping sections.
Use exclusively plastic, non-marring tools on these surfaces. Soft-touch vinyl, glossy piano-black finishes, and wood-grain veneers scratch easily under minimal pressure. Apply layers of masking tape to both the trim piece you are removing and the adjacent dashboard frame to prevent any rubbing or scraping during the process.
When managing delicate climate control vents, infotainment surrounds, or hazard switch panels, be aware of fragile ribbon cables and integrated circuit boards. Pull these components straight out slowly to avoid straining the short wiring harnesses behind them. Never twist or bend the trim pieces excessively, as rigid plastics can snap easily under torsional stress.
Always support the trim piece with your free hand as soon as the clips begin to release. A long or heavy dashboard trim piece can easily drop once freed, scratching the center console, gear shifter, or steering column cover. Having a helper hold one end of a long trim piece can prevent accidental drops and surface damage.
Surface Protection Techniques and Tool Handling
Mastering the physical handling of your trim removal tool is the key to preventing marring, gouging, or cracking. When prying a panel, the tool requires a fulcrum point to generate leverage. If you pivot the tool directly against an adjacent plastic panel, you will concentrate all the force onto a tiny point, which can dent, discolor, or crack the plastic.
To prevent this, always use a buffer. Place a folded microfiber cloth or a dedicated rubber tool guard directly under the pivot point of your pry tool. This simple step distributes the pressure across a much wider surface area, protecting the underlying material from localized crushing.
Additionally, recognize the difference in flexibility between various interior materials. Soft-touch plastics and vinyl-wrapped panels flex easily but can tear or stretch permanently if pried incorrectly. Rigid structural frames, such as the main dashboard housing, do not flex and are highly susceptible to cracking if subjected to sudden, uneven force. Apply gradual, steady pressure rather than sudden jerks to allow the plastic clips to release smoothly.
Knowing when to stop is a vital skill. If you are applying significant force and the panel is not budging, do not push harder. Stop, release the pressure, and re-evaluate the panel. Shine a flashlight into the gap to check for missed screws, metal retaining clips, or secondary locking mechanisms that may be anchoring the panel in place.
Inspecting and Reinstalling the Panels
Once the panels are successfully removed, take the time to inspect their condition and prepare them for a secure, rattle-free reinstallation. Examine both the back of the removed panel and the vehicle’s metal frame. It is common for plastic retaining clips to bend, break, or remain stuck in the metal frame instead of pulling out with the panel.
If any clips or broken remnants are left in the mounting holes of the vehicle frame, use a metal clip extraction tool or needle-nose pliers to carefully remove them. Be careful not to scratch the paint inside the mounting holes, as exposed metal can rust quickly in humid tropical environments.
Before attempting reassembly, source and install the correct replacement clips. Keep a selection of universal plastic retaining clips on hand that match the exact shaft diameter, head size, and length of the original fasteners. Slide the new clips into the molded slots on the back of the panel.
To reinstall the panel, align all the plastic clips perfectly with their corresponding holes in the vehicle frame. Once aligned, press the panel inward firmly using the flat palm of your hand directly over each clip location. You should hear a clear click as each clip seats. Never strike the panel with your fist or a mallet, as this can shatter the plastic mounting tabs on the back of the panel.
Finally, before tightening any visible screws or snapping cosmetic trim caps back into place, temporarily reconnect the battery (if it was disconnected) and test all electrical components. Verify that the window switches, door locks, mirror adjusters, hazard lights, and speakers function perfectly. Once verified, complete the installation by securing all remaining screws and fasteners.
Frequently Asked Questions (FAQ)
Can I use a flathead screwdriver instead of a trim removal tool?
Using a flathead screwdriver or any other metal tool is highly discouraged for interior trim work. Metal screwdrivers concentrate immense force on a very narrow, sharp edge, which easily gouges soft dashboard vinyl, scrapes paint off metal frames, and shatters brittle plastic clips. Plastic trim removal tools are specifically designed with wider, blunter profiles that distribute prying forces safely while flexing slightly to protect delicate cabin materials.
What should I do if a plastic retaining clip breaks during removal?
If a plastic retaining clip breaks, use needle-nose pliers or a metal clip removal tool to extract the broken base from the vehicle’s metal frame. Clean any plastic debris out of the mounting slot on the back of the trim panel. Obtain a replacement clip of the exact same dimensions and slide it into the panel’s mounting slot before reinstalling. Replacement clips are inexpensive and widely available at local auto supply shops.
Do I need to disconnect the car battery before removing interior panels?
Disconnecting the battery is highly recommended if the panels you are removing house electrical switches, side-impact airbags, or sensitive electronic modules. Disconnecting the negative battery terminal prevents accidental short circuits, blown fuses, or unexpected airbag deployment. Always consult your vehicle’s service manual for specific safety protocols and wait times before working near airbag systems.

Community discussion
Share your experience or ask a question. Comments are reviewed before publication.