
A sudden loss of power while riding or an engine that cranks endlessly without starting can quickly disrupt your schedule. When a motorcycle refuses to run, the fuel delivery system is one of the first areas to investigate. A failing motorcycle fuel pump is a common culprit behind these frustrating symptoms, but replacing it without proper testing can lead to unnecessary expenses.
Fortunately, you can perform several basic diagnostic checks at home to confirm whether the pump is truly broken or if the issue lies elsewhere in the electrical or fuel system. By taking a systematic approach, you can isolate the problem and make an informed decision about repairs. This guide outlines how to identify the symptoms of a failing pump, prepare your workspace safely, and execute step-by-step diagnostic tests.
Recognizing the Symptoms of a Failing Motorcycle Fuel Pump
Identifying a failing motorcycle fuel pump starts with observing how the engine behaves during startup and under load. One of the most common signs is an engine that cranks vigorously but fails to start. This occurs because the fuel injectors or carburetor are not receiving the pressurized fuel required to initiate combustion.
Products mentioned in this guide
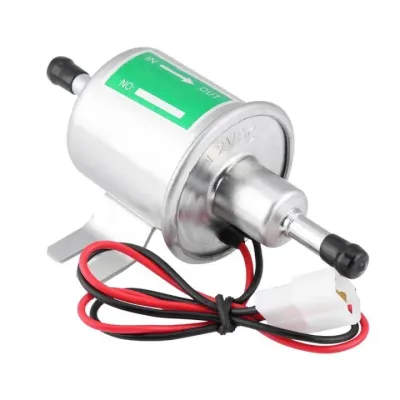
16 Lazada user ratings
Efficient fuel pump, saves on gas!, Ideal for both diesel and gasoline engines., Universal fit, suitable for various vehicles., Provides con…Read full reviewShow less
Efficient fuel pump, saves on gas!, Ideal for both diesel and gasoline engines., Universal fit, suitable for various vehicles., Provides consistent low-pressure fuel flow.
Low intensity diesel electric pump at a very reasonable price and at a very quite very fast delivery at that also
good po naikabit kona salamat seller
Quite durable
not working
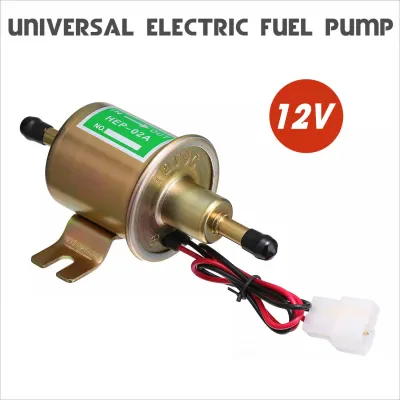
1 Lazada user ratings
💰Price:10/10 very affordable 🔨Durability:10/10 rugged looking. fits on chassis 🔌Compatibility:10/10 works in my car
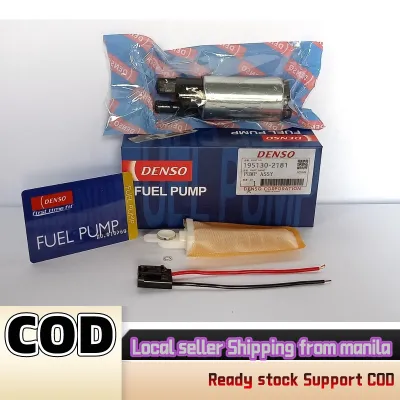
112 Lazada user ratings
Enhances engine performance significantly, Great value for top-notch quality, Precision engineering for optimal function, Reliable and effic…Read full reviewShow less
Enhances engine performance significantly, Great value for top-notch quality, Precision engineering for optimal function, Reliable and efficient fuel pump, Smooth and consistent fuel delivery, Denso quality never disappoints,
good na good
Prices are valid at publication and may change. Please refer to the product page for the latest price.
Another frequent symptom is engine sputtering or hesitating when you accelerate or climb a hill. When the engine demands more fuel under load, a weak pump cannot maintain the necessary flow rate, causing the air-fuel mixture to lean out. This struggle often leads to sudden power loss or stalling, which can resolve temporarily after the motorcycle sits for a few minutes.
It is crucial to differentiate fuel pump issues from other common mechanical or electrical failures. For instance, a dead or weak battery typically causes slow engine cranking or a rapid clicking sound from the starter solenoid, whereas a fuel pump issue allows the engine to crank at normal speed. A clogged air filter generally causes a gradual, consistent decline in performance and a rich fuel mixture, unlike the sudden, intermittent starvation characteristic of a failing pump.
Essential Safety Precautions Before Testing the Fuel System
Working on a motorcycle fuel system requires strict adherence to safety protocols due to the highly flammable nature of gasoline. Always conduct your diagnostics in a well-ventilated outdoor area or an open garage to prevent the accumulation of toxic and explosive fuel vapors. Keep a Class B fire extinguisher nearby and ensure there are no open flames, pilot lights, or active spark sources in the vicinity.

Before disconnecting any fuel lines or electrical connectors, ensure the motorcycle’s engine is completely cold. Spraying fuel onto a hot exhaust pipe or engine block can cause immediate ignition. Additionally, wear fuel-resistant gloves and safety goggles to protect your skin and eyes from pressurized fuel spray.
Disconnect the negative terminal of the motorcycle battery before performing any physical disassembly of the fuel lines. This simple step eliminates the risk of accidental electrical sparks near open fuel sources. Never attempt to bypass fuses, relays, or safety switches with temporary jumper wires to force the pump to run, as this can overheat the wiring harness or trigger an electrical fire.
Because fuel system diagnostics involve handling flammable liquids and working near electrical circuits, always consult your original vehicle manufacturer’s service manual before proceeding. If the diagnostic steps require disassembling high-pressure fuel rails or complex electrical harnesses, qualified professional service is highly recommended to prevent hazardous leaks or electrical damage.
Step-by-Step DIY Diagnostic Checks
To safely determine the health of your fuel pump, follow a logical diagnostic sequence that moves from the least invasive checks to hands-on inspections. This structured approach helps you rule out simple electrical faults before opening the fuel system.
Always keep your specific motorcycle’s service manual on hand during these checks. Component locations, wire colors, and fuel line routing vary significantly between makes and models, and referencing the official documentation prevents damage to sensitive connectors.
Listening for the Prime Sound
The simplest initial check requires no tools and determines if the fuel pump is receiving power and attempting to operate. Sit on the motorcycle in a quiet environment and turn the ignition key to the “ON” position. Ensure the engine kill switch is set to the “RUN” or “START” position.
Listen closely near the fuel tank for a distinct, high-pitched whirring or buzzing sound that lasts for two to three seconds. This is the priming cycle, during which the engine control unit (ECU) runs the pump briefly to build up pressure in the fuel lines before the engine starts. A clear, consistent hum indicates that the pump motor is receiving electrical power and functioning mechanically.
If you hear complete silence, a weak clicking, or an unusual grinding noise, the pump is not priming correctly. Before assuming the pump itself is broken, locate the motorcycle’s fuse box and check the fuel pump fuse. If the fuse is intact, inspect the fuel pump relay and the kill switch wiring, as a faulty relay or loose connection can prevent power from reaching a perfectly healthy pump.
Checking Fuel Flow and Line Condition
If the pump primes but the engine still struggles to run, you must verify whether fuel is physically flowing through the system. Locate the fuel line connecting the fuel tank to the fuel injector rail or the carburetor. Carefully depress the quick-release tabs or loosen the hose clamp to disconnect the line, keeping a shop rag handy to catch any residual drips.
Direct the open end of the disconnected fuel line into a clean, fuel-safe, approved container. Turn the ignition key to the “ON” position to trigger the priming cycle, or briefly crank the starter motor for one to two seconds while observing the discharge. A healthy fuel pump should deliver a strong, steady stream of fuel into the container.
If you observe a weak trickle, intermittent spurts, or no fuel at all, the delivery system is compromised. Inspect the entire length of the external fuel lines for physical kinks, sharp bends, cracks, or collapsed sections that could restrict flow. A kinked line acts as a bottleneck, mimicking the symptoms of a completely broken pump.
Note that while a visual flow test confirms fuel movement, verifying exact operating pressure requires a dedicated fuel pressure gauge connected to the fuel system. Consult your manufacturer’s service manual for the exact pounds per square inch (PSI) or bar specifications required for your model. If you do not own a compatible gauge or if the readings fall below the manufacturer’s threshold, seek professional testing to confirm if the pump’s internal pressure regulator has failed.
Troubleshooting Table: Symptoms, Possible Causes, and Next Steps
Use this reference matrix to map your diagnostic observations to logical troubleshooting steps before purchasing replacement parts.
| Symptom | Possible Cause | Recommended Next Step |
|---|---|---|
| No priming sound when key is turned on | Blown fuel pump fuse, faulty relay, or damaged wiring harness | Check the fuse box; test the relay with a multimeter; inspect the kill switch. |
| Weak or trickling fuel flow during prime | Clogged fuel filter, kinked fuel line, or worn pump motor | Inspect lines for physical kinks; replace the fuel filter; check pump voltage. |
| Engine starts but sputters and stalls under load | Insufficient fuel pressure or clogged fuel injector | Perform a fuel pressure test with a gauge; check for tank debris. |
| Intermittent starting issues when engine is hot | Thermal breakdown of the fuel pump motor or electrical relay | Let the engine cool completely; retest the prime sound; check electrical connections. |
| Constant high-pitched whining from the tank | Severely clogged internal filter straining the pump motor | Remove the pump assembly to inspect and clean or replace the internal strainer. |
When to Stop DIY Testing and Seek Professional Help
While basic diagnostic checks are manageable at home, certain scenarios require specialized expertise and equipment. If your diagnostic steps point toward a complex electrical fault, such as a damaged wiring harness or an ECU communication error, troubleshooting with a standard multimeter can be difficult without advanced training.
Stop testing immediately if you detect persistent fuel leaks that you cannot easily contain, or if you smell strong gasoline fumes indoors. Pressurized fuel systems can spray fuel at high velocity if a fitting is damaged, creating a severe fire hazard. Additionally, if your motorcycle requires removing structural frame members or dropping the fuel tank without stable lifting equipment, professional assistance is necessary to prevent physical injury or damage to the bike.
Consider consulting a qualified motorcycle mechanic in the Philippines if you are uncomfortable handling fuel components or if your bike features an integrated in-tank pump and regulator assembly. Professional technicians have the precise diagnostic tools to measure fuel volume and pressure simultaneously, ensuring an accurate diagnosis before you invest in a replacement pump.
Preventive Maintenance to Extend Fuel Pump Life
Taking care of your motorcycle’s fuel system can prevent premature pump failures and save you from unexpected breakdowns. One of the most effective habits is keeping your fuel tank above a quarter full. In most modern fuel-injected motorcycles, the fuel pump is submerged inside the tank, using the surrounding liquid fuel to cool and lubricate the pump motor; running the tank low repeatedly forces the pump to run hot, accelerating wear.
If you plan to store your motorcycle for extended periods, especially in humid climates, treat the fuel system with a high-quality fuel stabilizer according to the product’s label-authorized instructions. Untreated gasoline degrades over time, forming gummy deposits and varnish that can clog the pump’s intake strainer and seize the internal motor components.
Regularly replace your motorcycle’s fuel filter in accordance with the manufacturer’s recommended maintenance schedule. A clean filter ensures unrestricted fuel flow, reducing the workload on the pump motor. Finally, always source your fuel from reputable, high-volume service stations to minimize the risk of introducing water, dirt, or rust particles into your fuel tank.

Community discussion
Share your experience or ask a question. Comments are reviewed before publication.