
Finding a reliable helmet with camera motorcycle setup in the Philippines requires balancing safety certifications, mounting stability, and your budget. Whether you are navigating the daily stop-and-go traffic of Metro Manila or embarking on weekend rides through the scenic curves of Marilaque, capturing your journey on camera serves both as a vital safety record and a way to share your experiences.
To make an informed decision, riders must evaluate how different price points handle camera integration. Entry-level options rely heavily on aftermarket adhesive mounts, while mid-range and premium tiers offer integrated mounting plates, superior aerodynamics, and advanced shell materials. Choosing the right setup involves verifying that the added weight of a camera does not compromise the helmet’s structural integrity or cause excessive neck fatigue during long, humid rides.
Key Criteria for Camera-Compatible Motorcycle Helmets
Safety certifications must always be your first point of verification before looking at any camera features. In the Philippines, look for the Import Commodity Clearance (ICC) sticker or the Philippine Standard (PS) mark, alongside international standards like ECE 22.05, ECE 22.06, or DOT. These certifications ensure the shell and inner expanded polystyrene (EPS) liner can withstand impacts, regardless of any accessories you attach. The newer ECE 22.06 standard is particularly relevant for camera users, as it includes testing for rotational brain injury, which can be exacerbated by a camera catching on the pavement during a slide.
Products mentioned in this guide
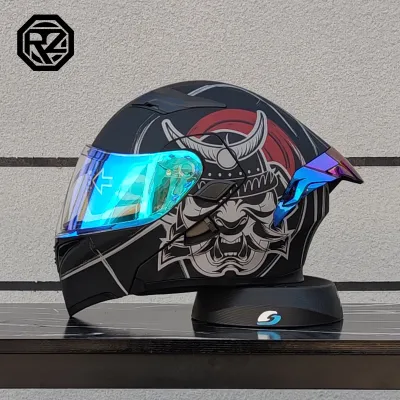
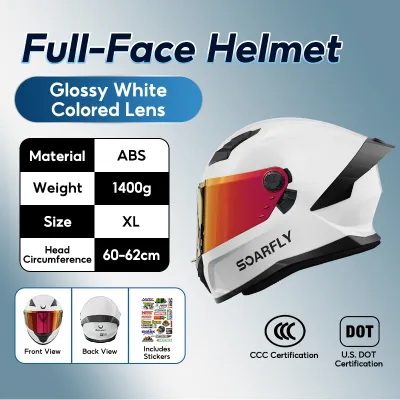
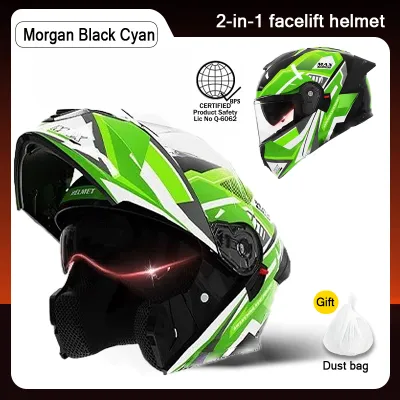
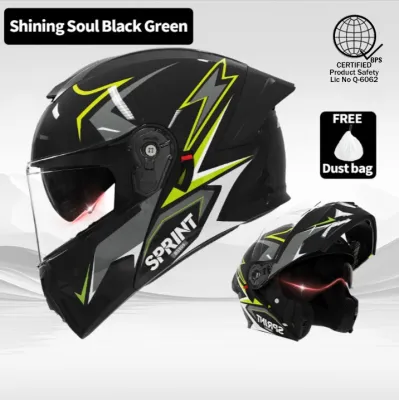
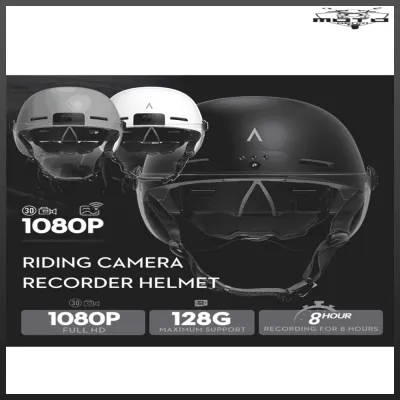
Prices are valid at publication and may change. Please refer to the product page for the latest price.
Mounting mechanisms vary significantly in stability, reversibility, and shell compatibility. Adhesive mounts use high-strength double-sided tape, which is highly reversible but requires a clean, flat, or matching curved surface on the shell. Clamp mounts grip the lower edge of the helmet shell, offering a secure mechanical hold without adhesives, though they may interfere with the rubber neck roll seal. Factory-integrated mounts provide the cleanest look and the most secure attachment point, molded directly into the helmet’s outer shell to prevent accidental detachment.
The physical impact of adding a camera to your helmet is a critical comfort and safety factor. A standard action camera and its mounting hardware can add 150 to 250 grams of asymmetrical weight to your head. At highway speeds, this extra weight acts as a lever, increasing aerodynamic drag and causing noticeable neck strain. Riders should check the helmet’s overall weight and choose mounting positions, such as the chin, that distribute the load more evenly and minimize wind resistance.
Entry-Level Budget: What to Expect and Verify
For riders shopping within a budget of ₱2,000 to ₱4,000, the primary goal is securing a certified helmet without overspending on premium materials. At this entry-level tier, helmets are almost exclusively constructed from injection-molded polycarbonate. While polycarbonate is highly impact-resistant and durable, it is inherently heavier than composite materials, meaning the added weight of an external camera will be more noticeable during long rides.

Aftermarket adhesive mounts are the standard solution for entry-level helmets. Because these helmets rarely feature flat surfaces designed specifically for cameras, you must carefully evaluate the curvature of the chin bar or the top of the shell. Curved adhesive pads or specialized flexible mounts are often necessary to ensure full surface contact, as any gaps in the adhesive can lead to the camera detaching at speed. High humidity and intense tropical heat in the Philippines can also weaken adhesive bonds over time, making regular checks essential.
Riders must also prepare for specific trade-offs when mounting cameras to entry-level helmets. These models typically feature basic ventilation systems that may struggle to keep you cool in tropical heat, especially when a chin-mounted camera partially blocks the front air vents. Additionally, the extra turbulence created by an external camera can significantly increase wind noise inside the helmet, making earplugs highly recommended for highway travel.
Mid-Range Budget: Integrated Mounts and Better Aerodynamics
Stepping up to a mid-range budget, typically spanning ₱4,500 to ₱10,000, introduces helmets designed with better accessory integration in mind. Many manufacturers in this segment offer factory-molded camera mount plates or dedicated flat zones on the chin bar. These design features eliminate the guesswork of adhesive placement, preserving the helmet’s sleek profile and reducing the risk of adhesive failure due to rain or high humidity.
Shell materials in the mid-range tier often transition from basic polycarbonate to advanced thermoplastic resins or fiberglass composites. These materials offer a higher strength-to-weight ratio, which helps offset the weight of your camera and communication gear. A lighter helmet shell reduces overall fatigue, allowing you to ride longer and more comfortably while recording your journey.
Weather versatility is another major benefit of mid-range helmets, which is particularly valuable during the sudden downpours of the Philippine wet season. Look for helmets equipped with upgraded visor mechanisms, robust rubber seals to prevent water intrusion, and Pinlock-ready visors. Installing an anti-fog insert ensures your vision remains perfectly clear, even when high humidity and heavy rain cause temperature differentials inside the shield.
Premium Tier: Advanced Tech and Track-Ready Features
For budgets exceeding ₱10,000, premium helmets offer highly engineered solutions for riders who demand top-tier performance and seamless camera integration. These high-end models frequently feature dedicated chin or top-mount designs optimized for specific action camera footprints. By integrating the mount directly into the aerodynamic flow of the helmet, these designs minimize buffeting and keep the camera incredibly stable, even at track speeds.
Aerodynamic performance is a hallmark of premium helmets, developed through extensive wind-tunnel testing. Manufacturers shape the outer shell to channel air smoothly around both the helmet and the attached camera, significantly reducing drag and neck fatigue. This precise engineering ensures that the helmet remains balanced and quiet, preventing the camera from acting as a sail in high winds.
Beyond camera compatibility, premium helmets are packed with advanced safety and convenience features. You can expect seamless integration ports for high-end communication systems, plush moisture-wicking liners that handle sweat efficiently, and emergency quick-release cheek pads that allow medical personnel to safely remove the helmet in an accident. The combination of carbon fiber or multi-composite shells and advanced energy-management systems provides maximum protection while keeping the overall weight exceptionally low.
Safe Installation and Pre-Ride Checks
Properly installing your camera mount is just as important as choosing the right helmet. If you are using adhesive mounts, always follow the manufacturer’s instructions for surface preparation. Clean the mounting area thoroughly with isopropyl alcohol to remove road grime, wax, and oils, and allow the adhesive to cure for at least 24 hours in a dry, temperature-controlled environment before exposing it to wind or moisture. Avoid using harsh solvents like acetone, which can melt polycarbonate shells.
Under no circumstances should you make physical modifications to the helmet itself. Drilling holes, sanding the outer shell, or compressing the internal expanded polystyrene (EPS) liner to accommodate a mount will permanently ruin the helmet’s structural integrity. These modifications compromise the helmet’s ability to absorb impacts, render all safety certifications void, and put your life at serious risk in a crash.
Before every ride, perform a comprehensive static fit and movement check with the camera fully mounted. Put the helmet on and move your head through its full range of motion to ensure the camera does not catch on your jacket collar or shoulder armor. Verify that the camera body does not obstruct your peripheral vision, block your line of sight, or interfere with the smooth operation of your visor and sun shield.
Frequently Asked Questions (FAQ)
Can I drill holes in my helmet to mount a camera?
No, you should never drill holes in your motorcycle helmet to mount a camera or any other accessory. Drilling punctures the outer protective shell and damages the internal expanded polystyrene (EPS) impact-absorbing liner, which is engineered to distribute crash forces. Any structural alteration of this nature voids the helmet’s safety certifications, compromises its protective capabilities, and requires immediate replacement of the helmet.
Do camera mounts affect the safety certification of a helmet?
Non-destructive mounting methods, such as external adhesive pads or external clamp mounts, generally do not affect the official safety certification of a helmet because they do not alter its physical structure. However, adding excessive weight or rigid, protruding mounts can introduce new rotational forces during an impact. Always check the helmet manufacturer’s guidelines regarding approved accessory weight limits and recommended mounting locations to ensure you maintain optimal safety.

Community discussion
Share your experience or ask a question. Comments are reviewed before publication.