
Choosing the right brake shoes for your Yamaha Mio i 125 is one of the most critical maintenance decisions you will make for your scooter. While many riders search for a single, definitive brand that guarantees superior stopping power, the reality is that no universal “best” option exists. Instead, the ideal choice depends on a balance between your daily riding conditions, budget, and safety requirements. Genuine Original Equipment Manufacturer (OEM) parts provide a predictable baseline of performance, guaranteed physical fitment, and excellent compatibility with your stock brake drum. On the other hand, reputable aftermarket manufacturers offer specialized friction materials designed to address specific challenges, such as heavy stop-and-go traffic or wet weather riding. Because your brakes are your primary safety system, evaluating these options requires looking past marketing claims and focusing on material specifications, verification of authenticity, and proper installation protocols. This guide establishes a practical framework to help you compare OEM and aftermarket brake shoes safely, ensuring your Mio i 125 remains reliable on every journey.
Assessing Your Riding Profile and Braking Needs
Before comparing specific brake shoe options, you must analyze your typical daily riding environment and habits. A rider who uses their Yamaha Mio i 125 solely for light, solo city commuting on flat roads has vastly different braking demands than someone operating a delivery service or carrying heavy pillion loads. Heavy loads increase the kinetic energy that your rear drum brake must dissipate, which generates significantly more heat and accelerates wear on the friction material. Similarly, navigating frequent hilly terrain or steep inclines requires brake shoes that can handle sustained friction without experiencing thermal fade.
Environmental factors also play a major role in how your brake shoes perform. In tropical climates characterized by high humidity, sudden downpours, and flooded streets, water intrusion into the rear brake drum can temporarily reduce stopping power. Under these wet conditions, the friction material must be capable of clearing water quickly to maintain a reliable grip against the drum surface. Conversely, dry and dusty road conditions can introduce fine debris into the drum assembly, leading to abrasive wear and squeaking if the shoe material is not designed to channel dust away effectively.
Products mentioned in this guide
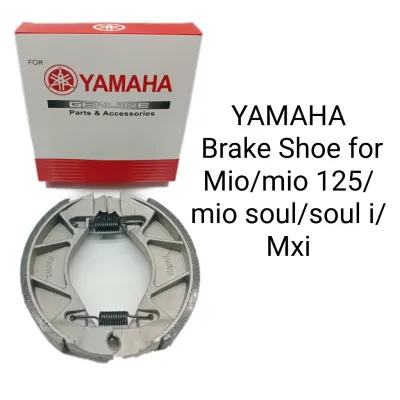
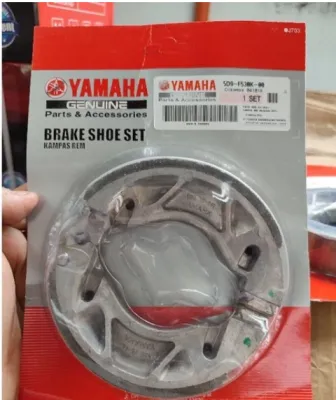
![Mio i 125 Brake Shoe Set Yamaha Genuine Parts for Motorcycle Genuine Parts 〽️ [5D9-F540K-00]〽️ (Check Description)!!!](https://img.lazcdn.com/g/ff/kf/S6356808935f5425b8f6806f4cb959685d.jpg_400x400q80.jpg_.webp)
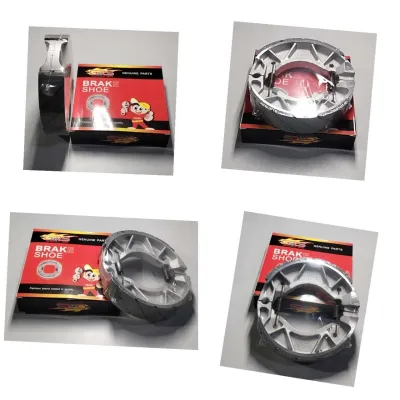
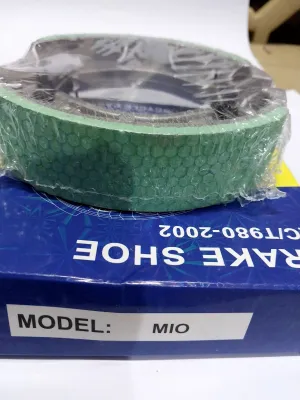
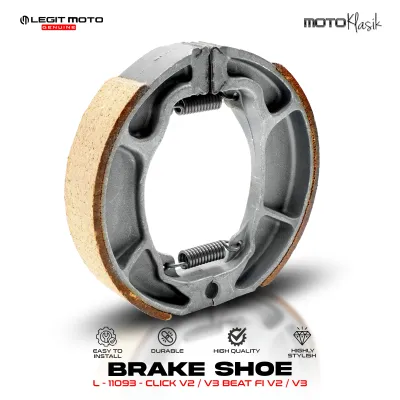
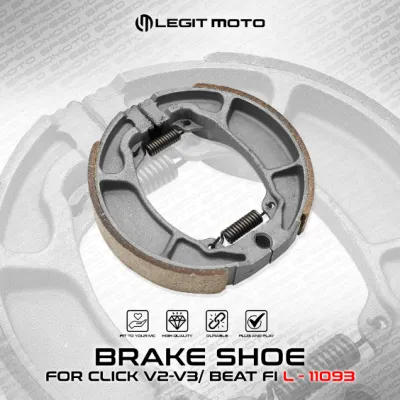
Prices are valid at publication and may change. Please refer to the product page for the latest price.
To establish a safe baseline, always consult your Yamaha Mio i 125 owner’s manual for the original manufacturer specifications. The manual outlines the standard drum dimensions, wear limits, and recommended inspection intervals. When selecting replacement parts, your primary goal should be maintaining or exceeding these original safety standards. Never compromise on the quality or authenticity of your braking components to save a small amount of money, as substandard parts can lead to sudden brake failure, putting your safety at immediate risk.
Yamaha OEM Brake Shoes: The Baseline for Reliability
Yamaha OEM brake shoes serve as the benchmark for reliability and performance on the Mio i 125. Because these parts are engineered specifically for your scooter model, they offer guaranteed physical fitment without the need for modification or sanding during installation. The friction material used in genuine Yamaha brake shoes is formulated to match the hardness of the stock brake drum perfectly. This precise engineering ensures a predictable initial bite, smooth progressive lever feel, and minimal wear on the drum itself, preserving the lifespan of your rear wheel hub over thousands of kilometers.

Despite these clear advantages, OEM brake shoes do have certain limitations that might prompt you to consider aftermarket alternatives. Genuine parts typically carry a higher upfront retail price compared to standard aftermarket options, which can be a deciding factor for budget-conscious riders. Additionally, the standard organic friction compound used in OEM shoes is optimized for general, all-around commuting. If your daily route involves extreme heavy-duty use, constant stop-and-go traffic in intense heat, or carrying heavy cargo, you may find that the OEM shoes wear down faster than expected under these demanding conditions.
The popularity of the Yamaha Mio i 125 has unfortunately made it a prime target for counterfeit parts, making verification a critical step in your purchasing process. Genuine Yamaha replacement parts are distributed in distinct, high-quality packaging featuring official branding, clear part numbers, and security holograms that shift color when tilted. When buying replacement shoes, inspect the packaging closely for blurry printing, misspelled words, or poorly aligned labels. Purchasing exclusively from authorized Yamaha 3S shops or highly reputable motorcycle parts dealers is the most effective way to ensure you are installing authentic, safe components on your scooter.
Navigating Aftermarket Brake Shoe Brands
When exploring the aftermarket, understanding the different types of friction materials is essential for making an informed choice. Organic brake shoes, which are similar to the OEM compound, use a blend of rubber, glass, and resins; they offer quiet operation and a gentle initial bite but wear out relatively quickly under heavy loads. Semi-metallic shoes incorporate fine metallic fibers into the friction mix, providing superior heat resistance and a stronger bite, though they can be noisier and cause faster wear on the brake drum. Ceramic compounds represent a premium option, delivering excellent thermal management, minimal dust, and quiet performance, though they require a higher initial investment.
The aftermarket is flooded with options, making it crucial to identify red flags that signal low-quality or dangerous products. Avoid brake shoes that lack clear manufacturing details, safety certifications, or specific material descriptions on their packaging. Unusually low prices—often significantly cheaper than the average market rate—are a strong indicator of substandard friction materials that may crack, delaminate from the metal backing, or fail entirely under thermal stress. Packaging that lacks clear brand markings or contact information should be treated with extreme caution.
To narrow down your choices, focus on aftermarket brands with an established track record in the motorcycle industry and positive feedback from professional mechanics. Reputable manufacturers invest in rigorous quality control and clearly state their material compositions and intended riding applications on the product label. Look for brands that comply with international safety standards, such as ISO certifications or specific automotive friction material ratings. Consulting with trusted local mechanics who service Mio i 125 scooters daily can provide valuable, real-world insights into which aftermarket brands deliver consistent durability and fitment.
Core Comparison Dimensions for Your Decision
To make an objective decision between OEM and aftermarket brake shoes, you must evaluate them across four core dimensions: stopping performance, durability, heat management, and cost-to-value ratio. Stopping performance should be assessed by looking at the initial bite—how quickly the brakes engage when you pull the lever—and the progressive feel, which allows you to modulate braking force smoothly. While some aftermarket semi-metallic shoes offer a highly aggressive initial bite, they may feel grabby to riders accustomed to the smooth, progressive modulation of genuine Yamaha OEM shoes.
Durability and wear rates are directly tied to the hardness of the friction material and your riding environment. Harder aftermarket compounds generally last longer and resist wear under heavy loads, but they also generate more brake dust and can accelerate the wear of your brake drum, potentially requiring an expensive wheel hub replacement sooner. Conversely, softer organic compounds preserve the drum and offer quiet operation, but they will require more frequent replacement intervals if you regularly ride in stop-and-go traffic or wet conditions.
Heat management is a critical safety factor, especially during prolonged braking down steep hills or in heavy traffic. When brake shoes overheat, they can experience brake fade, a dangerous condition where the friction coefficient drops rapidly, resulting in a spongy lever and a severe loss of stopping power. Verify product labels and manufacturer specifications for thermal ratings; reputable aftermarket brands often highlight their materials’ resistance to high temperatures, whereas OEM shoes rely on a proven, balanced thermal profile designed for standard operating limits.
Finally, consider the cost-to-value ratio by weighing the retail price in ₱ against the expected lifespan and safety assurance of the product. While a cheap aftermarket shoe might save you money upfront, its rapid wear rate or potential to damage the brake drum can result in higher long-term maintenance costs. Investing a bit more in genuine OEM shoes or certified, high-quality aftermarket options ensures reliable performance, reduces the frequency of maintenance, and provides the peace of mind that comes with knowing your safety system is secure.
Installation, Bedding-In, and Safety Protocols
Because the rear brake is a critical safety component of your Yamaha Mio i 125, proper installation is just as important as the quality of the parts you choose. If you are not an experienced DIY mechanic with the proper tools, you should always have your brake shoes installed by a qualified motorcycle technician. If you choose to perform the replacement yourself, you must strictly adhere to the official Yamaha service manual instructions, ensuring all torque specifications and safety steps are followed precisely to prevent mechanical failure.
Before installing the new brake shoes, perform a thorough inspection and cleaning of the entire rear brake assembly. Use a dedicated brake cleaner to remove accumulated brake dust, road grime, and grease from the inside of the brake drum and the backing plate. Inspect the return springs for tension loss or corrosion, and examine the brake cam shaft for smooth operation, applying a tiny amount of high-temperature grease to the pivot points while keeping the friction surfaces completely clean. Check the inner surface of the brake drum for deep scoring, cracks, or an out-of-round condition, as a damaged drum will rapidly destroy new brake shoes and compromise your stopping power.
Once the new brake shoes are installed, they must undergo a proper bedding-in process to achieve optimal contact with the drum surface. Avoid hard, sudden braking for the first 50 to 100 kilometers of riding; instead, perform gradual, gentle stops from moderate speeds to allow the friction material to wear in evenly and conform to the shape of the drum. If during installation you encounter mismatched parts, damaged hardware, or if the brake lever feels excessively spongy or tight after assembly, stop immediately. Do not ride the scooter; instead, consult a professional mechanic to diagnose and resolve the issue before operating the vehicle.
Frequently Asked Questions (FAQ)
How do I know when it is time to replace my Mio i 125 brake shoes?
You can easily check the wear of your brake shoes by inspecting the wear indicator pointer located on the rear brake cam shaft. When you pull the rear brake lever fully and the pointer aligns with the wear limit mark on the engine case, the friction material has worn down to its limit and requires immediate replacement. Additionally, watch for physical symptoms such as a spongy feel in the left brake lever, unusual squeaking or grinding noises during braking, or a noticeable increase in the distance required to bring your scooter to a complete stop.
Is it safe to use aftermarket brake shoes for daily heavy traffic commuting?
Yes, it is entirely safe to use aftermarket brake shoes for daily heavy traffic commuting, provided you select high-quality, certified products from reputable manufacturers. In stop-and-go urban traffic, high-quality semi-metallic or premium organic aftermarket shoes can offer excellent heat dissipation and reliable stopping power. However, you must avoid unbranded, ultra-cheap alternatives sold on online marketplaces, as these low-grade parts often use inferior bonding agents that can fail under the constant heat and stress of daily commuting.
Do I need to replace the brake drum when changing the brake shoes?
You do not need to replace the brake drum every time you change your brake shoes, but you must inspect it thoroughly during every service. The brake drum, which is integrated into the rear wheel hub of the Mio i 125, only requires replacement if it shows deep scoring, cracks, or if its inner diameter has worn beyond the maximum limit specified in the owner’s manual. To ensure optimal performance of your new shoes, always clean the drum interior with brake cleaner and lightly scuff the surface with fine-grit sandpaper to remove glaze and build-up.

Community discussion
Share your experience or ask a question. Comments are reviewed before publication.