
Selecting the best top box bracket for your Honda ADV 160 in the Philippines requires finding a model-specific, structurally sound mounting system that bolts directly to the rear frame without any permanent modifications. Navigating the diverse road conditions of the Philippines—ranging from congested metropolitan streets to uneven provincial roads—demands a secure cargo setup. A top box is highly practical for storing rain gear, helmets, and daily essentials, but its safety and stability depend entirely on the quality of the bracket underneath.
When riding in tropical climates, your motorcycle accessories are constantly exposed to high humidity, heavy downpours, and road vibrations. A poorly designed bracket can lead to structural failure, paint chipping, rust, or even damage to the motorcycle’s subframe. Therefore, evaluating brackets based on engineering standards rather than aesthetic appeal alone is crucial for long-term safety. This guide provides a comprehensive framework to help you evaluate bracket materials, verify exact fitment before purchasing from online marketplaces, and maintain your mounting system for safe daily riding.
Understanding Rear Frame Fitment and Mounting Types
The Honda ADV 160 features a robust rear subframe designed to support passenger weight and moderate cargo. However, mounting a top box shifts the motorcycle’s center of gravity upward and rearward, placing unique dynamic stresses on the rear frame. To handle these forces safely, aftermarket brackets must utilize the factory-designated mounting points. Understanding how different bracket designs interact with these mounting points is the first step in choosing a reliable accessory.
Products mentioned in this guide
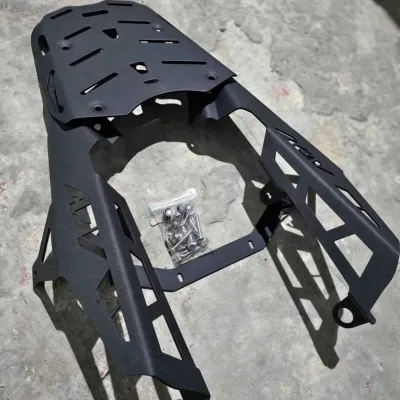
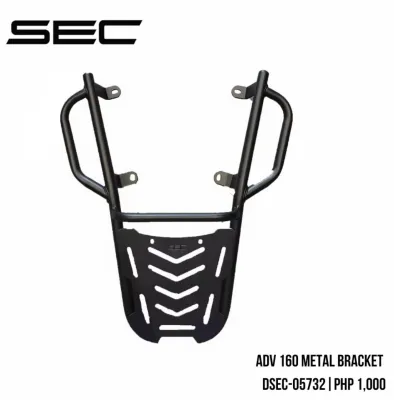
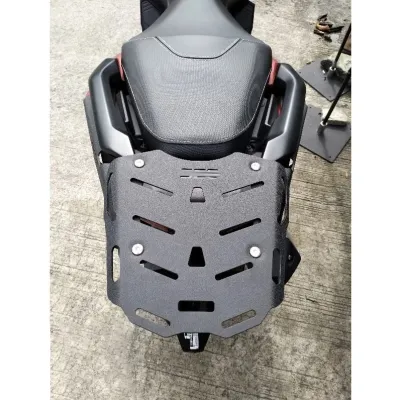
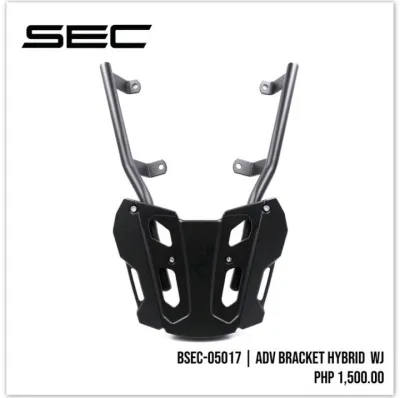
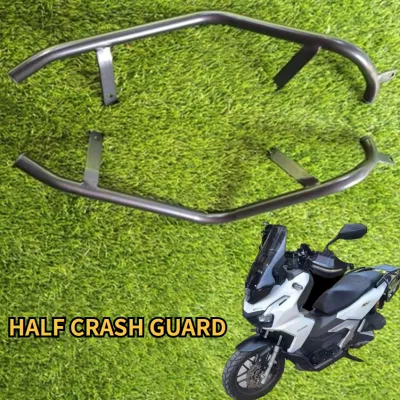
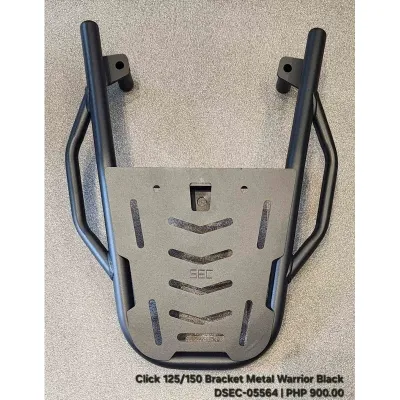
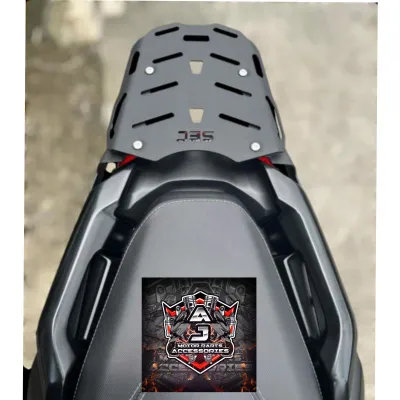
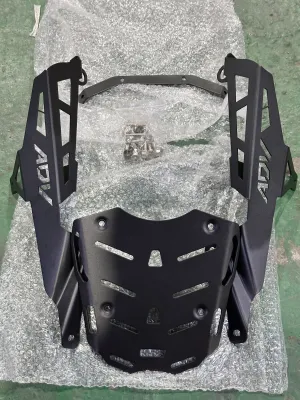
Prices are valid at publication and may change. Please refer to the product page for the latest price.
One major design distinction among aftermarket brackets is whether they require the removal of the original passenger grab rails. Some brackets are designed to replace the grab rails entirely, offering a streamlined, integrated appearance that sits closer to the tail section. Other designs mount underneath or alongside the existing grab rails, preserving the original passenger handholds. While retaining the grab rails offers convenience for pillion riders, grab-rail-replacement brackets often position the top box slightly lower and further forward, which can improve weight distribution.
Regardless of the mounting style, a high-quality bracket must offer a true bolt-on installation. This means the bracket aligns perfectly with the factory-threaded holes on the subframe without requiring any drilling, welding, or physical bending of the bracket arms. Forcing a misaligned bracket into place introduces constant lateral tension to the mounting bolts and the subframe, which can lead to thread stripping or structural cracking over time under the influence of road vibrations.
Because of these precise structural requirements, you must select a bracket engineered specifically for the Honda ADV 160. The rear frame geometry of the ADV 160 is distinct from other scooters, including its predecessor, the ADV 150, and visually similar models. Universal brackets or those marketed as compatible with multiple models often rely on adjustable joints or slotted holes that are inherently weaker and more prone to loosening than solid, model-specific brackets.
Key Criteria for Evaluating Bracket Build and Capacity
When comparing top box brackets, the choice of material directly impacts the accessory’s weight, durability, and resistance to environmental wear. In the Philippines, where high humidity and coastal salt air accelerate corrosion, material selection is a critical factor for longevity. The two most common materials used in quality brackets are tubular steel and aluminum alloy, each presenting distinct engineering trade-offs.

Tubular steel brackets are highly favored for their exceptional structural rigidity and high load-bearing capacity. Steel can withstand significant repetitive stress and impact without cracking, making it ideal for rough roads and heavy cargo. However, steel is inherently heavy, which adds to the overall weight at the rear of the motorcycle. Furthermore, steel is highly susceptible to rust; if the protective powder coating is chipped by road debris or scratched during installation, moisture will quickly cause corrosion that can weaken the structure over time.
Aluminum alloy brackets, often cast or CNC-machined, offer a lightweight and highly corrosion-resistant alternative. These brackets match the premium aesthetic of the ADV 160 and do not rust when exposed to rain or humid air. However, aluminum is more brittle than steel. Under extreme, repetitive vibrations—such as riding over unpaved roads or potholes—poorly engineered cast aluminum brackets can develop hairline fractures and fail catastrophically without warning. If you choose an aluminum bracket, ensure it is made from high-grade, thick-gauge alloy designed specifically for heavy-duty motorcycle applications.
Beyond material composition, you must carefully cross-reference the bracket’s rated load capacity with the limits specified in your Honda ADV 160 owner’s manual. While a heavy-duty steel bracket might be rated by its manufacturer to carry 15 kilograms, the motorcycle’s subframe itself often has a lower maximum cargo limit, typically around 5 to 10 kilograms. Overloading the rear of the motorcycle, regardless of the bracket’s strength, lightens the front wheel, which severely compromises steering control, braking efficiency, and overall stability, especially on wet or slippery roads.
Finally, consider how the bracket interfaces with your top box mounting system. Top boxes generally use specific mounting plates, such as quick-release systems or universal plates that bolt onto a flat rack. Ensure the bracket you select features a top plate with pre-drilled holes that align with your top box’s base plate. Some premium brackets are designed to accept specific proprietary mounting systems directly, eliminating the need for an intermediate adapter plate and creating a lower, more stable mounting profile.
How to Verify Exact Compatibility Before Purchasing
Purchasing motorcycle accessories from online marketplaces or local shops requires careful verification to avoid receiving ill-fitting parts. Because many sellers use generic product listings or group different motorcycle models together, the burden of confirming compatibility falls on the buyer. Taking a systematic approach to verifying fitment before completing your purchase can save time, money, and potential safety hazards.
Start by scrutinizing the product description for an explicit fitment list. The listing must clearly specify “Honda ADV 160” and match your motorcycle’s specific model year. Avoid listings that use vague, generalized terms such as “ADV series,” “150/160 universal,” or “160cc scooter bracket.” Because the ADV 150 and ADV 160 have different rear frame dimensions and grab rail mounting points, a bracket designed for the older 150cc model will not fit the ADV 160 without unsafe modifications.
To confirm the physical dimensions, request detailed documentation from the seller before purchasing. Ask for the installation manual, fitment diagrams, or clear, high-resolution photos of the bracket installed on an actual ADV 160. Pay close attention to the alignment of the mounting holes relative to the motorcycle’s frame. If the seller cannot provide clear evidence of a direct, bolt-on fitment, or if they suggest that minor adjustments or bending are normal during installation, treat this as a major warning sign and look for an alternative product.
Additionally, look for red flags in customer reviews and product listings. A lack of specified load ratings, missing information about the material grade, or listings that do not include the necessary mounting hardware (such as high-tensile bolts, spacers, and washers) are indicators of low-quality manufacturing. Spacers are particularly important for the ADV 160, as they prevent the bracket from crushing or scratching the surrounding plastic body panels during installation and daily use.
Installation Safety and Routine Maintenance Checks
Installing a top box bracket is a straightforward process, but it must be executed with strict adherence to safety boundaries to prevent damage to your motorcycle. Because the bracket connects directly to the rear subframe, improper installation can compromise the structural integrity of the vehicle. Following correct mechanical procedures ensures that the bracket remains secure under all riding conditions.
Always use a torque wrench to tighten the mounting bolts to the specifications outlined in the bracket’s installation manual or the motorcycle’s service manual. The threaded holes in the ADV 160’s subframe are typically made of aluminum or mild steel, which can easily strip if subjected to excessive torque. Conversely, under-tightening the bolts can allow them to back out over time due to engine vibrations and road impacts. Applying a medium-strength thread-locking compound to the bolt threads before installation is highly recommended to prevent loosening.
Once installed, the bracket and top box system require routine inspections to ensure ongoing safety. The combination of tropical heat, heavy rain, and bumpy road surfaces in the Philippines subjects the mounting system to continuous stress. Every few weeks, or after a long ride with heavy cargo, visually inspect the bracket for any signs of metal fatigue, such as hairline cracks near the welds or bends. Check the mounting bolts with a wrench to ensure they remain tight, and inspect any rubber vibration dampers or spacers for signs of cracking or dry rot.
If you encounter any alignment issues during the installation process, establish a strict stop condition. If the bracket’s mounting holes do not line up perfectly with the subframe holes, do not attempt to force the bolts in at an angle or use a hammer to bend the bracket into place. Cross-threading a bolt can ruin the subframe’s threads, requiring expensive re-tapping or frame repairs. If the bracket does not fit naturally, halt the installation immediately and consult a qualified motorcycle mechanic or contact the manufacturer for assistance.
Frequently Asked Questions (FAQ)
Can I use a top box bracket designed for the PCX 160 on my ADV 160?
No, you cannot safely use a PCX 160 bracket on a Honda ADV 160. Although both scooters share a similar 160cc engine platform, their rear subframes, grab rails, and body panels are shaped differently. The mounting hole spacing and the angle of the rear frame differ significantly between the two models. Attempting to force a PCX 160 bracket onto an ADV 160 will result in severe misalignment, putting unsafe lateral stress on the mounting bolts and potentially cracking the subframe under load. Always purchase a bracket engineered specifically for the ADV 160.
Does installing an aftermarket bracket void the motorcycle's warranty?
Installing a bolt-on aftermarket top box bracket generally does not void your motorcycle’s overall powertrain or electrical warranty. However, warranty coverage is highly specific to the component that fails. If an improperly installed, poorly manufactured, or overloaded aftermarket bracket causes structural damage—such as cracking the rear subframe or stripping the factory mounting threads—the manufacturer’s warranty will not cover the cost of those repairs. To protect your warranty, always use high-quality, model-specific brackets, adhere to specified torque limits, and never exceed the recommended cargo weight capacity.

Community discussion
Share your experience or ask a question. Comments are reviewed before publication.